For example, a business might run a text analysis engine which processes the tweets about its business mentioning the company name, location, process and analyse the emotion related to that tweet. Correct actions can be taken faster if that business get to know about growing negative tweets for it in a particular location to save itself from a blunder or anything else. Another common example will for Youtube. The Youtube admins and moderators get to know about effect of a video depending on the type of comments made on a video or the video chat messages. This will help them find inappropriate content on the website much faster because now, they have eradicated the manual work and employed automated smart text analysis bots.
In this lesson, we will study some of the concepts related to text analysis with the help of NLTK library in Python. Some of these concepts will involve:
- Tokenization, how to break a piece of text into words, sentences
- Avoiding stop words based on English language
- Performing stemming and lemmatization on a piece of text
- Identifying the tokens to be analysed
NLP will be the main area of focus in this lesson as it is applicable to enormous real-life scenarios where it can solve big and crucial problems. If you think this sounds complex, well it does but the concepts are equally easy to understand if you try examples side by side. Let's jump into installing NLTK on your machine to get started with it.
Installing NLTK
Just a note before starting, you can use a virtual environment for this lesson which we can be made with the following command:
python -m virtualenv nltksource nltk/bin/activate
Once the virtual environment is active, you can install NLTK library within the virtual env so that examples we create next can be executed:
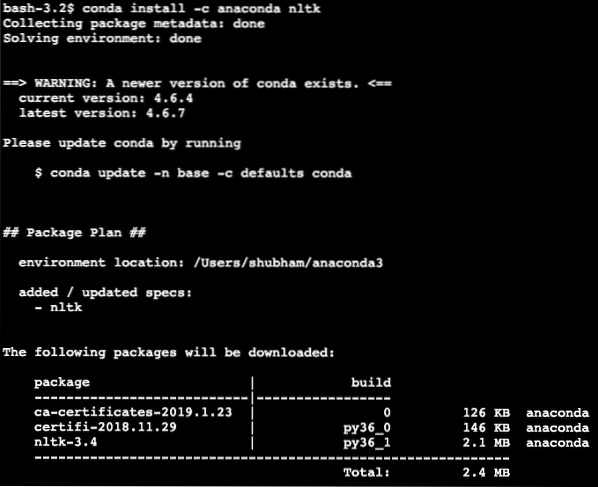
pip install nltkWe will make use of Anaconda and Jupyter in this lesson. If you want to install it on your machine, look at the lesson which describes “How to Install Anaconda Python on Ubuntu 18.04 LTS” and share your feedback if you face any issues. To install NLTK with Anaconda, use the following command in the terminal from Anaconda:
conda install -c anaconda nltkWe see something like this when we execute the above command:
Once all of the packages needed are installed and done, we can get started with using the NLTK library with the following import statement:
import nltkLet's get started with basic NLTK examples now that we have the prerequisites packages installed.
Tokenization
We will start with Tokenization which is the first step in performing text analysis. A token can be any smaller part of a piece of text which can be analysed. There are two types of Tokenization which can be performed with NLTK:
- Sentence Tokenization
- Word Tokenization
You can guess what happens on each of the Tokenization so let's dive into code examples.
Sentence Tokenization
As the name reflects, Sentence Tokenizers breaks a piece of text into sentences. Let's try a simple code snippet for the same where we make use of a text we picked from Apache Kafka tutorial. We will perform the necessary imports
import nltkfrom nltk.tokenize import sent_tokenize
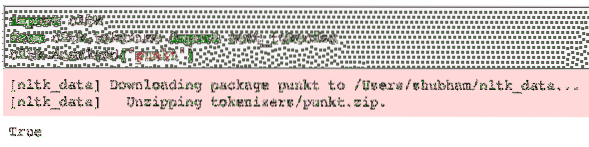
Please note that you might face an error due to a missing dependency for nltk called punkt. Add the following line right after the imports in the program to avoid any warnings:
nltk.download('punkt')For me, it gave the following output:
Next, we make use of the sentence tokenizer we imported:
text = """A Topic in Kafka is something where a message is sent. The consumerapplications which are interested in that topic pulls the message inside that
topic and can do anything with that data. Up to a specific time, any number of
consumer applications can pull this message any number of times."""
sentences = sent_tokenize(text)
print(sentences)
We see something like this when we execute the above script:

As expected, the text was correctly organised into sentences.
Word Tokenization
As the name reflects, Word Tokenizers breaks a piece of text into words. Let's try a simple code snippet for the same with the same text as the previous example:
from nltk.tokenize import word_tokenizewords = word_tokenize(text)
print(words)
We see something like this when we execute the above script:

As expected, the text was correctly organised into words.
Frequency Distribution
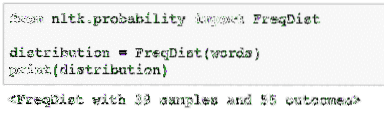
Now that we have broken the text, we can also calculate frequency of each word in the text we used. It is very simple to do with NLTK, here is the code snippet we use:
from nltk.probability import FreqDistdistribution = FreqDist(words)
print(distribution)
We see something like this when we execute the above script:
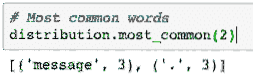
Next, we can find most common words in the text with a simple function which accepts the number of words to show:
# Most common wordsdistribution.most_common(2)
We see something like this when we execute the above script:
Finally, we can make a frequency distribution plot to clear out the words and their count in the given text and clearly understand the distribution of words:
Stopwords
Just like when we talk to another person via a call, there tends to be some noise over the call which is unwanted information. In the same manner, text from real world also contain noise which is termed as Stopwords. Stopwords can vary from language to language but they can be easily identified. Some of the Stopwords in English language can be - is, are, a, the, an etc.
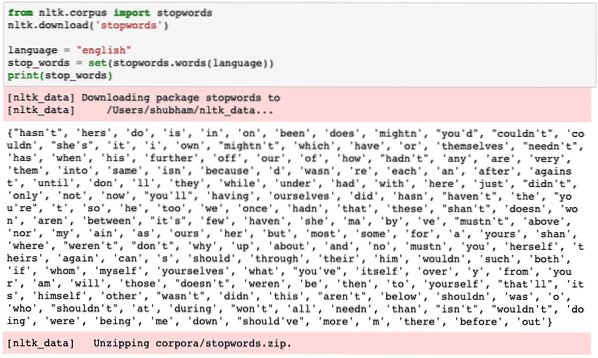
We can look at words which are considered as Stopwords by NLTK for English language with the following code snippet:
from nltk.corpus import stopwordsnltk.download('stopwords')
language = "english"
stop_words = set(stopwords.words(language))
print(stop_words)
As of course the set of stop words can be big, it is stored as a separate dataset which can be downloaded with NLTK as we shown above. We see something like this when we execute the above script:
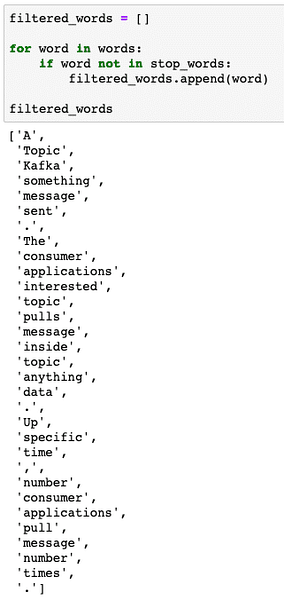
These stop words should be removed from the text if you want to perform a precise text analysis for the piece of text provided. Let's remove the stop words from our textual tokens:
filtered_words = []for word in words:
if word not in stop_words:
filtered_words.append(word)
filtered_words
We see something like this when we execute the above script:
Word Stemming
A stem of a word is the base of that word. For example:
We will perform stemming upon the filtered words from which we removed stop words in the last section. Let's write a simple code snippet where we use NLTK's stemmer to perform the operation:
from nltk.stem import PorterStemmerps = PorterStemmer()
stemmed_words = []
for word in filtered_words:
stemmed_words.append(ps.stem(word))
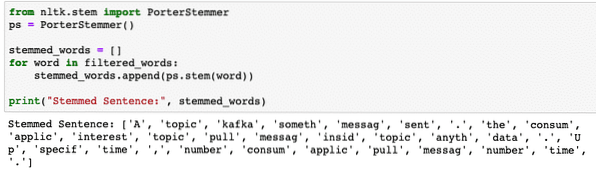
print("Stemmed Sentence:", stemmed_words)
We see something like this when we execute the above script:
POS Tagging
Next step in textual analysis is after stemming is to identify and group each word in terms of their value, i.e. if each of the word is a noun or a verb or something else. This is termed as Part of Speech tagging. Let's perform POS tagging now:
tokens=nltk.word_tokenize(sentences[0])print(tokens)
We see something like this when we execute the above script:

Now, we can perform the tagging, for which we will have to download another dataset to identify the correct tags:
nltk.download('averaged_perceptron_tagger')nltk.pos_tag(tokens)
Here is the output of the tagging:
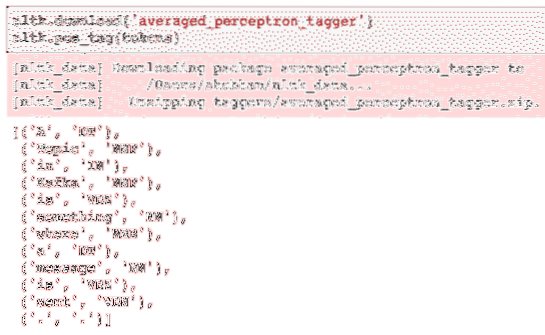
Now that we have finally identified the tagged words, this is the dataset on which we can perform sentiment analysis to identify the emotions behind a sentence.
Conclusion
In this lesson, we looked at an excellent natural language package, NLTK which allows us to work with unstructured textual data to identify any stop words and perform deeper analysis by preparing a sharp data set for text analysis with libraries like sklearn.
Find all of the source code used in this lesson on Github. Please share your feedback on the lesson on Twitter with @sbmaggarwal and @LinuxHint.


