In this article, I will show you how to install Ubuntu Core on Raspberry Pi 3 Model B. So, let's get started.
Components You Need:
To follow this article, you need:
- Raspberry Pi 2 or 3 Single Board Microcomputer.
- A 16GB or more microSD card.
- HDMI Cable.
- An USB Keyboard.
- Ethernet Cable.
- Power Adapter for Raspberry Pi.
- A Laptop or Desktop computer for installing/flashing Ubuntu Core on the SD card.
Setting Up Ubuntu One Account for Ubuntu Core:
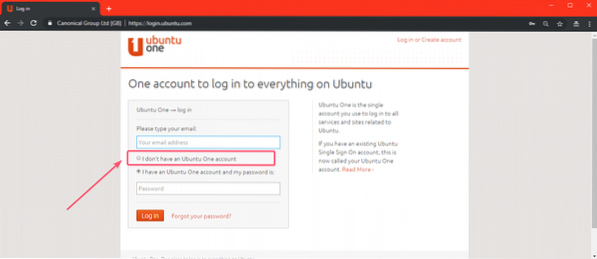
If you want to use Ubuntu Core on your Raspberry Pi 3, then you need an Ubuntu One account. If you don't have an Ubuntu One account, you can create one for free. Just visit https://login.ubuntu.com and click on I don't have an Ubuntu One account as marked in the screenshot below.
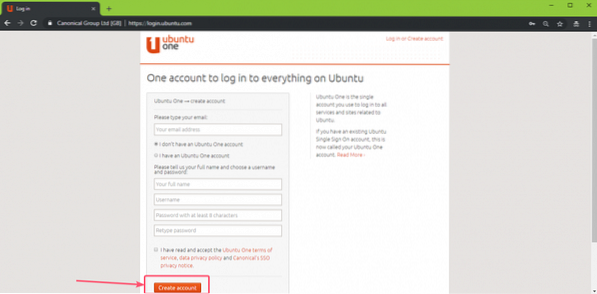
Now, fill in the required details and click on Create account.
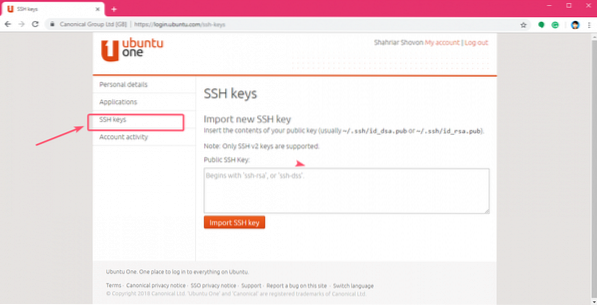
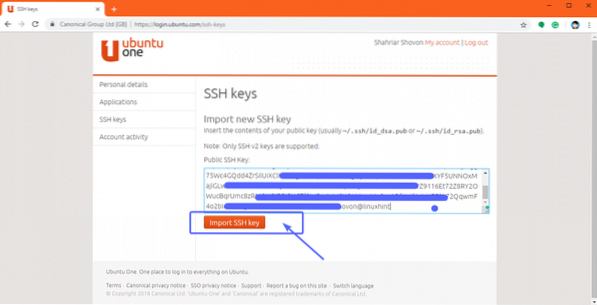
Now, verify your email address and your account should be created. Now, visit https://login.ubuntu.com/ and login to your Ubuntu One account. Now, click on SSH keys and you should see the following page. Here, you have to import the SSH key of the machine from which you will be connecting to your Ubuntu Core installed on your Raspberry Pi 3 device.
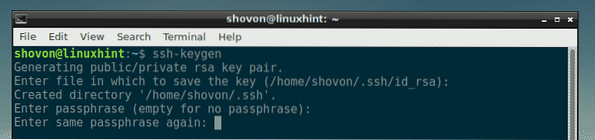
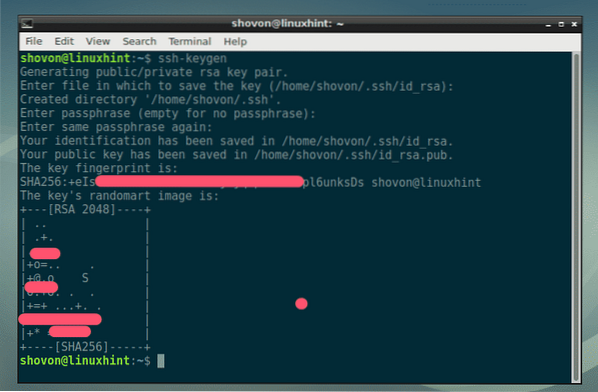
You can generate SSH key very easily with the following command:
$ ssh-keygen
By default, the SSH keys will be saved in the .ssh/ directory of your login user's HOME directory. If you want to save it somewhere else, just type in the path where you would like to save it and press

Now, press
NOTE: If you want to encrypt the SSH key with password, type it in here and press

Press
NOTE: If you've typed in a password in the earlier step, just re-type the same password and press
Your SSH key should be generated.
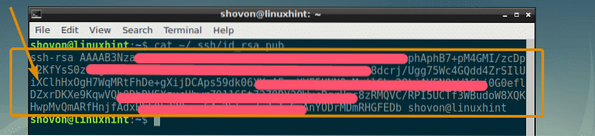
Now, read the SSH key with the following command:
$ cat ~/.ssh/id_rsa.pub
Now, copy the SSH key as marked in the screenshot below.
Now, paste it in the Ubuntu One website and click on Import SSH key as marked in the screenshot below.
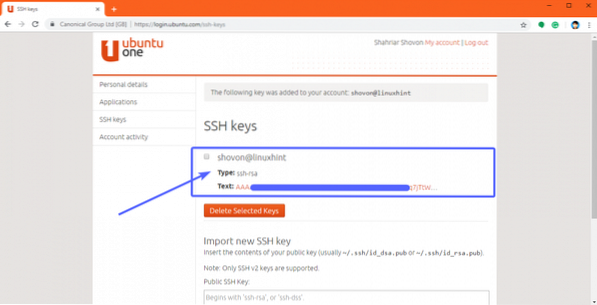
As you can see, the SSH key is added.
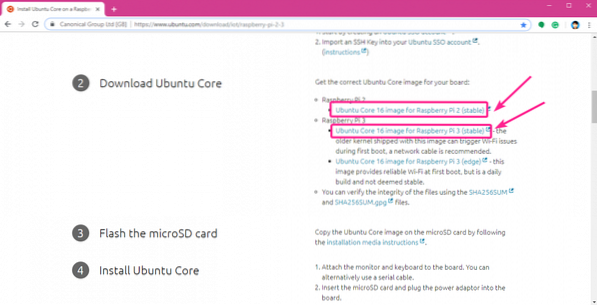
Downloading Ubuntu Core:
Now that you have your Ubuntu One account set up, it's time to download Ubuntu Core. First, go to the official website of Ubuntu at https://www.ubuntu.com/download/iot/raspberry-pi-2-3
Now, scroll down to the Download Ubuntu Core section and click on the download link for either Raspberry Pi 2 or Raspberry Pi 3 depending on the version of Raspberry Pi you have. I have Raspberry Pi 3 Model B, so I am going for the Raspberry Pi 3 image.
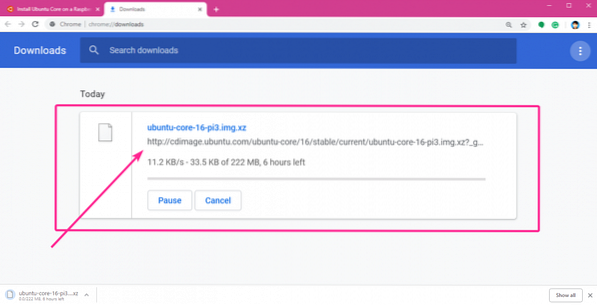
Your download should start.
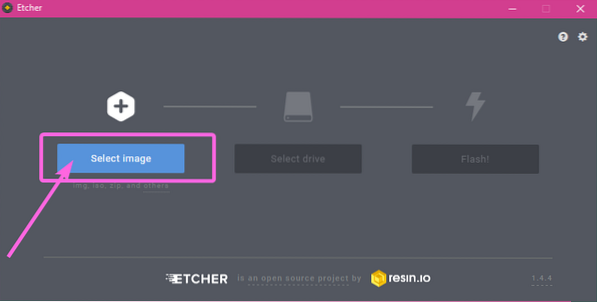
Flashing Ubuntu Core on microSD Card:
You can flash Ubuntu Core on your microSD card very easily on Windows, Linux and macOS operating system using Etcher. Etcher is a really easy to use software for flashing microSD cards for Raspberry Pi devices. You can download Etcher from the official website of Etcher at https://etcher.io/
NOTE: I can't show you how to install Etcher in this article as it is out of the scope of this article. You should be able to install Etcher on your own. It's very easy.
Once you install Etcher, open Etcher and click on Select image.
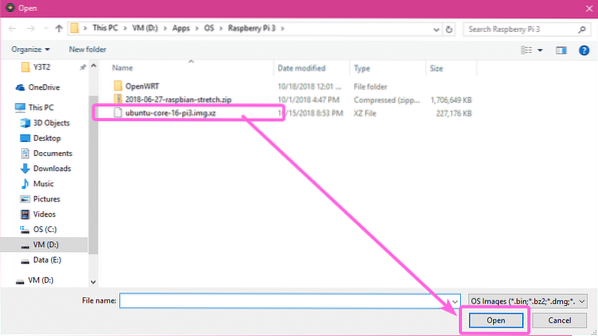
A file picker should be opened. Now, select the Ubuntu Core image that you just downloaded and click on Open.
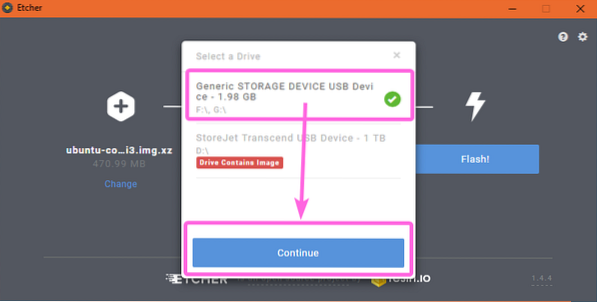
Now, insert the microSD card on your computer and click on Select drive.

Now, click to select your microSD card and click on Continue.
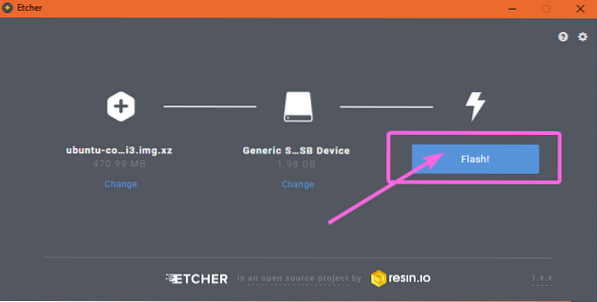
Finally, click on Flash!
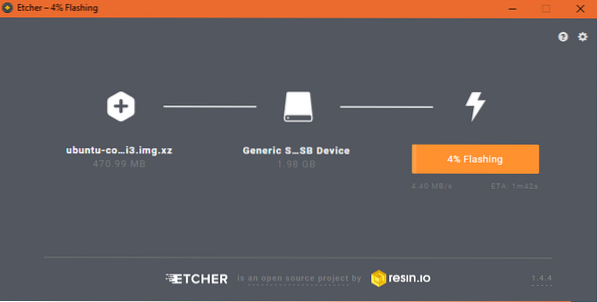
As you can see, your microSD card is being flashed…
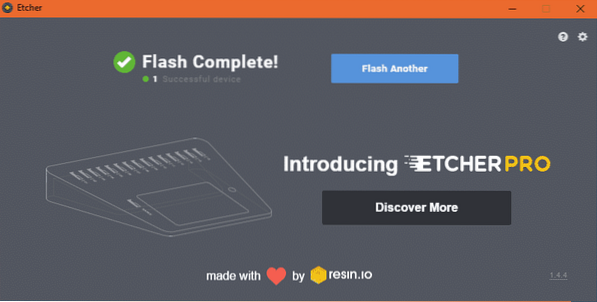
Once your microSD card is flashed, close Etcher.
Preparing Raspberry Pi:
Now that you have flashed Ubuntu Core on the microSD card, insert it on your Raspberry Pi's microSD card slot. Now, connect one end of the Ethernet cable to the RJ45 Ethernet port of your Raspberry Pi and another end to one of the port on your Router or Switch. Now, connect one end of the HDMI cable to your Raspberry Pi and the other end to your Monitor. Also, connect the USB keyboard to one of the USB port of your Raspberry Pi. Finally, plug in the power adapter to your Raspberry Pi.
After connecting everything, my Raspberry Pi 3 Model B looks as follows:

Setting Up Ubuntu Core on Raspberry Pi:
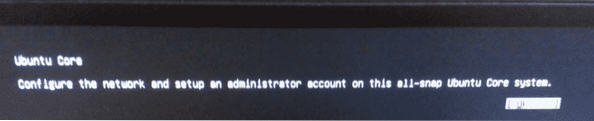
Now, power on your Raspberry Pi device and it should boot into Ubuntu Core as you can see in the screenshot below.

One you see the following window, press

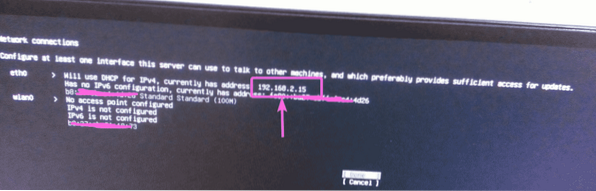
First, you have to configure networking. This is essential for Ubuntu Core to work. To do that, press
As you can see, Ubuntu Core has automatically configured the network interface using DHCP. The IP address is 192.168.2.15 in my case. Yours should be different. Once you're done, select [ Done ], press
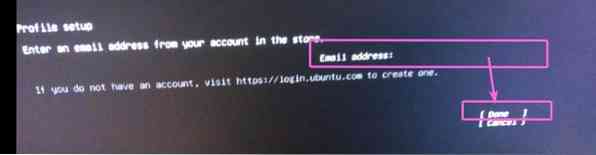
Now, type in the email address that you used to create your Ubuntu One account. Then, select [ Done ] and press
The configuration is complete. Now press
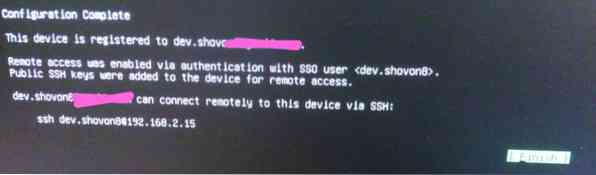
Now, you should see the following window. You can SSH into your Raspberry Pi with the command as marked in the screenshot below.
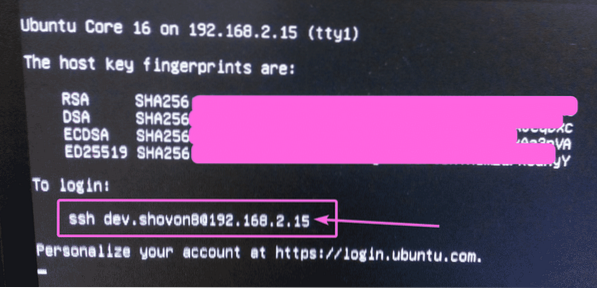
Connecting to Raspberry Pi Using SSH:
Now, SSH into your Raspberry Pi device from your computer as follows:
$ ssh [email protected]
Now, type in yes and press

You should be logged into your Raspberry Pi.
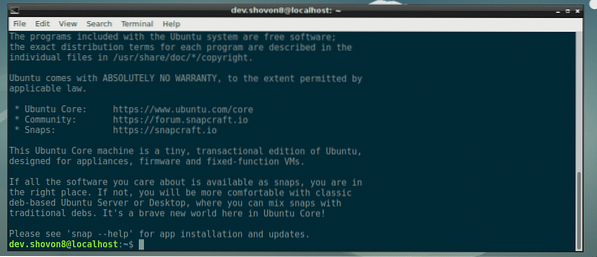
As you can see, I am running Ubuntu Core 16.

It's using just a few megabytes of memory. It's very lightweight as I said.

So, that's how you install Ubuntu Core on Raspberry Pi 2 and Raspberry Pi 3. Thanks for reading this article.


