With GitLab, you can plan your projects and implement methodologies like Agile for your team members. Track issues and development cycle. Implement a CD/CI pipelines, maintain container registries and automate the containerization of newly shipped versions. You can also write documentation and maintain private wikis, monitor the environment and resource utilization of the software in various stages like testing or production.
Prerequisites
As per the minimum requirements of GitLab Community you need:
- 1 vCPU but 2 is recommended for optimum performance
- At least 4GB of RAM with 4GB of swap space
- Root access or sudo privileges over the server
If you are experimenting on your local network (say in your home) then you don't need a public IP or a Fully Qualified Domain Name (FQDN) but for real-world use cases it is highly recommend that you do have:
- A static public IP to the server where GitLab with be installed
- An FQDN pointing to that IP
More than anything else, an FQDN will help you integrate GitLab with LetsEncrypt which is quite essential from a security and privacy perspective.
We will talk about LetsEncrypt integration, but for the most part, the demo is done over a Local Network with GitLab running behind a NAT with a private IP. Lastly, we want our server to be running a clean installation Ubuntu 18.04 LTS server so as to emulate the real-world scenario accurately.
Installing Dependencies and Adding Repositories
The first step we would need to perform is the customary update and upgrade of the system:
$ sudo apt update$ sudo apt upgrade -y
Next we need to verify that the following the packages - ca-certificates, software-properties-common and openssh-server are installed. Chances are that you are already logged in using OpenSSH and the other packages come out of the box with Ubuntu 18.04. Nevertheless, it is a good idea to be thorough.
$ sudo apt install ca-certificates openssh-server software-properties-commonOne important dependency that may require some assistance during installation is Postfix, a mail transfer agent. GitLab needs it to communicate with the users via email.
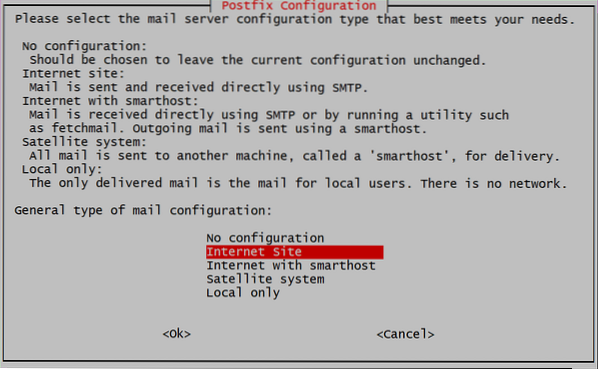
$ sudo apt install postfixHere, you will be asked to select what type of installation it is, Select Internet Site, and then make sure that the FQDN.
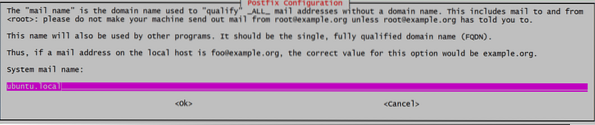
Next we are required to add a domain name, in case you are using public or private IP, you can simply add that IP address as well. I have set up a local DNS and the GitLab is being installed on ubuntu.local. If you are using an FQDN, like gitlab.example.com for your GitLab instance, use that domain name in here.
Now we are ready to add GitLab to our list of repositories which would then be installed.
$ curl https://packages.gitlab.com/install/repositories/gitlab/gitlab-ce/script.deb.sh | sudo bashThis script will install a few additional dependencies, add gpg keys for the official repositories and add the repository to the list of sources. Making our system ready for the final step of the installation.
Installing and Configuring GitLab
Installing GitLab is now as easy as running:
$ sudo apt install gitlab-ceThis might take some time, because the package itself is huge (around 470MB at the time of this writing) and downloading and unpacking it might take a while. Once that is done we are now ready to configure GitLab.
Open up the file /etc/gitlab.rb using your favorite text editor (using sudo privileges) and edit the line which says external_url as shown below:

If you are installing it on the public hosting service, with an FQDN, you can add that as a value. Also you can use https, instead of http. So if your domain name is gitlab.example.com it will be entered as:

But we will be using http, since it is a local installation.
LetsEncrypt Integration (HTTPS)
This step is applicable only for people using an FQDN and have set external_url to use https, in the above step.
In the same file /etc/gitlab/gitlab.rb, search for the section that concerns LetsEncrypt (search for “Let's Encrypt Integration”) and enable Let's Encrypt, along with it add your current email account, in case LetsEncrypt wants to notify you about unscheduled/scheduled certificate renewals.

The two lines that were modified here are:
# letsencrypt['enable'] = true# letsencrypt['contact_emails'] = ['[email protected]']
Now you can save the file and start GitLab application with the modified configuration.
$ sudo gitlab-ctl reconfigureThat is it! You GitLab instance is up and running. Use your browser to visit the control panel over at http://IP_ADDRESS or https://gitlab.example.com in case you used FQDN with SSL.
Initial Setup
Upon visiting the website on your browser, you will first be asked to set a password for the “root” user
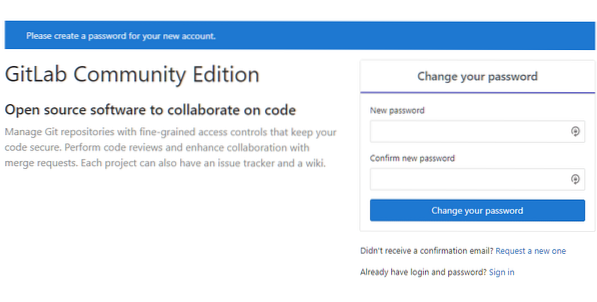
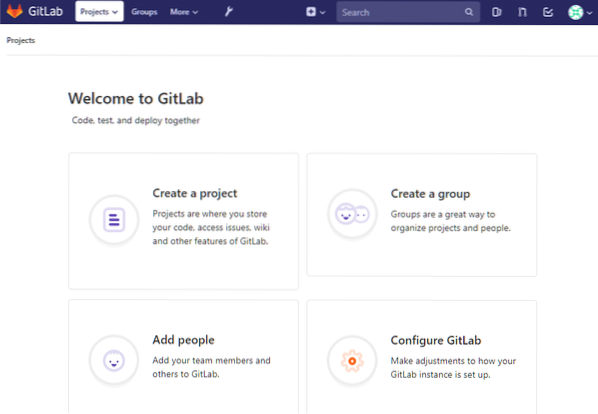
Set a password and then login as user “root” using the same. From here begins your GitHub free journey. Take control of your projects, add your team members and be productive once again!
Conclusion
While I, personally, think that Microsoft has been a good steward of the open source community in the last few years, it is still good to know that there are options like GitLab for users who want something else. Monopolies are never good for the community. On this note, we will be coming back to the topic of GitLab and see how to set up a container registry in a follow up. Stay tuned for that!


