When you EFS encrypt your files/folders, it's recommended you create a backup of your file encryption certificate and key to a PFX file, to avoid permanently losing access to your encrypted files and folders if the original certificate and key are lost or corrupted. In this post, we will show you how to import the PFX file for your EFS file encryption certificate and key in Windows 10.
If you lose access to your encrypted files and folders, you will not be able to open them again unless you are able to restore your file encryption certificate and key used with EFS. So it is imperative that you save it. You can import the PFX file to restore your EFS File Encryption Certificate and Key in either of two ways, via-
- PFX file.
- Certificates Manager.
Import PFX file to restore EFS File Encryption Certificate & Key via PFX file
Double-click or right-click the backed up PFX file and click Install PFX.
Ensure the Current User radio button is selected. Click Next.
Click Next.
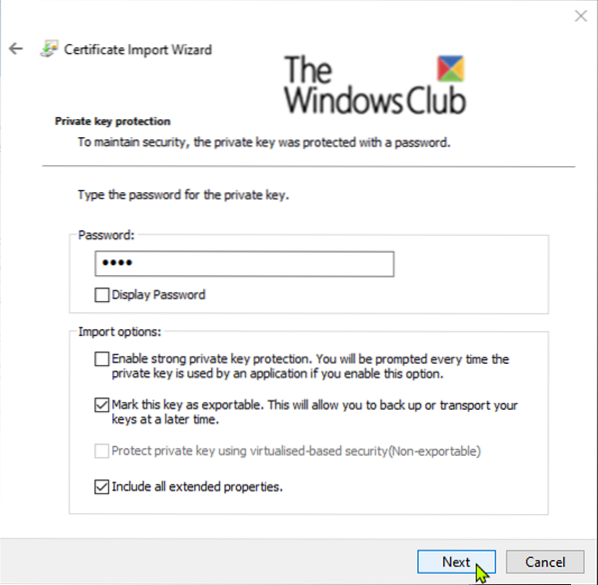
Type in the password for the PFX file private key, check Mark this key as exportable, check Include all extended properties, and Next.
Select the radio button for Automatically select the certificate store based on the type of certificate, and click Next.

Click Finish.
Click OK on the Certificate Import Wizard prompt.
You have now successfully imported your EFS File Encryption Certificate and Key.
Import PFX file to restore EFS File Encryption Certificate & Key via Certificates Manager
Press the Windows key + R. In the Run dialog box, type certmgr.msc, hit Enter to open Certificates Manager.
In the left pane of certmgr window, right-click the Personal store, click All Tasks, and click Import.
Click Next.
Click on the Browse button, select Personal Information Exchange from the file type drop-down, navigate to the location you saved the PFX file, select the PFX file, click on Open, and click Next.
Type in the password for the PFX file private key, check Mark this key as exportable, check Include all extended properties, and click Next.
Select the radio button for Automatically select the certificate store based on the type of certificate, and click Next.
Click Finish.
Click OK on the Certificate Import Wizard prompt.
You have now successfully imported your EFS File Encryption Certificate and Key.
You will need to refresh (F5) certmgr to see your imported EFS file encryption certificate and key now restored in Certificates in the Personal store, as shown above.
Hope you find this post on how to import EFS File Encryption Certificate and Key useful.


