The reason this happens is that the Selenium web driver must download the webpage and finish rendering the page before you can do anything on it. In the past, the webserver generated the content of a website, and the browser just downloaded it and rendered it. These days we have many single-page web apps that work a little bit differently. In Single Page Web Apps (SPAs), the webserver serves only the frontend codes. Once the frontend code is rendered on the browser, the frontend code uses AJAX to request API data to the webserver. Once the frontend receives the API data, it renders them on the browser. So, even though the browser has finished downloading and rendering the web page, the webpage is still not ready. You must wait for it to receive the API data and render them as well. So, the solution to this problem is to wait for the data to be available before we do anything with Selenium.
In Selenium, there are 2 types of waits:
1) Implicit wait
2) Explicit wait
1) Implicit wait: This is the easiest to implement. An implicit wait tells the Selenium web driver to wait for several seconds for the DOM (document object model) to be ready (the web page to be ready).
2) Explicit wait: This is a little bit complex than the implicit wait. In explicit wait, you tell the Selenium web driver what to wait for. Selenium waits for that specific condition to be fulfilled. Once it is fulfilled, the Selenium web driver will be ready to take other commands. Usually, the explicit wait time is variable. It depends on how quickly the conditions are satisfied. In the worst-case scenario, the explicit wait will wait as long as the implicit wait.
In this article, I am going to show you how to wait (implicit and explicit) for a page to load with Selenium. So, let's get started.
Prerequisites:
To try out the commands and examples of this article, you must have,
1) A Linux distribution (preferably Ubuntu) installed on your computer.
2) Python 3 installed on your computer.
3) PIP 3 installed on your computer.
4) Python virtualenv package installed on your computer.
5) Mozilla Firefox or Google Chrome web browsers installed on your computer.
6) Must know how to install the Firefox Gecko Driver or Chrome Web Driver.
For fulfilling the requirements 4, 5, and 6, read my article Introduction to Selenium with Python 3 at Linuxhint.com.
You can find many articles on the other topics on LinuxHint.com. Be sure to check them out if you need any assistance.
Setting Up a Project Directory:
To keep everything organized, create a new project directory selenium-wait/ as follows:
$ mkdir -pv selenium-wait/drivers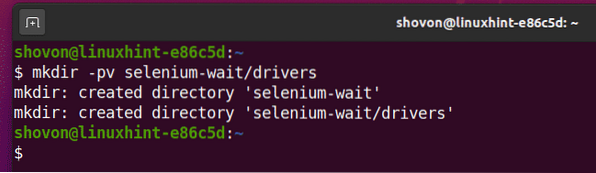
Navigate to the selenium-wait/ project directory as follows:
$ cd selenium-wait/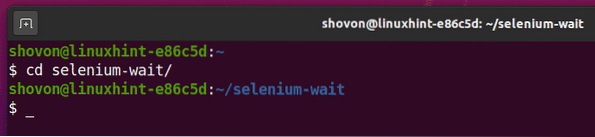
Create a Python virtual environment in the project directory as follows:
$ virtualenv .venv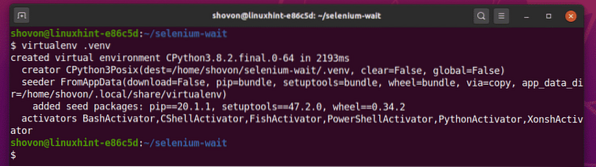
Activate the virtual environment as follows:
$ source .venv/bin/activate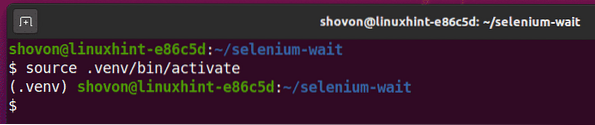
Install Selenium using PIP3 as follows:
$ pip3 install selenium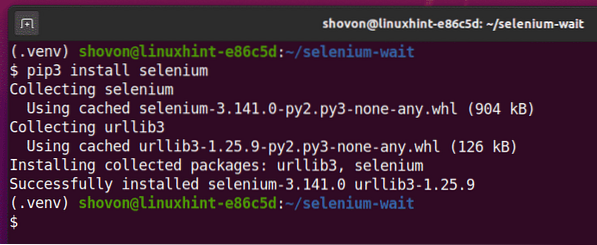
Download and install all the required web driver in the drivers/ directory of the project. I have explained the process of downloading and installing web drivers in my article Introduction to Selenium with Python 3. If you need any assistance, search on LinuxHint.com for that article.
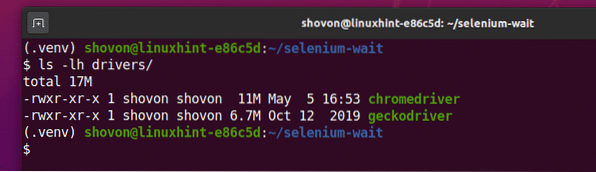
I will be using the Google Chrome web browser for the demonstration in this article. So, I will be using the chromedriver binary from the drivers/ directory.
Working with Implicit Wait:
To experiment with implicit wait, create a new Python script ex01.py in your project directory and type in the following lines of codes in that file.
from selenium import webdriverfrom selenium.webdriver.common.keys import Keys
options = webdriver.ChromeOptions()
options.headless = True
browser = webdriver.Chrome(executable_path="./drivers/chromedriver", options=options)
browser.implicitly_wait(10)
browser.get("https://www.unixtimestamp.com/")
timestamp = browser.find_element_by_xpath("//h3[@class='text-danger'][1]")
print('Current timestamp: %s' % (timestamp.text.split(")[0]))
browser.close()
Once you're done, save the ex01.py Python script.
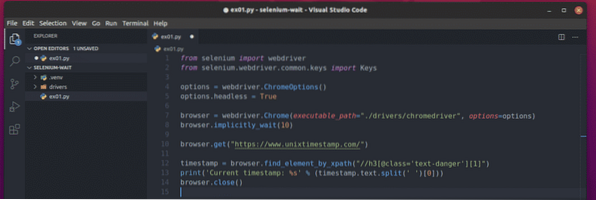
Line 1 and 2 imports all the required Selenium components.

Line 4 creates a Chrome Options object.

Line 5 enables headless mode for the Chrome web driver.

Line 7 creates a Chrome browser object using the chromedriver binary from the drivers/ directory.

Line 8 is used to tell Selenium to wait implicitly for 10 seconds using the implicitly_wait() browser method.

Line 10 loads the www.unixtimestamp.com in the browser.

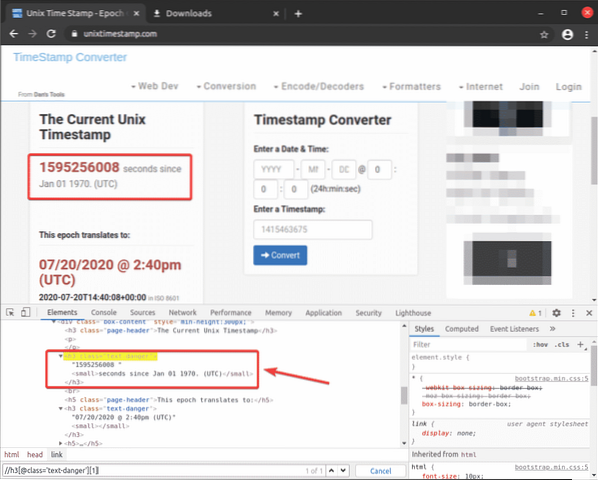
Line 12 finds the timestamp element using the XPath selector //h3[@class='text-danger'][1] and stores it in the timestamp variable.

I got the XPath selector from the Chrome Developer Tool. As you can see, the timestamp is in the first h3 element with the class name text-danger. There are 2 h3 elements with the class text-danger.
Line 13 prints only the timestamp from the element I have selected using the XPath selector and stored in the timestamp variable.

Line 14 closes the browser.

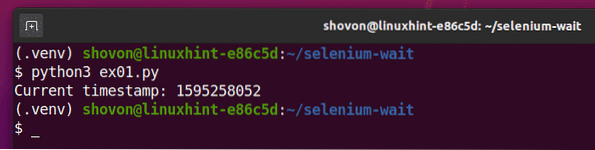
Once you're done, run the Python script ex01.py as follows:
$ python3 ex01.py
As you can see, the current timestamp is extracted from unixtimestamp.com and printed on the console.
Working with Explicit Wait:
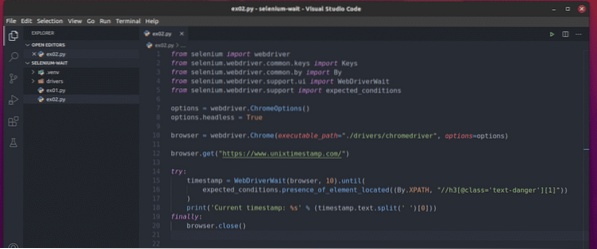
To experiment with explicit wait, create a new Python script ex02.py in your project directory and type in the following lines of codes in that file.
from selenium import webdriverfrom selenium.webdriver.common.keys import Keys
from selenium.webdriver.common.by import By
from selenium.webdriver.support.ui import WebDriverWait
from selenium.webdriver.support import expected_conditions
options = webdriver.ChromeOptions()
options.headless = True
browser = webdriver.Chrome(executable_path="./drivers/chromedriver", options=options)
browser.get("https://www.unixtimestamp.com/")
try:
timestamp = WebDriverWait(browser, 10).until(
expected_conditions.presence_of_element_located((By.XPATH, "
//h3[@class='text-danger'][1]"))
)
print('Current timestamp: %s' % (timestamp.text.split(")[0]))
finally:
browser.close()
Once you're done, save the ex02.py Python script.
Line 1-5 imports all the required components from the Selenium library.

Line 7 creates a Chrome Options object.

Line 8 enables headless mode for the Chrome web driver.

Line 10 creates a Chrome browser object using the chromedriver binary from the drivers/ directory.

Line 12 loads the www.unixtimestamp.com in the browser.

The explicit wait is implemented in the try-finally block (from line 14-20)

Line 15-17 uses creates WebDriverWait() object. The first argument of WebDriverWait() is the browser object, and the second argument is the maximum allowed time (worst-case scenario) for fulfilling the condition, which is 10 seconds in this case.
In the until() block, expected_conditions.presence_of_element_located() method is used to make sure that the element is present before attempting to select the element. Here, By.XPATH is used to tell the presence_of_element_located() method that we have used an XPath selector to select the element. The XPath selector is //h3[@class='text-danger'][1].
Once the element is found, it is stored in the timestamp variable.

Line 18 prints only the timestamp from the selected element.

Finally, line 19-20 closes the browser.
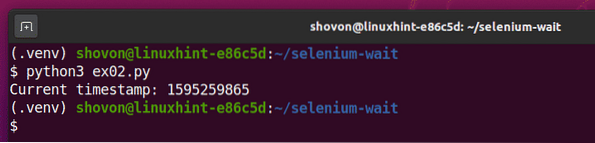
Once you're done, run the ex02.py Python script as follows:
$ python3 ex02.py
As you can see, the current timestamp from unixtimestamp.com is printed on the console.
Selecting Elements in Explicit Waits:
In the earlier section, I have used By.XPATH for selecting the element using the XPath selector. You can also select the elements using ID, tag name, CSS class name, CSS selector, etc.
The supported selection methods are given below:
By.XPATH - Selects element/elements using XPath selector.
By.CLASS_NAME - Selects element/elements using CSS class name.
By.CSS_SELECTOR - Selects element/elements using CSS selector.
By.ID - Selects element by ID
By.NAME - Selects element/elements by name.
By.TAG_NAME - Selects element/elements by HTML tag name.
By.LINK_TEXT - Selects element/elements by link text of a (anchor) HTML tag.
By.PARTIAL_LINK_TEXT - Selects element/elements by partial link text of a (anchor) HTML tag.
For more information on these, visit the Python Selenium API Documentation Page.
Expected Conditions in Explicit Waits:
In the earlier explicit wait example, I have used the presence_of_element_located() method of expected_conditions as the explicit wait condition to make sure that the element I was looking for do exists before selecting it.
There are other expected_conditions you can use as an explicit wait condition. Some of them are:
title_is(title) - checks if the title of the page is title.
title_contains(partial_title) - checks if the title of the page contains a part of the title partial_title.
visibility_of(element) - checks if the element is visible on the page that is the element has width and height greater than 0.
visibility_of_element_located(locator) -
presence_of_element_located(locator) - Make sure that the element located (by the locator) is present on the page. The locator is a tuple of (By, selector), as I have shown in the explicit wait example.
presence_of_all_element_located() - Makes sure that all the element matched by the locator is present on the page. The locator is a (By, selector) tuple.
text_to_be_present_in_element(locator, text) - Checks whether the text is present in the element located by the locator. The locator is a (By, selector) tuple.
element_to_be_clickable(locator) - Checks if the element located by the locator is visible and clickable. The locator is a (By, selector) tuple.
element_to_be_selected(locator) - Checks if the element located by the locator is selected. The locator is a (By, selector) tuple.
alert_is_present() - expect an alert dialog to be present on the page.
There are many more expected_conditions available for you to use. For more information on these, visit the Python Selenium API Documentation Page.
Conclusion:
In this article, I have discussed Selenium's implicit and explicit waits. I have also shown you how to work with an implicit and explicit wait. You should always try to use explicit wait in your Selenium projects as Selenium will try to reduce the wait time as much as possible. This way, you won't have to wait for a specific number of seconds each time you run your Selenium projects. The explicit wait should save a lot of seconds.
For more information on Selenium waits, visit the official Selenium Python Library waits Documentation page.


