Now, why would you need arping? Imagine you are working with a small office network. Using the classic ping command to ping hosts to verify their availability is very tempting, right? Well, if you are using the ICMP protocol, then you are actually performing ARP requests for probing devices in the network.
This is where the arping tool comes in. Like ping, arping pings network hosts using network layer ARP packets. This method is useful for hosts that do not respond to Layer 3 and Layer 4 ping requests.
This article shows you how to use arping command in Linux.
Arping in Linux
Among network admins, arping is a popular tool. However, it does not come included in the default set of tools offered by Linux. So, you will have to install arping manually.
Thankfully, arping is a popular tool. No matter what distro you are using, it should be available directly from the official package servers. Run the following command according to your distro.
For Debian/Ubuntu and derivatives, the net-tools package is necessary for the arp tool:
$ sudo apt install arping net-toolsFor Fedora and derivatives:
$ sudo dnf install arpingFor openSUSE and derivatives:
$ sudo zypper install arping2Using arping
Discover Hosts
If multiple devices are connected over Ethernet, then the systems already have an internal ARP table for communicating over the network. You can use arping to list the entries in the network.
Run the following command to do so:
$ arp -a
As you can see, the command will print a list of hostnames, along with their IP and MAC addresses.
Ping Hosts
If you know the IP address of the target device, you can simply pass the address to arping to perform an ARP ping.
$ arping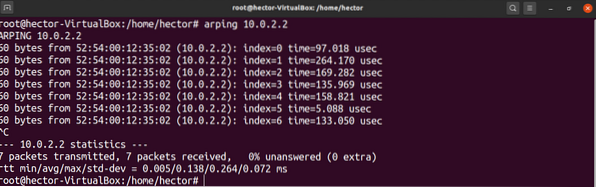
Arping also allows you to define the number of times to ping the target device. To do so, use the “-c” flag, followed by the number of pings to perform.
One quick tip: If a new device is identified, you should run the following command to update the ARP table:
ARP Timeout
If arping cannot resolve the IP address of the target, this will cause an ARP timeout. To demonstrate, run the following command. The IP address should be something inaccessible.
$ arping -c 7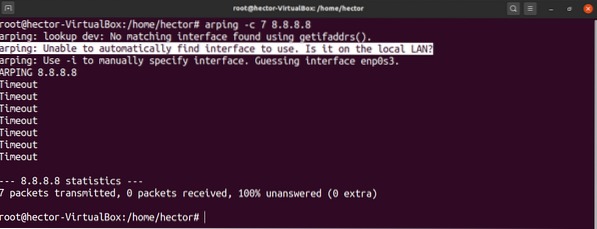
As you can see, arping will notify you if you did not specify the network interface. This is because arping expects you to specify the interface. If not specified, arping tries to guess it.
Specify Network Interface
As you have seen in the previous section, arping prefers that you specify the network interface. This is especially necessary if there are multiple network interfaces on the server. Arping is not able to guess which network card to use.
To avoid this problem, we can manually specify the network interface to arping. If this method is used, arping will utilize the specified network interface instead of doing guesswork.
First, list all the available network interfaces with the following command:
$ ip link show
Then, specify the network interface to arping using the “-I” flag, as shown below:
$ arping -I -c 7
Specify Source MAC Address
As in the previous method, it is also possible to specify the MAC address of the source from which you are sending the packets. To achieve this, use the “-s” flag, followed by the MAC address you desire, as follows:
$ arping -c 7 -s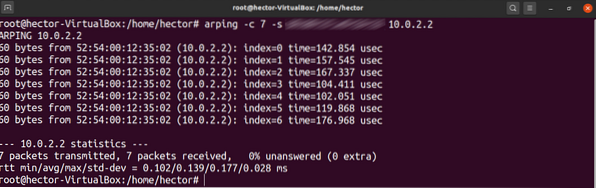
Now, depending on whether you own the MAC address, there are two outcomes:
- If you own the MAC address, you can just go with the “-s” flag.
- If you do not own the MAC address, then you are trying to spoof it. If that is the case, then you will have to use the promiscuous mode. Check out more on promiscuous mode here. As a quick reminder, this mode is configured in a way that it transmits all frames received by the NIC.
The good thing is, arping can run on the promiscuous mode. To enable this mode, use the “-p” flag. The command will look something like this:
$ arping -c 7 -s -p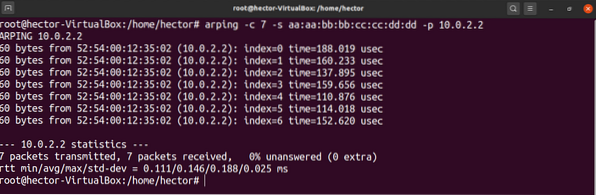
Specify Source IP Address
Another interesting feature of arping is the ability to define the source IP address manually. The way that this method works is quite like the previous step.
However, this method does come with its own issues. Once arping pings the device, the device will reply back to the IP address that you manually defined. Without ownership of that IP address, arping will not receive the replies.
To define the source IP address manually, use the “-S” flag.
$ arping -c 7 -S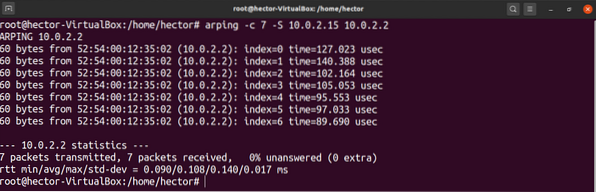
There are further nuances to this method. How you use this method depends on whether you own the IP address:
- If you own the IP address, then you are good to go.
- If you do not own the IP address, then you may want to use the promiscuous mode.
If your situation matches the second option, use the “-p” flag to enable the promiscuous mode.
$ arping -c 7 -S -p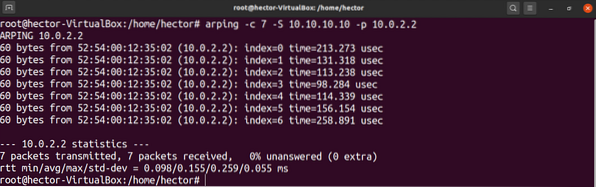
Arping Help
While these are the most commonly used arping commands, there are more features that arping offers. For example, arping offers a quick help page for documentation on the fly:
$ arping --help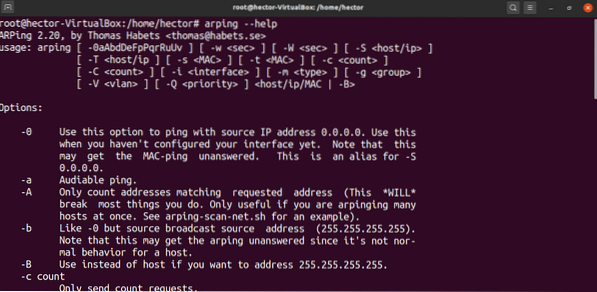
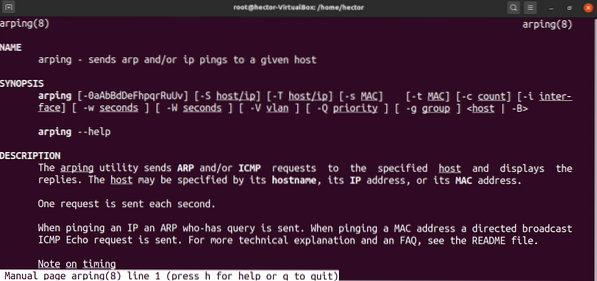
If you are interested in in-depth information about the features of arping, you may dive deeper into the man page:
Final Thoughts
This tutorial covers some of the more common methods of using arping. You can update the ARP table and spoof MAC and IP address using promiscuous mode.
For the ambitious Linux network and system administrators, this need not be the place to stop! Check out Fierce, a more advanced and feature-packed tool used for network scanning.
Happy computing!


