For developers, Zabbix comes with a robust API that offers almost all the functions of Zabbix.
This guide will demonstrate how to install and configure Zabbix in Debian.
Prerequisites
In Linux, performing any system-level change requires root (or sudo) privilege access. In Debian, it blocks other users from running any action that may alter the system. You will need to access the root account (or any other account with sudo privileges) to install and configure Zabbix.
In this example, we will be configuring Zabbix, along with the MySQL database for storing data, PHP, and the Apache server for the web interface.
Installing Zabbix on Debian
The following steps show you how to download and install Zabbix onto your Debian system.
Step 1: Install Apache and PHP
This is the first step in installing Zabbix. It is a tool written in PHP, so you will need to have a server ready to run it. Fire up a terminal and run the following command.
$ apt update && apt install apache2 php php-mysql php-mysqlnd php-ldapphp-bcmath php-mbstring php-gd php-pdo php-xml libapache2-mod-php

If the installation went successfully, then the system will be triggered to start the Apache service automatically. The service is also enabled to start during boot. Verify that the service is up and running via the following command.
$ systemctl status apache2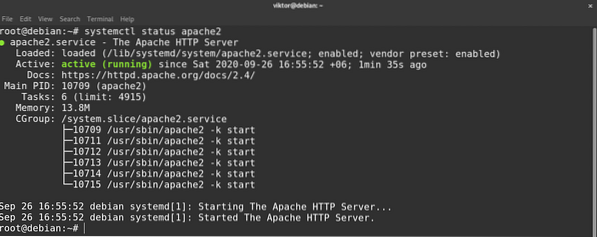
Before moving further, here are some quick systemctl commands to manage the Apache service. The commands are self-explanatory, and you can use them to start, stop, and restart the Apache service.
$ systemctl start apache2$ systemctl stop apache2
$ systemctl restart apache2
Step 2: Install Database Solution
Zabbix requires a database management system to function. This section shows you how to install and configure MariaDB.
First, install MariaDB.
$ apt update && apt install mariadb-server mariadb-client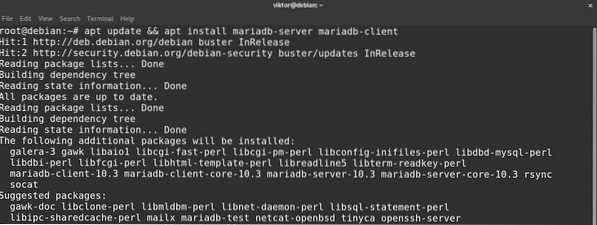
Verify the installation by running the following command to check the MariaDB service status.
$ systemctl status mariadb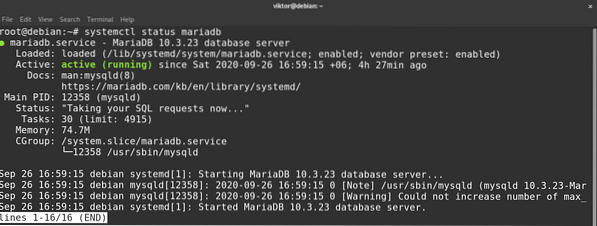
The next step is to perform the MariaDB server database installation. The MariaDB package comes with a script that automates the job for you.
$ mysql_secure_installation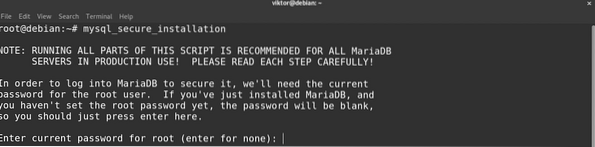


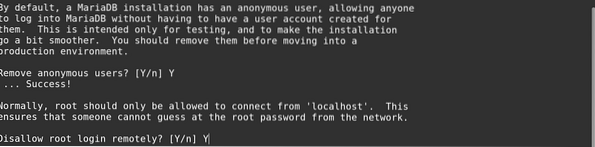


When the script is run, you will be asked for several options. It is recommended to remove anonymous users, disable remote root login, and remove the test database.
We will now create a dedicated database for Zabbix. Launch a terminal and start the MariaDB shell by entering the following command.
$ mysql -u root -p
Then, run the following commands sequentially. Enter a strong and suitable password in the password field.
$ create database zabbix character set utf8 collate utf8_bin;$ grant all privileges on zabbix.* to zabbix@localhost identified by
'


Step 3: Install Zabbix
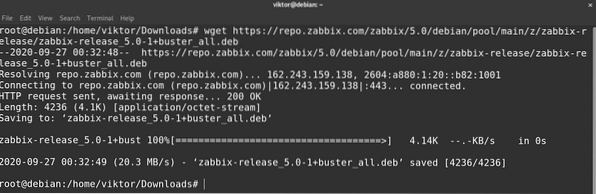
Finally, your system is now ready to install Zabbix. Installing Zabbix is a bit different from the previous steps. Zabbix offers an installable DEB package for Debian/Ubuntu that configures the Zabbix official repo in the system. Check it out at the Zabbix download page.
$ wget https://repo.zabbix.com/zabbix/5.0/debian/pool/main/z/zabbix-release/zabbix-release_5.0-1+buster_all.deb
Once the package is downloaded, install the package using APT. This will ensure that all the dependencies are taken care of at once.
$ apt install ./zabbix-release_5.0-1+buster_all.deb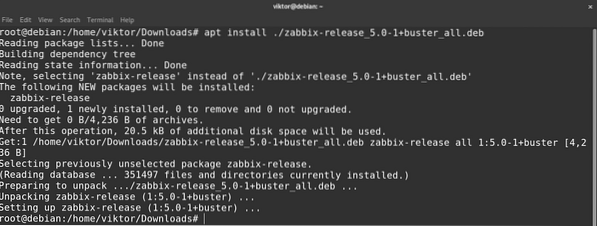
The following command will install the Zabbix server, web front-end, and agent packages.
$ apt install -y zabbix-server-mysql zabbix-frontend-php zabbix-agent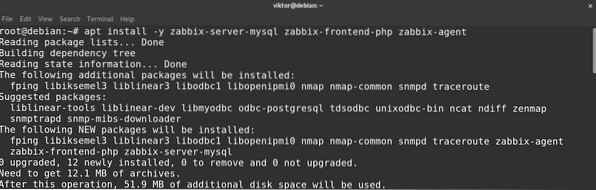
Step 4: Configure Zabbix Server Daemon
Zabbix should now be installed successfully on your Debian system. However, Zabbix still has to be configured for you to use the database you just created. Ensure that all the packages (especially the Zabbix packages) are up-to-date by entering the following command.
$ apt update && apt upgrade -yLoad the Zabbix initial schema and data into the Zabbix dedicated database via the command given below.
$ zcat /usr/share/doc/zabbix-server-mysql/create.sql.gz |mysql -u zabbix -p zabbix

Open the Zabbix server configuration file in an editor of your choice.
$ nano /etc/zabbix/zabbix_server.confHere are the entries that you need to change. Note that if any of them are commented, uncomment them first.
$ DBHost=localhost


Step 5: Configure Apache
To make sure that the Apache server works with the Zabbix front-end, you will need the Apache-specific Zabbix configuration file. Install the Zabbix configuration file for Apache via the following command.
$ apt update && apt install -y zabbix-apache-conf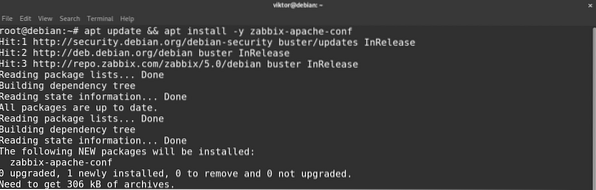
To take the changes into effect, reload Apache by entering the following.
$ systemctl reload apache2
Open the Zabbix configuration file for Apache in your favorite text editor.
$ nano /etc/zabbix/apache.confFind the appropriate section of PHP (for example, PHP 7.x) and edit the following entry. Do not forget to uncomment the line first (remove the extra “#” character(s) in front of the line).
$ php_value date.timezone
Step 6: Finalize Configuration
You are almost finished configuring the server. After making all the changes, it is now time to restart the server. First, restart the Apache service by entering the following command.
$ systemctl restart apache2
It is now time to start the Zabbix server. To do so, enter the following command.
$ systemctl start zabbix-server zabbix-agent
Run the following command.
$ systemctl enable zabbix-server zabbix-agent
Check the Zabbix server status by entering the following.
$ systemctl status zabbix-server
We will now check whether the Zabbix agent is running. In this example, the agent is monitoring the localhost. If you want the agent to monitor a remote server, then be sure to make the necessary changes in the steps demonstrated above.
$ systemctl status zabbix-agentStep 7: Tweak Firewall
For Zabbix to work, you will need to have port 80 and 443 open. These are the default ports that most applications use. Nevertheless, it is always a good idea to make sure that these ports are open when using Zabbix.
The following commands are for the UFW firewall.
$ ufw allow 80/tcp


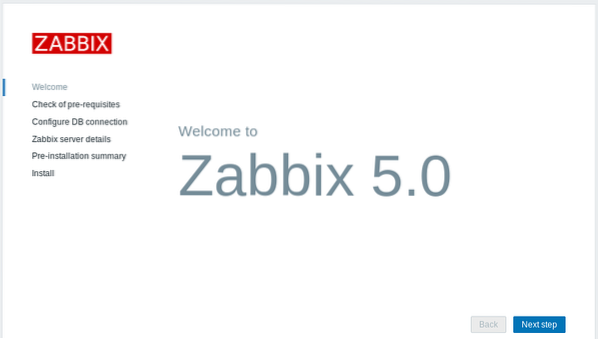
Step 8: Configure Zabbix Front-End
Before using Zabbix, you will also need to run some initial setups through a web installer. Launch the following URL in any web browser.
$ http://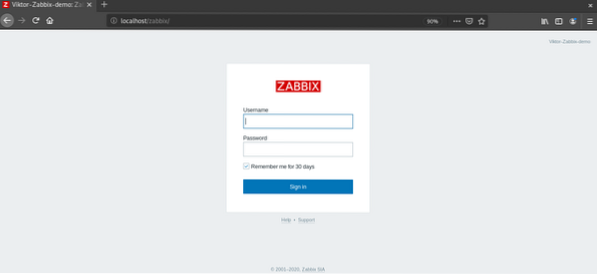
Zabbix will load the setup wizard. Click “Next step” to continue.
Next, Zabbix will perform a check on the PHP settings to see if everything is fine. Click “Next step” to continue.

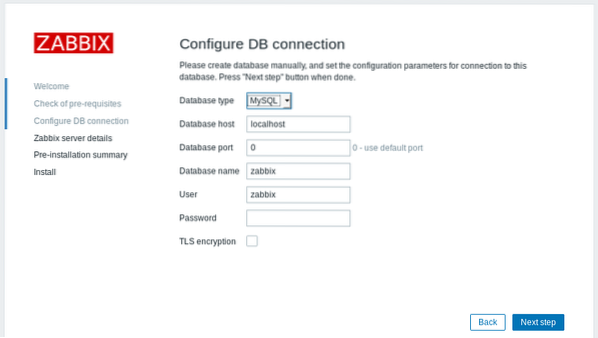
You will then be asked for the database connection info. Zabbix will automatically fill in most of these fields. The only field you must fill in yourself is the password. Enter the password and click “Next step” to continue.
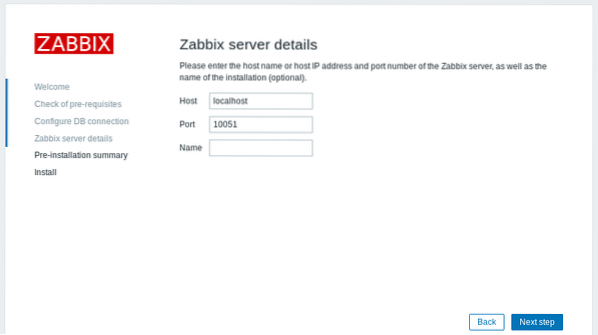
In this step, Zabbix will ask for the server details. Generally, the host and port information will be used as-is. Give the server a suitable name and click “Next step” to continue.
Zabbix will show a quick summary of the installation. Check if there is anything that requires changes. If not, click “Next step” to continue.

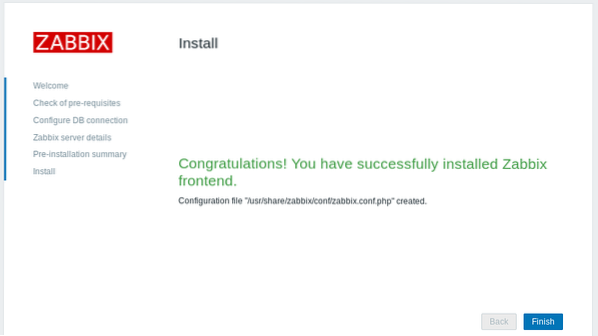
The installation is now finished! Click the “Finish” button.
You will now be brought to the Zabbix login page. The username is “Admin” and the password is “zabbix.” You will have to change these manually later on to ensure security.
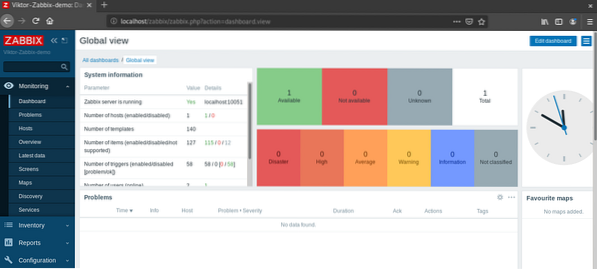
Voilà! Zabbix is set and running! We are currently on the Zabbix dashboard.
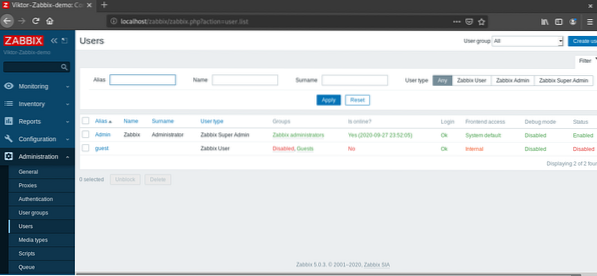
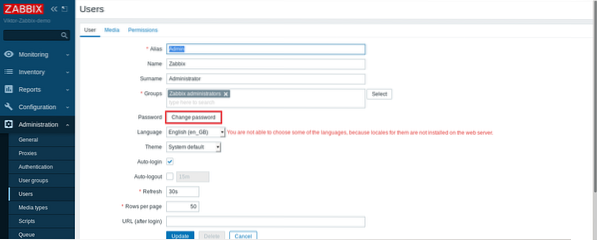
Before going ahead, let us show you how to change the default administrator password of Zabbix. Go to Administrator >> Users.
Click “Admin” under the “Alias” column.
Click “Change password.”
Enter a new password. Then, click “Update.”
Final Thoughts
Zabbix is a wonderful solution for monitoring networks. Although the method for installing Zabbix is demonstrated on Debian in this article, the process should be similar for any Debian-based distro, for example, Ubuntu, Linux Mint, etc.
Happy computing!


