Proxmox VE (Virtualization Environment) is an open-source enterprise virtualization platform. It has a built-in user-friendly web interface that you can use to manage your virtual machines and Linux containers easily. It has features such as software-defined storage, networking, high availability clustering, and many more.
In this article, I am going to show you how to install Proxmox VE on Odyssey X86J4105 x86 mini-computer. So, let's get started.
Downloading Proxmox VE ISO Image:
To download the latest version of Proxmox VE ISO image, visit the official Proxmox download page from your favorite web browser. Once the page loads, click on the Download button of Proxmox VE ISO Installer as marked in the screenshot below.
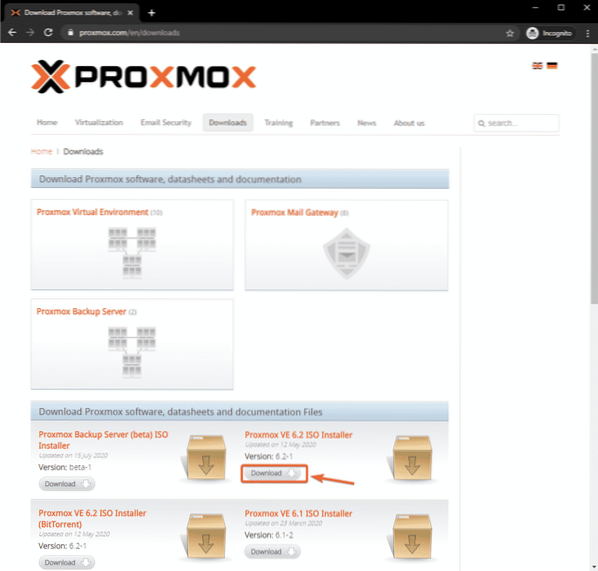
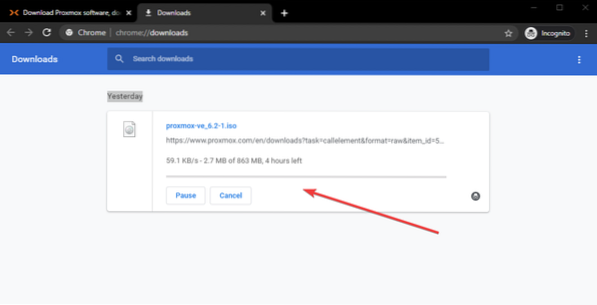
Proxmox VE ISO image should start downloading. It may take a while to complete. I won't download it as I already have it downloaded on my computer.
Making a Bootable USB Thumb Drive on Windows:
If you're using the Windows operating system, you can use Rufus to easily make a bootable USB thumb drive for installing Proxmox VE on your Odyssey X86J4105 mini-computer.
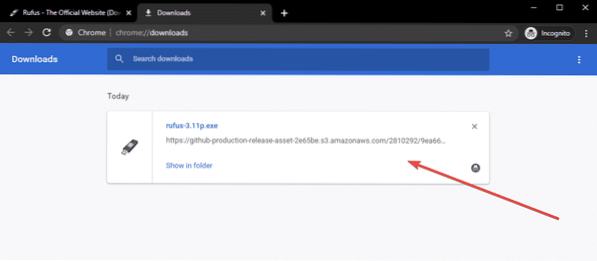
To download Rufus, visit the official website of Rufus.

Scroll down a little bit and click on the Rufus portable link, as marked in the screenshot below.

Rufus should be downloaded.
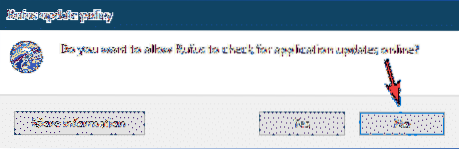
Now, insert a USB thumb drive on your computer and run Rufus. You may see the following window, click on No.
Rufus should start. Click on SELECT.
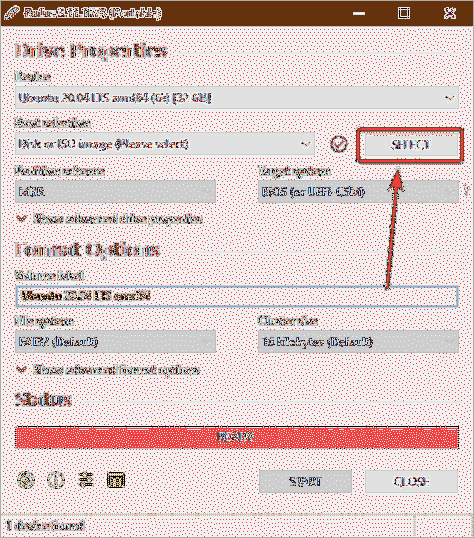
A file manager should open. Select the Proxmox VE ISO image that you have just downloaded and click on Open.

Click on START.

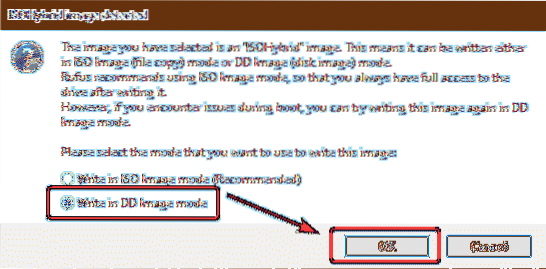
Select Write in DD Image mode and click on OK.
If you have any important data on your USB thumb drive, move them somewhere safe and click on OK.

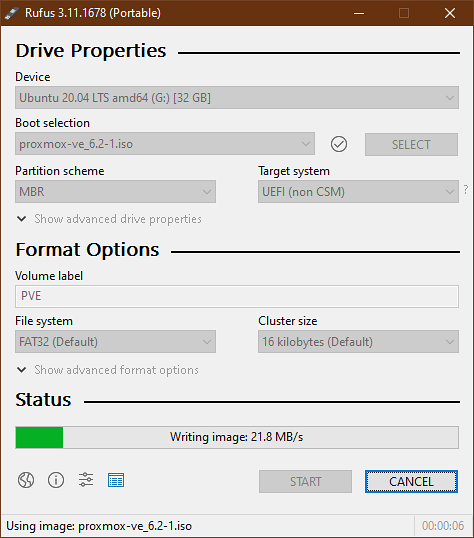
Rufus should copy all the essential files from the ISO file to your USB thumb drive. It may take a while to complete.
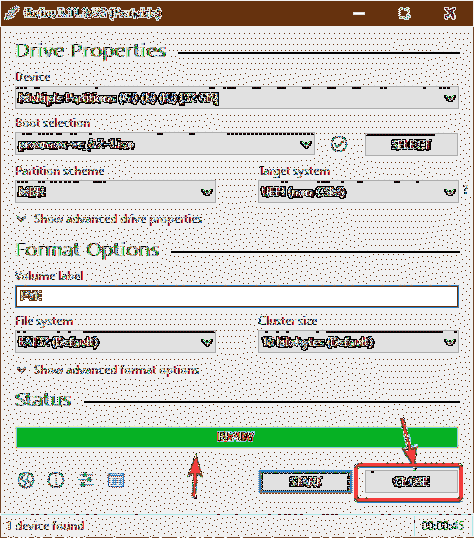
Once all the files are copied, the status should be READY. You can click on CLOSE to close Rufus. Then, eject the USB thumb drive from your computer.
Making a Bootable USB Thumb Drive on Linux:
If you're using a Linux distribution, you can use the dd command to easily make a bootable USB thumb drive for installing Proxmox VE on your Odyssey X86J4105 mini-computer.
Once you've downloaded the Proxmox VE ISO image, navigate to the ~/Downloads directory as follows:
$ cd ~/Downloads/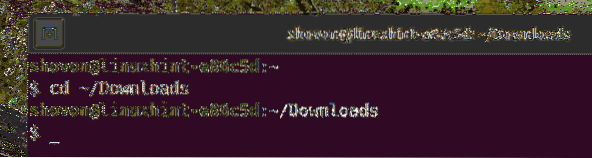
You should find the Proxmox VE ISO file there.
$ ls -lh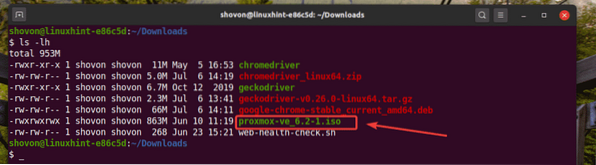
Now, run the following command:
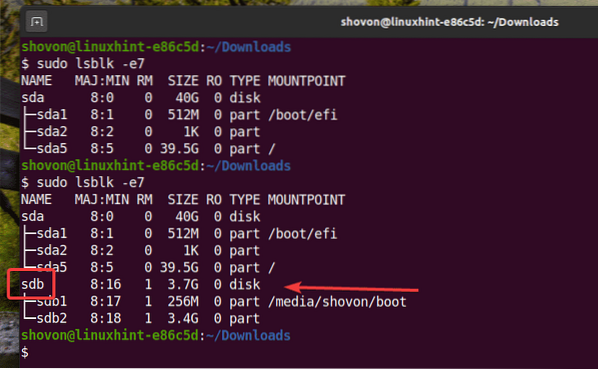
$ sudo lsblk -e7Then, insert the USB thumb drive on your computer and run the following command:
$ sudo lsblk -e7If you compare the outputs, you should see a new disk (sdb in my case). This is your USB thumb drive. You can access it as /dev/sdb.
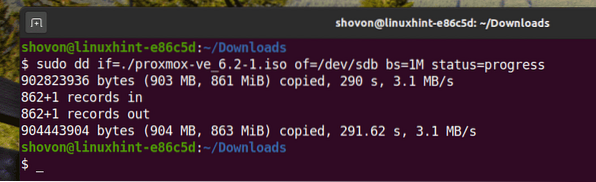
Run the following command to write the Proxmox VE ISO file to your USB thumb drive /dev/sdb:
$ sudo dd if=./Proxmox-ve_6.2-1.iso of=/dev/sdb bs=1M status=progress
NOTE: Make sure that there are no important files on your USB thumb drive.
The required files are being copied to the USB thumb drive. It should take a while to complete.

At this point, the USB thumb drive should be ready.
Now, eject the USB thumb drive from your computer as follows:
$ sudo eject /dev/sdb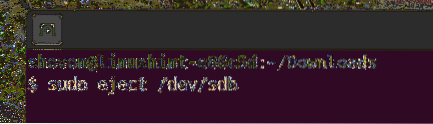
Booting from the USB Thumb Drive:
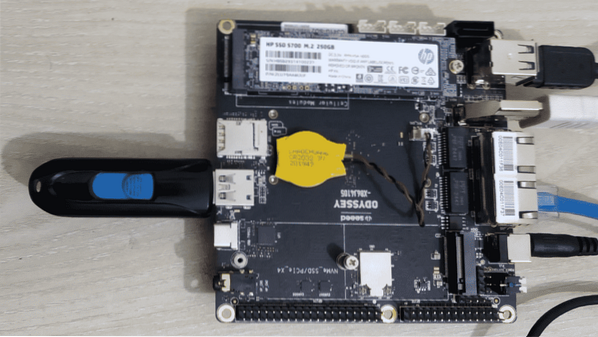
Before you power on the Odyssey Mini-computer, connect a USB keyboard and a mouse in the USB 2.0 ports(7), the HDMI cable of your monitor(8), the DC power jack(6), Ethernet cable to the RJ-45 port(8), and the bootable USB thumb drive on the USB 3.1 port(5) of your Odyssey mini-computer.
Once you power on the Odyssey X86J4105 mini-computer, you should see the Seeed Studio logo, as shown in the screenshot below. When you see this image, press the

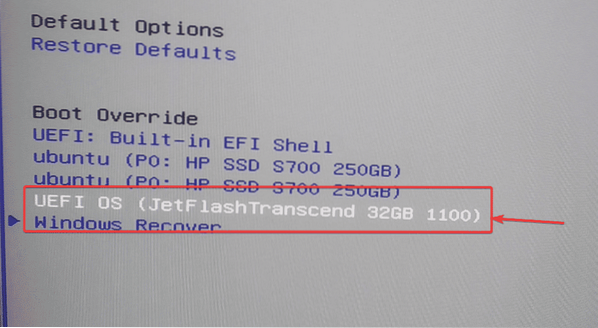
From the BIOS, go to the Save & Exit tab and select your USB thumb drive from the Boot Override list, as shown in the screenshot below.
Proxmox VE installer boot menu should be displayed. Select Install Proxmox VE and press

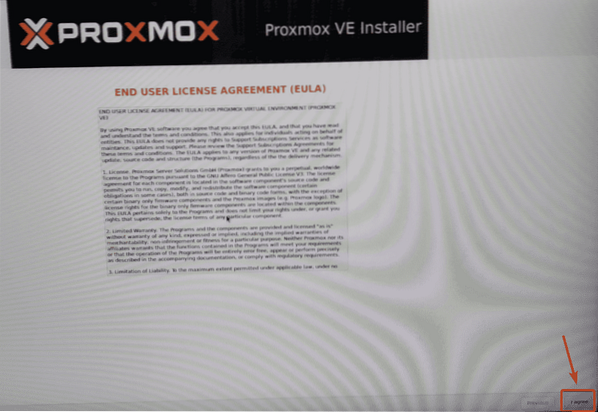
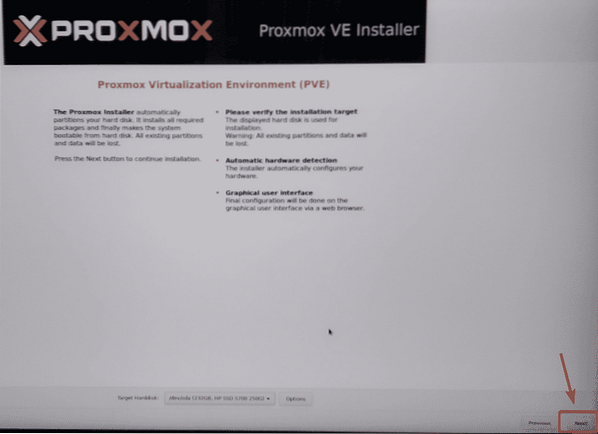
Proxmox VE installer wizard should be displayed. Click on I agree, as marked in the screenshot below.
If you have only a single SSD/HDD installed on your Odyssey x86 mini-computer, the Proxmox VE installer should automatically select it as the installation target.
If you have multiple SSD/HDD installed on your Odyssey x86 mini-computer, then you have to select the SSD/HDD where you want to install Proxmox VE as the target hard disk.
Once you're done, click on Next.
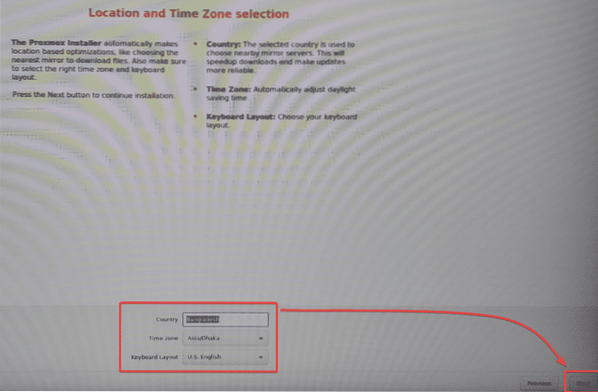
Select your country, time zone, and keyboard layout. Then, click on Next.
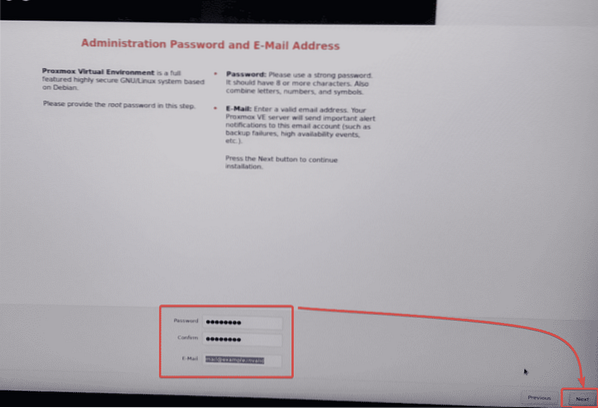
Type in your Proxmox VE administrative password and email address. Then, click on Next.
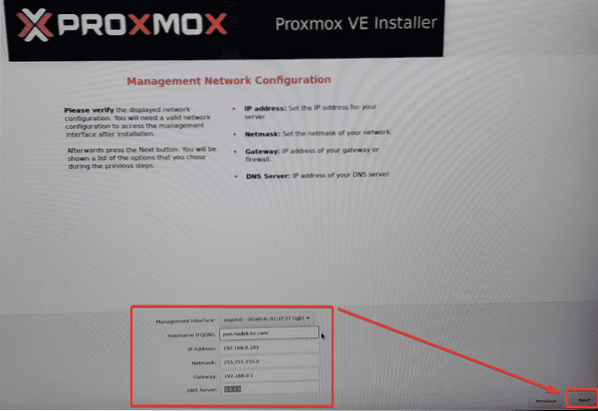
If you have a DHCP server configured on your network, the Proxmox VE installer should automatically assign an IP address to your Odyssey x86 mini-computer.
If you want, you can manually configure the network as well.
Once you're done, click on Next.
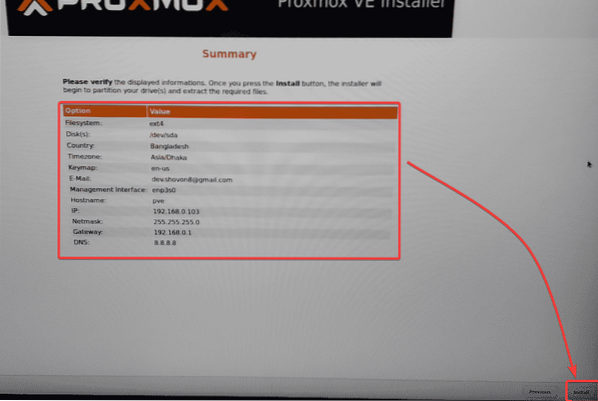
A summary of the installation should be displayed. If everything seems alright, click on Install.
The Proxmox VE installer should start installing Proxmox VE on your Odyssey x86 mini-computer. It may take a while to complete.

Once the installation is complete, click on Reboot.
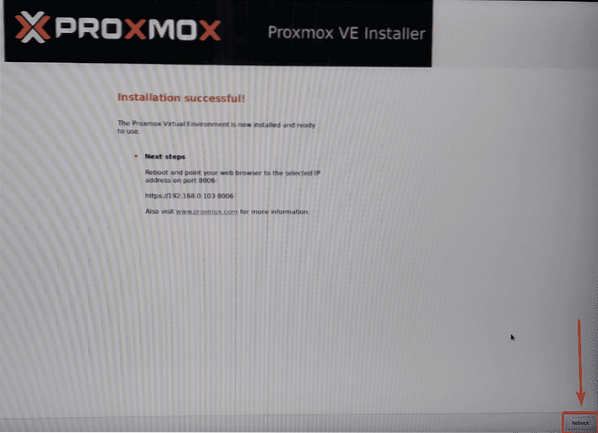
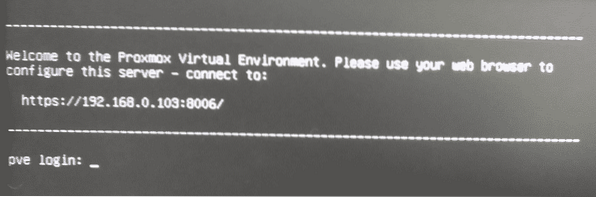
Odyssey x86 mini-computer should boot Proxmox VE from the SSD. The access URL of the Proxmox VE web portal should be displayed on the screen.
Accessing Proxmox VE from Web Browser:
You can access Proxmox VE from any computer of your network using a web browser.
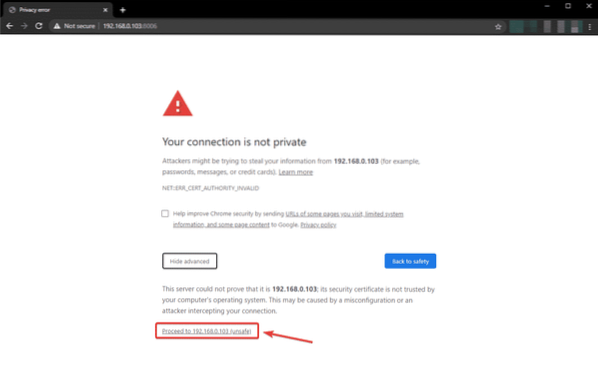
Open your favorite web browser and visit https://192.168.0.103:8006. Proxmox VE has a self-signed SSL certificate installed by default. So, you may see the following message. Click on Advanced.
NOTE: Your IP address will be different. So, make sure to replace it with yours here.
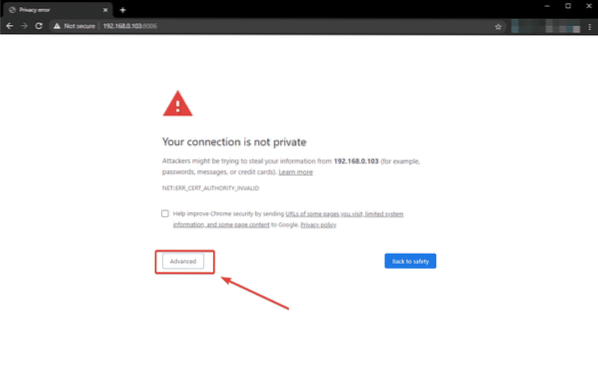
Click on Proceed to 192.168.0.103 (unsafe) to accept the self-signed SSL certificate.
You should see the Proxmox VE Login page.
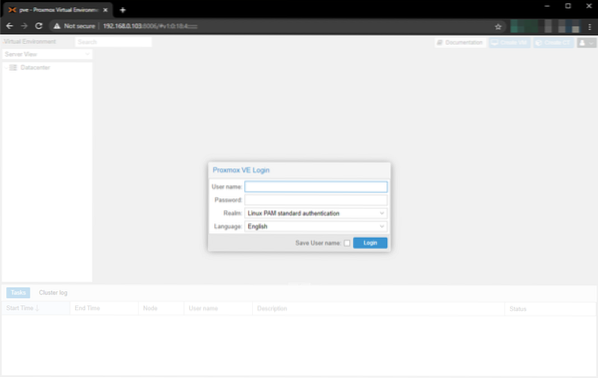
The username is the root, and the password is the one you have set while installing Proxmox VE.
Type in root as the username, type in your password and click on Login.

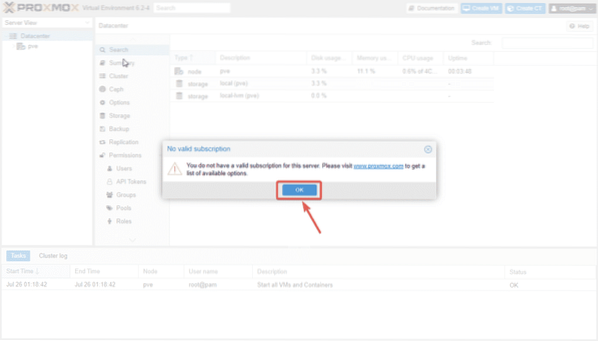
The free version of Proxmox VE does not have any subscription/license attached to it. So, you will see the following message. Click on OK.
You should see the Proxmox VE dashboard.
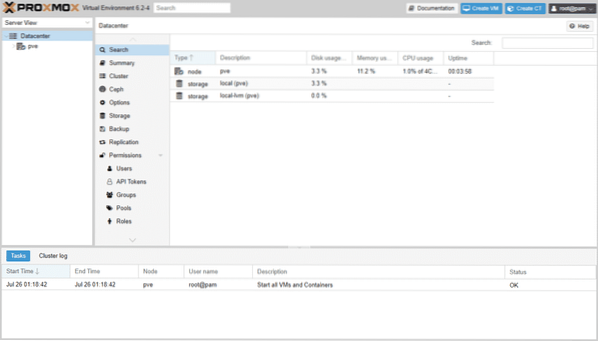
In the Summary tab of Proxmox VE node, you should see the resource usage information of your Odyssey x86 mini-computer.
No VMs or containers are running. Proxmox VE still needs about 900 MB of memory to run.

Working with Proxmox VE Containers:
In this section, I am going to show you how to create a Linux container and run it on Proxmox VE.
Before you can create a container, you must download a template of your favorite Linux distribution.
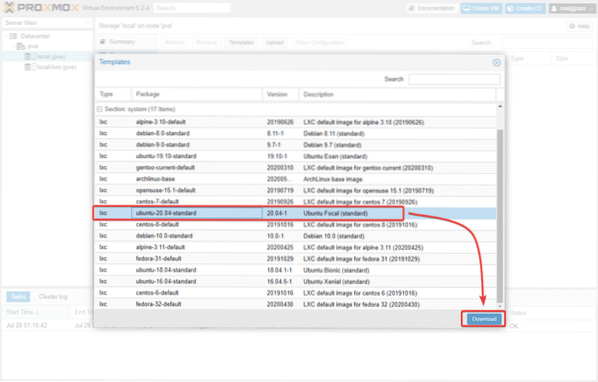
To download a container template, expand the pve node, click on local (pve), and navigate to Content. Then, click on Templates. The steps are marked in the screenshot below.

A list of container images should be listed. Select your favorite container image and click on Download. I am going to download the Ubuntu 20.04 LTS container image for the demonstration.
Proxmox VE should start downloading the container image. It may take a while to complete.

Once the download is complete, click on the x button.
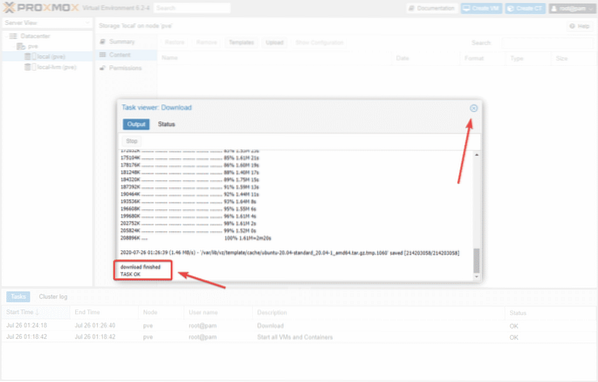
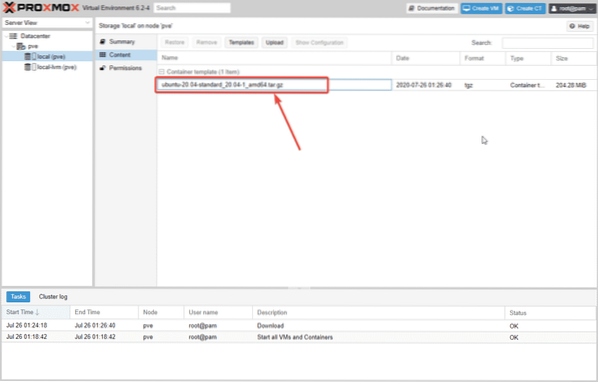
As you can see, the Ubuntu 20.04 LTS container image is downloaded.
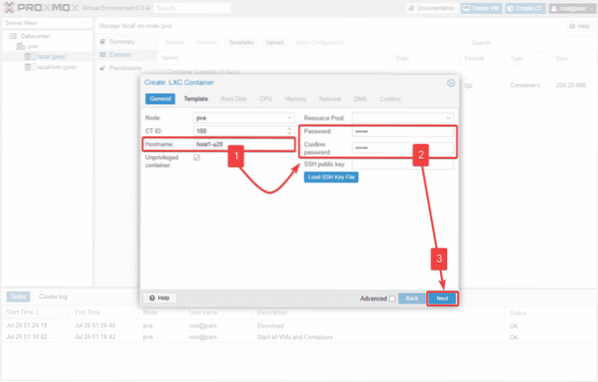
To create a Linux container, click on Create CT from the top right corner, as marked in the screenshot below.

The container creation wizard should be displayed.
Type in the hostname of your container(1), type in the log in the password of your container(2), and click on Next.
Select a container template from the list. I only have the Ubuntu 20.04 LTS container template on the list, as this is the only one I have downloaded.

Once you have selected a container template, click on Next.

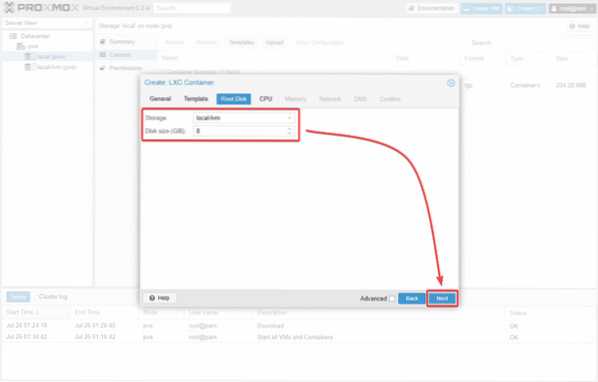
Type in the disk size of the container (in Gigabyte unit) and click on Next.
Type in the number of CPU cores you want to assign to the container and click on Next.
NOTE: For Odyssey x86 mini-computer, you can assign a maximum of 4 CPU cores to your container.

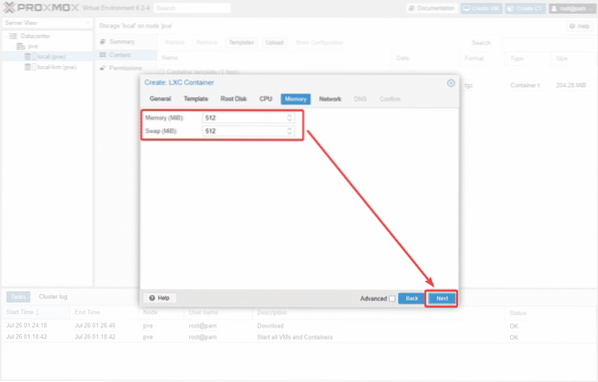
Type in the memory size and swap size for the container and click on Next.
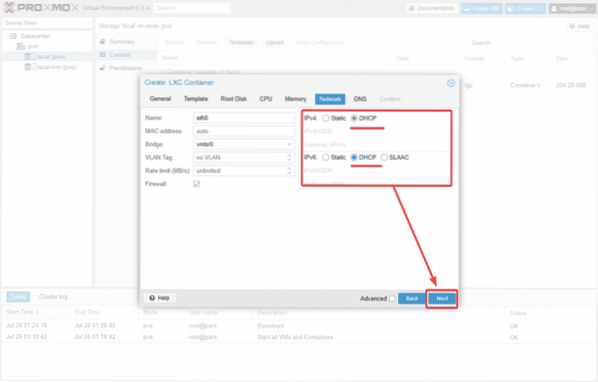
Select DHCP for the IPv4 and IPv6 if you want to use DHCP to assign an IP address to the container automatically.
If you want, you can configure a static IP address as well.
Once you're done, click on Next.
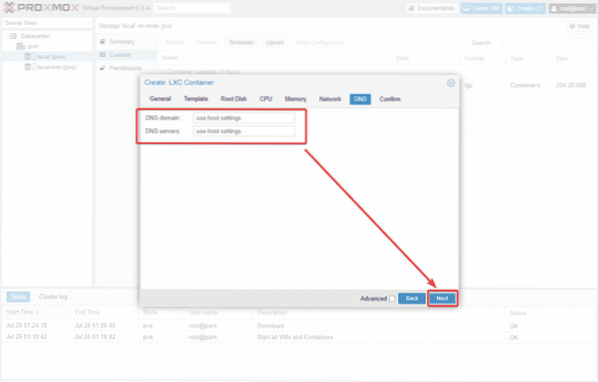
You can assign your DNS search domain, and DNS server addresses to this container from here.
Once you're done, click on Next.
If everything is all right, click on Finish to create your very first container.
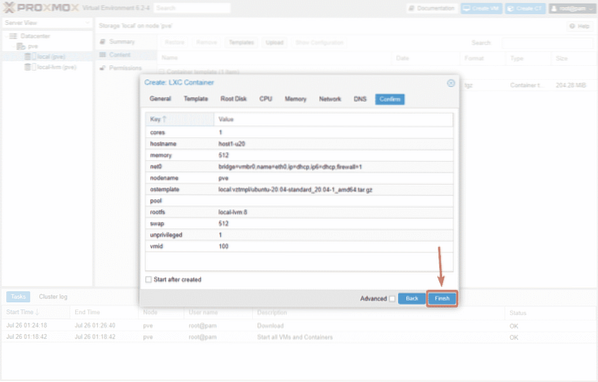
As you can see, a container is being created.
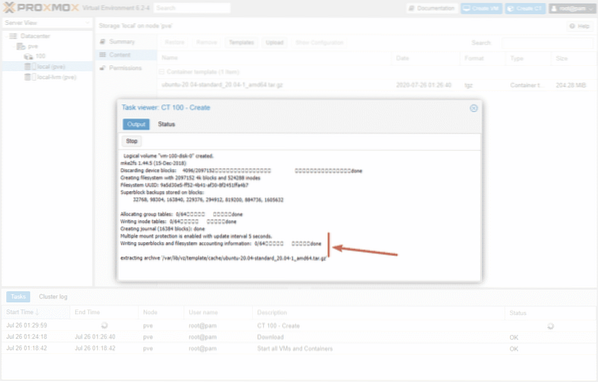
At this point, the container should be created. Click on x.

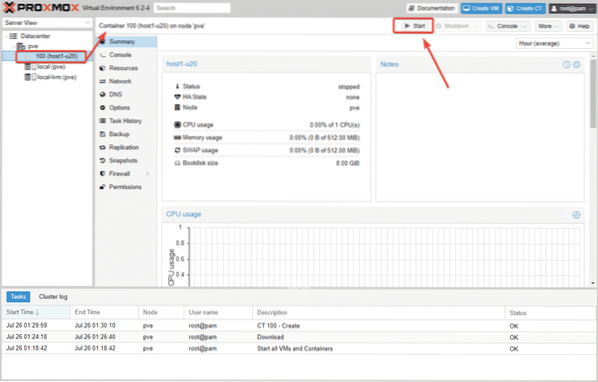
As you can see, a container host-u20 is created. Click on it.

Click on Start to start the container.
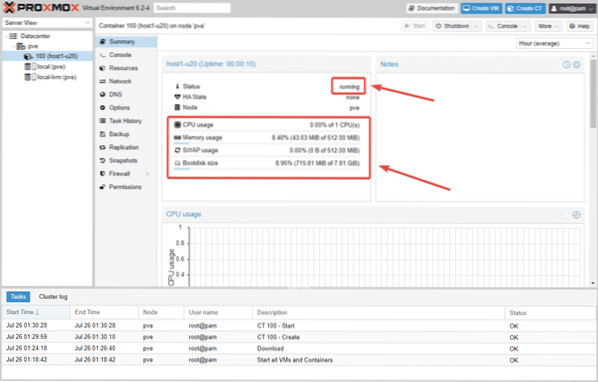
The container should start. The resource usage statistics of the container should be displayed in the Summary tab of the container.
To access the console of the container, go to the Console tab of the container.
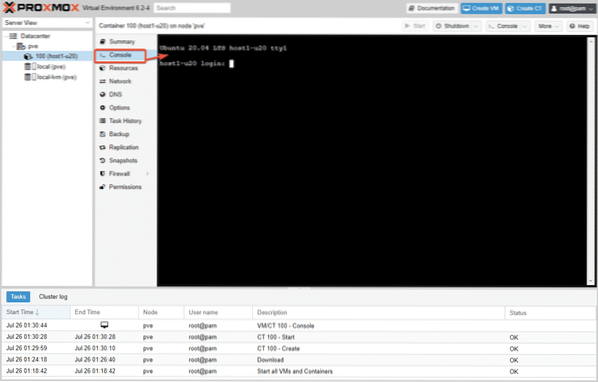
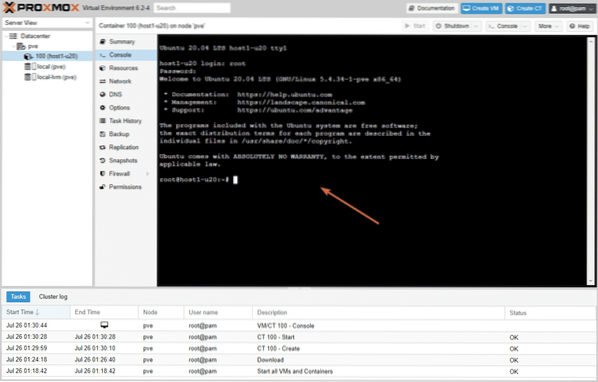
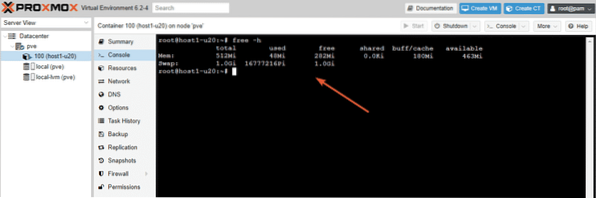
You can log in to the shell of the container using the username root and the password you have set when you have created the container.
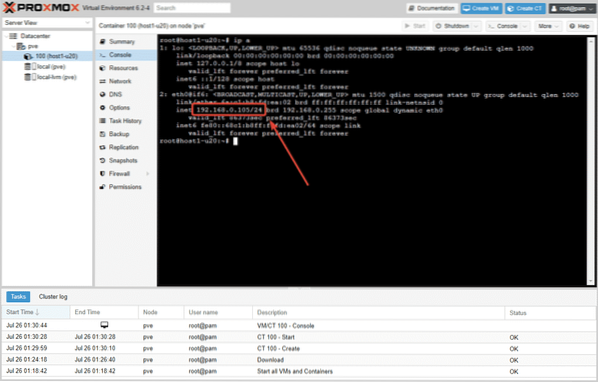
As you can see, the DHCP server has assigned an IP address to the container.
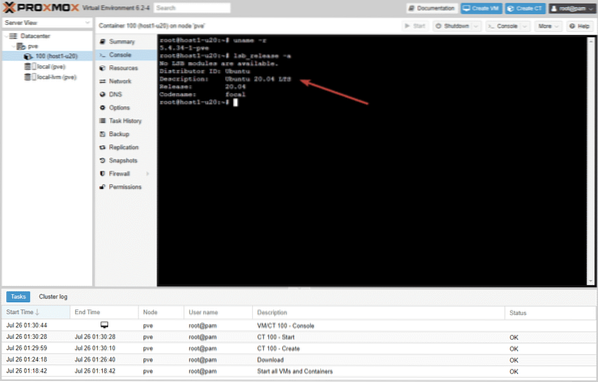
You can run any command you want on the container as well.
The container uses a few megabytes of memory (less than 50 MB), as you can see in the screenshot below.
Because of the small memory footprint of containers, you can run a lot of containers on your Odyssey x86 mini-computer.
In the Summary tab of the Proxmox VE node, you can see the total resource usage information.
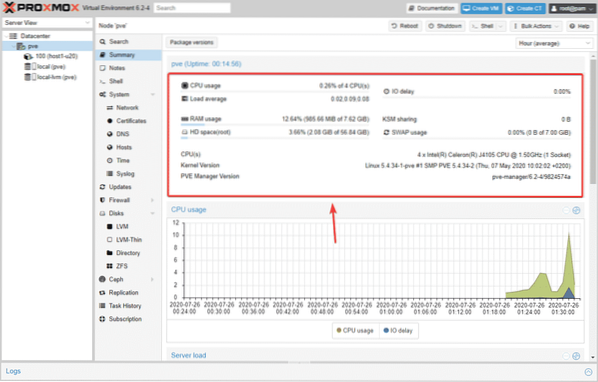
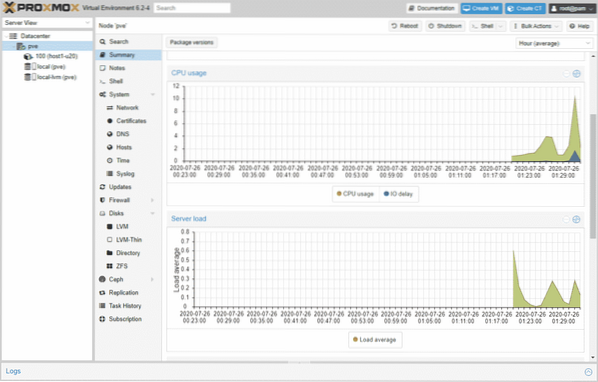
If you scroll down a little bit, Proxmox VE will show you a nice CPU usage and Server load graph.
If you scroll down a little bit more, Proxmox VE will show you a nice Memory usage and Network traffic graph.

Conclusion:
Proxmox VE runs very well on Odyssey x86 mini-computer. Because of the Quad-core Intel Celeron CPU, 8 GB of memory, lots of networking, and storage options, Odyssey x86 mini-computer can be one of the best affordable Proxmox VE hosts. You can use it for hosting your website or for web or app development purposes.

