Installing KDE on CentOS 7:
I have a minimal CentOS 7 server virtual machine set up. It does not have any graphical desktop environment installed yet. I am going to install KDE desktop environment there.
KDE Desktop environment is available in the official package repository of CentOS 7. It is really easy to install as well.
First update the YUM package repository cache with the following command:
$ sudo yum makecache
The YUM package repository cache should be updated.

Now you can install KDE desktop environment with the following command:

Thousands of packages will be installed and about 984 MB of packages will be downloaded from the internet. Press y and then press
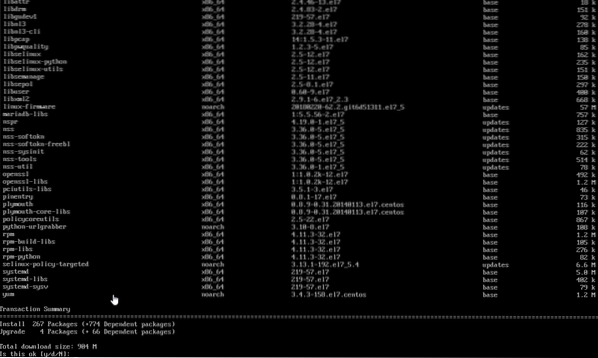
The packages should start downloading as you can see from the screenshot below. It should take a while.

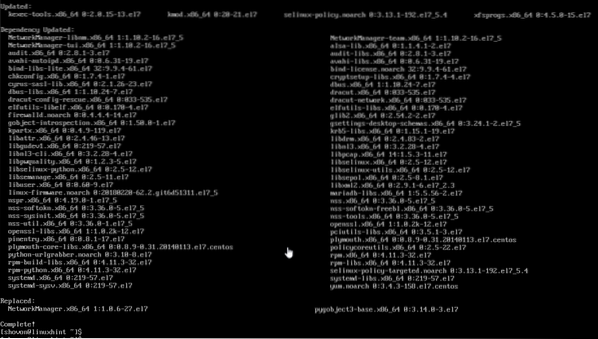
Once the installation is complete, you should see the following window.
Now you have to tell CentOS 7 that you want to start graphical desktop environment when you start your computer by default. To do that, run the following command:
$ sudo systemctl set-default graphical.target
A graphical desktop environment should be loaded the next time you start your CentOS 7 machine.

Now restart your computer with the following command:
[cc lang=”bash”]
$ sudo reboot
[cc]

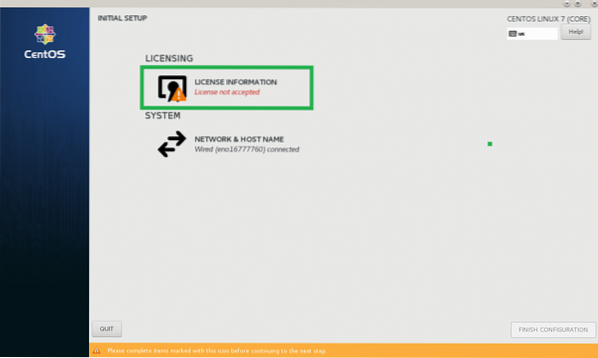
When your computer boots, you may see the following window. It is a license agreement window. Click on the marked section of the screenshot below.
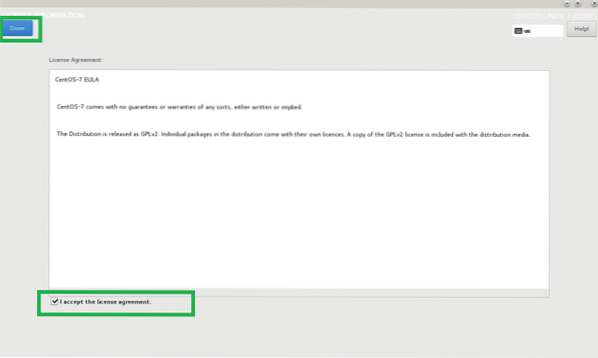
Now from the following window check I accept the license agreement checkbox and click on Done.
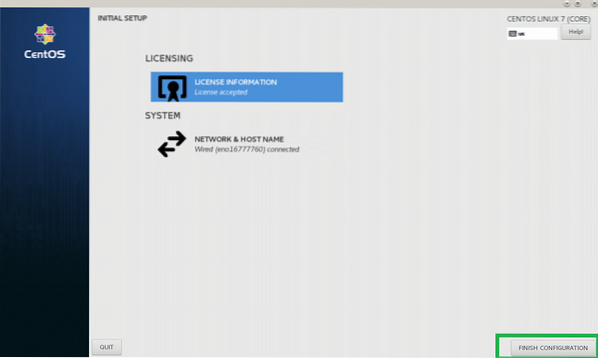
Now click on FINISH CONFIGURATION as marked in the screenshot below.
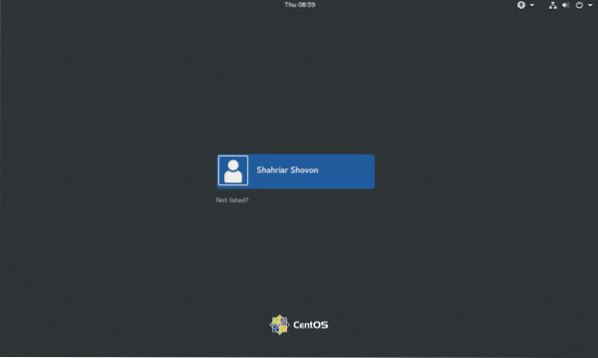
Now you should see the GDM login screen. Click on your user account to select it.
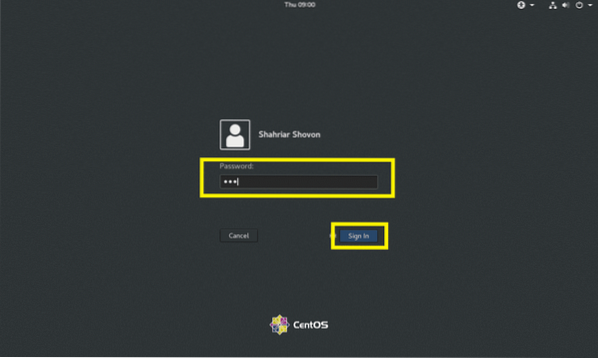
Now type in your login password and click on Sign In.
You should see the KDE splash screen as shown in the screenshot below.
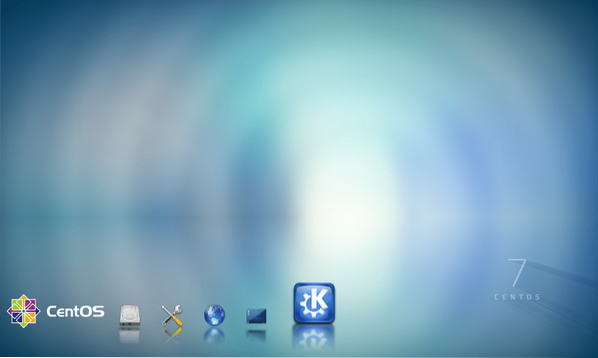
After a while, KDE desktop environment should load as you can see in the screenshot below.
Configuring KDE Desktop Environment on CentOS 7:
In this section, I will show you the basic configuration of KDE 4 desktop environment on CentOS 7.
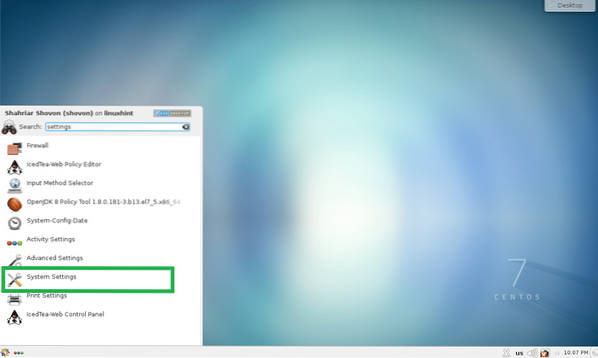
KDE has System Settings app, from where you can configure the whole KDE 4 desktop environment. You can find System Settings from the KDE 4 Application Menu as you can see in the screenshot below.
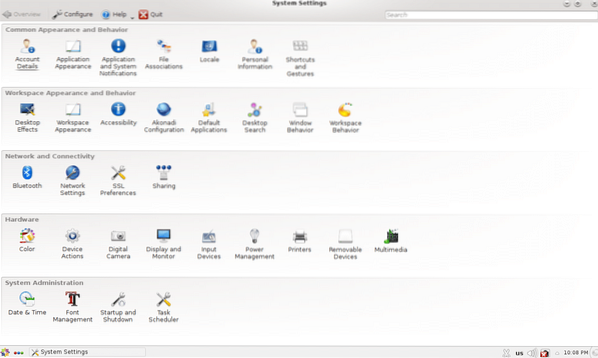
System Settings app should open. From here you can configure KDE 4 themes, desktop effects, file associations, date and time, fonts, workspace, monitors and many more. Everything is really easy to find here as everything is nicely categorized. You can also search for specific things in System Settings app using the top right search box.
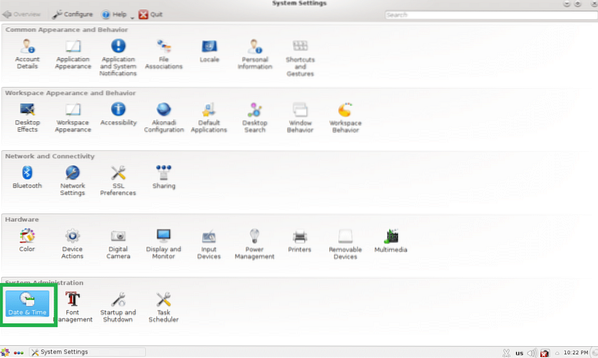
For example, if you want to change the date and time of your computer, double click on Date & Time as marked in the screenshot below.
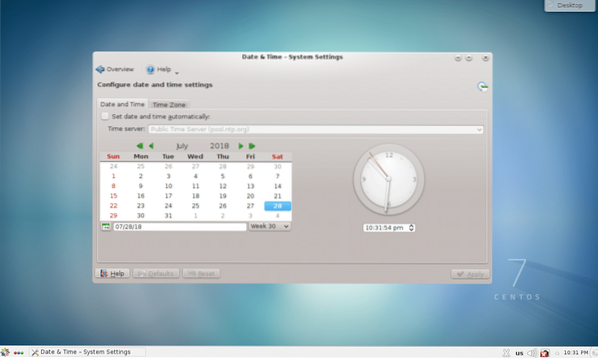
Date & Time settings should show up as you can see from the screenshot below. From here you can change date, time, time zone and also set up time server.
Changing Wallpapers:
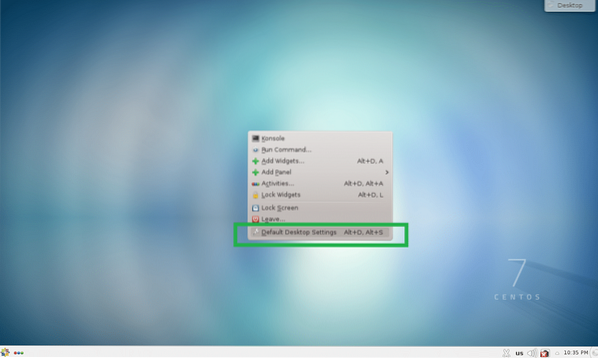
You can change wallpapers of your KDE 4 desktop environment. Right click on an empty place of your desktop and click on Default Desktop Settings from the menu.
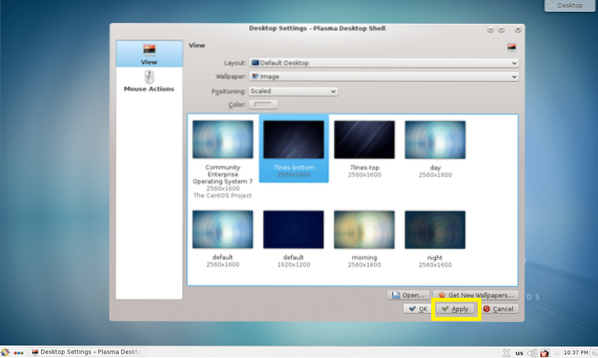
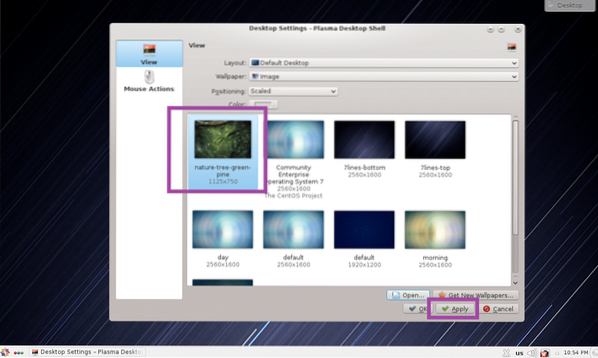
Desktop Settings app should start. You can select any of the wallpapers that are available by default and click on Apply.
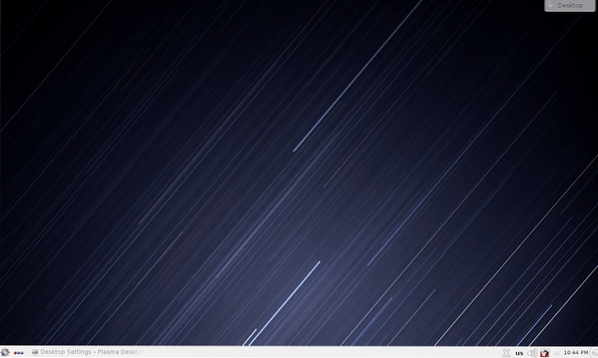
It should be set as the desktop wallpaper as you can see from the screenshot below.
If you don't like the default wallpapers, you can also set your own wallpaper. To do that click on Open…
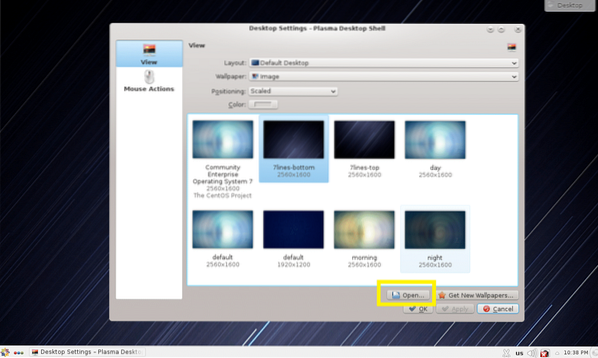
Now select your image that you want to set as wallpaper and click on Open.
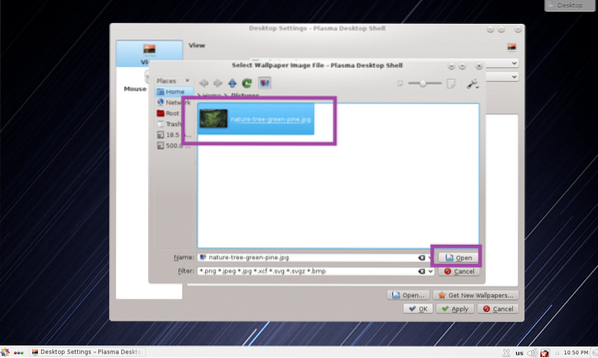
The image file should show up in the Desktop Settings app now. Select it and click on Apply.
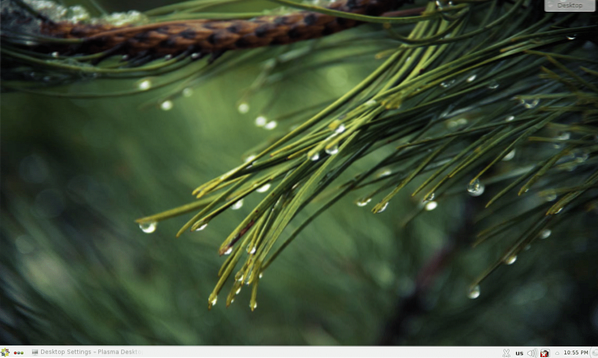
The wallpaper should be changed.
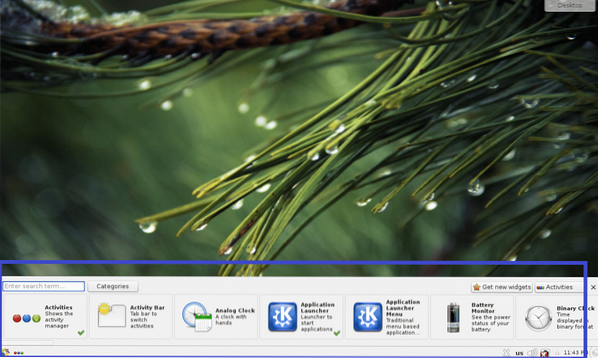
Working with KDE Widgets:
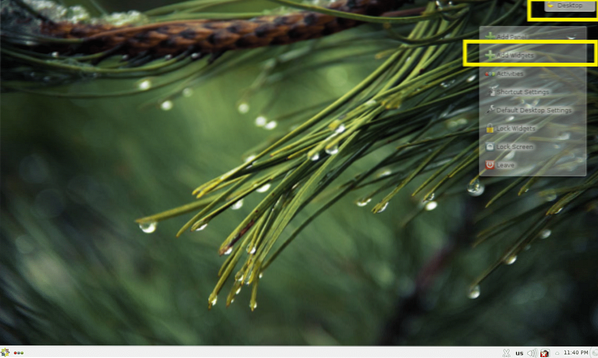
KDE 4 plasma desktop environment has many desktop widgets which you can use to make your desktop more beautiful and interactive. To add a widget, click on Desktop and then click on Add Widgets as marked in the screenshot below.
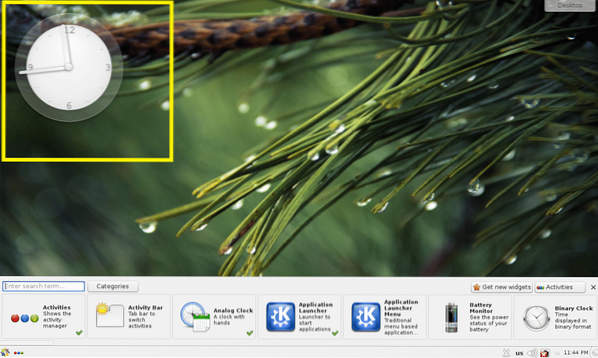
Now double click on a widget you like to activate it. I am activating the Analog clock widget.
As you can see from the screenshot below, the Analog Clock widget is activated and an analog clock is displayed on the desktop.
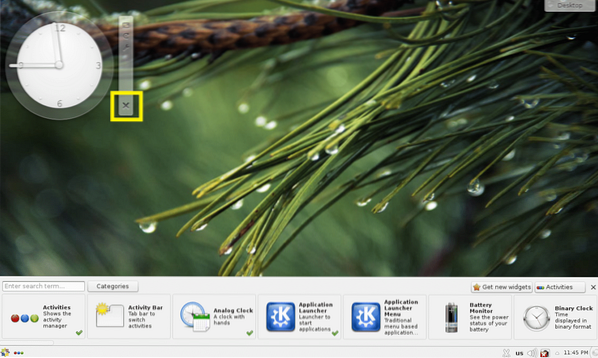
To remove the widget from the desktop, click on it and a transparent menu should appear. Click on the cross icon as marked in the screenshot below. The widget should be removed from the desktop.
You can also click on a widget to select it, and then drag and drop it somewhere on desktop as you like.
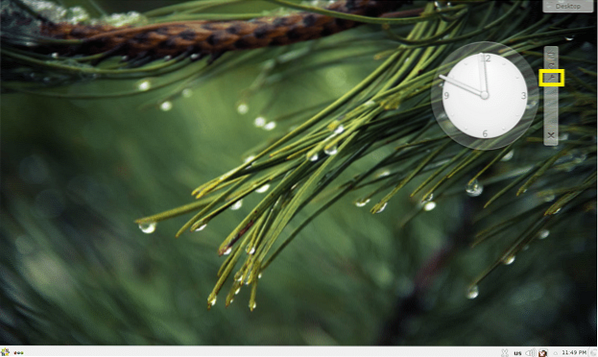
The widgets may have specific settings, which you can access from the widget menu as you can see from the screenshot below.
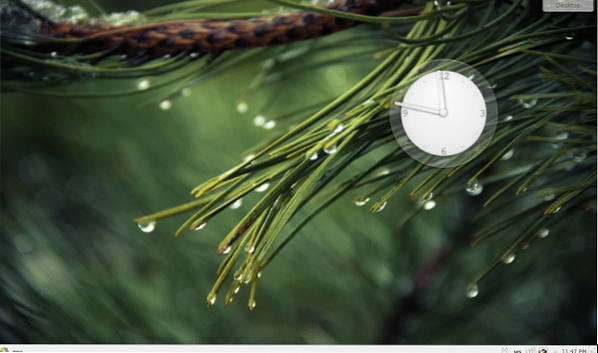
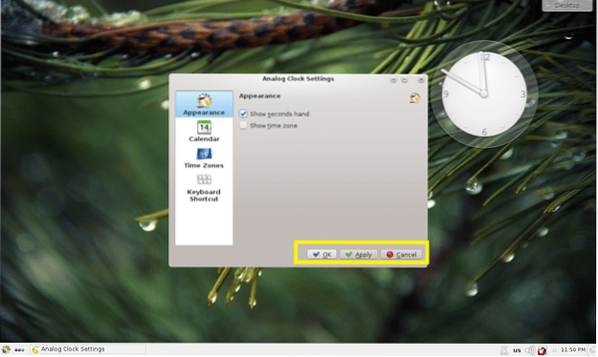
The widget specific settings should show up. I enabled the seconds hand on my analog clock. To save the changes, click on Apply or OK.
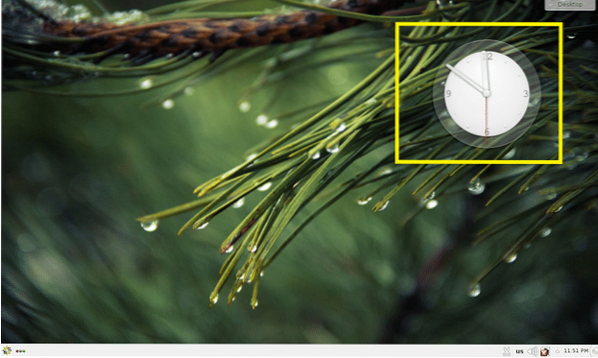
As you can see, the seconds hand is displayed.
Applications of KDE 4 Desktop Environment in CentOS 7:
In this section, I will talk about some of the applications installed by default on KDE 4 desktop environment of CentOS 7.
Web Browsers:
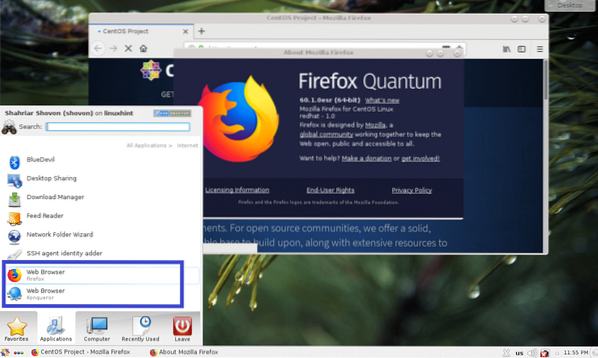
On CentOS 7 KDE 4 desktop environment, Firefox and Konqueror web browsers are installed by default.
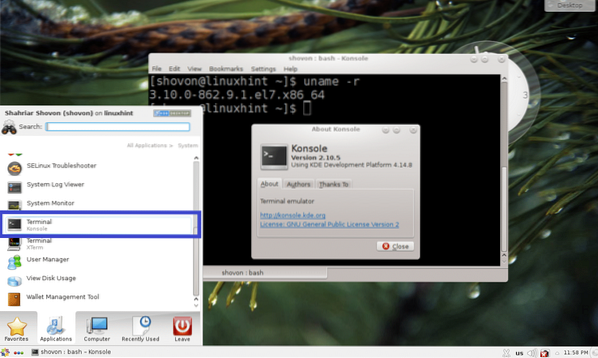
Terminal/Console:
On KDE 4 desktop environment, Konsole is the default terminal application. It is a very powerful terminal emulator.
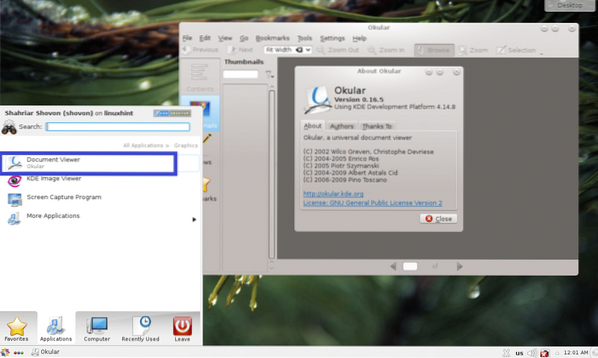
Document Viewer:
Okular is the document viewer of KDE 4 desktop environment. It supports many types of digital documents such as PDF, CHM, DjVU, EPub and many more. I really like Okular.
KDE 4 has many more applications. I leave the rest of it to you to find out. Have fun KDEing on CentOS 7.
That's how you install and configure KDE on CentOS 7. Thanks for reading this article.


