A partition must be formatted to prepare it for use, but a partition can also be formatted to erase all its data, to establish a different filesystem, or to fix errors. In this article, we will show you how to format disk partitions on Linux, assuming that you have already created the target partition.
Formatting disk partitions on Linux
Depending on the tools being used, the formatting process can be carried out in two ways. However, before you begin, make sure that there are no data in the partition that you are afraid to lose.
Formatting a partition using a GUI
This method is probably more usable for most Linux users because it provides a user interface and explains the process at each step. To show you how to carry out this process, we will use GParted: an open-source partition editor that offers an organized UI for managing disk partitions.
GParted allows you to resize, copy, and move partitions without data loss, and it allows you to rescue data from lost partitions. GParted does not come pre-installed with most Linux distros, but you can install it by using the appropriate installation command for your Linux distro.
For Debian/Ubuntu and derivatives:
$ sudo apt install gparted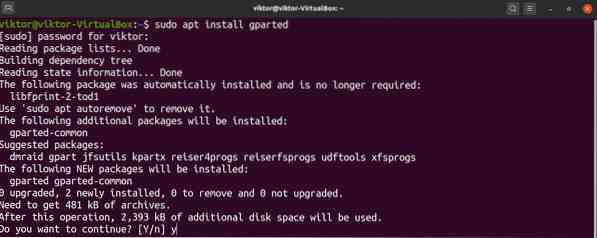
For Fedora and derivatives:
For openSUSE, SUSE Linux and derivatives:
$ sudo zypper install gpartedFor Arch Linux and derivatives:
$ sudo pacman -S gpartedGParted can also be used through live CD/USB regardless of your distro, and you can find the official GParted live ISO here. To do so, you must make a bootable USB flash drive. (Click here to learn how to make a bootable USB flash drive from an ISO.)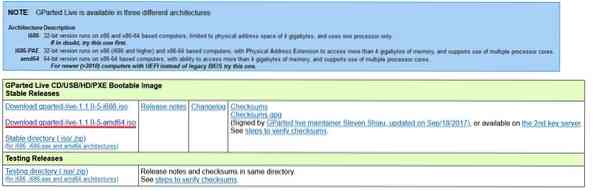
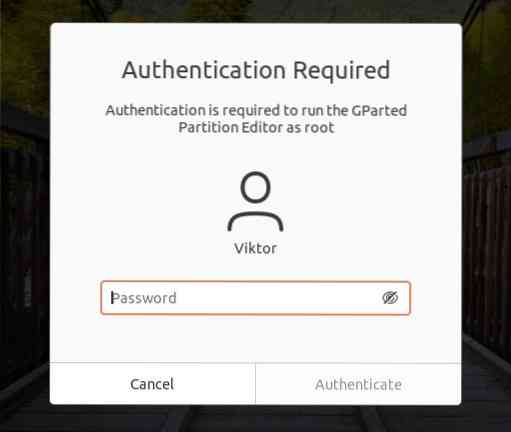
Now, launch GParted. GParted requires root permission to launch because it makes system-level changes.
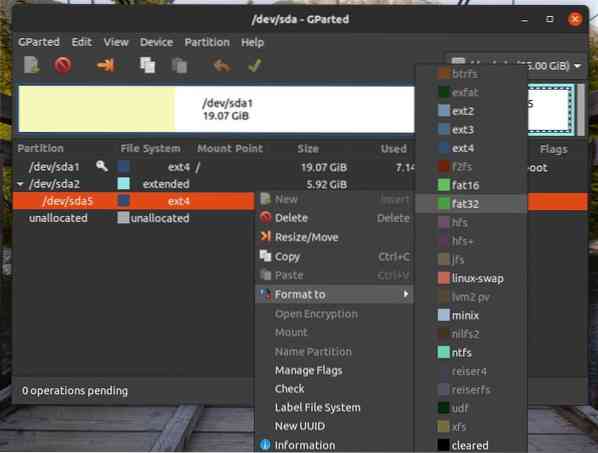
The image below shows the main window of GParted. First, select the appropriate disk from the top-right corner. In our case, there's only one disk connected.
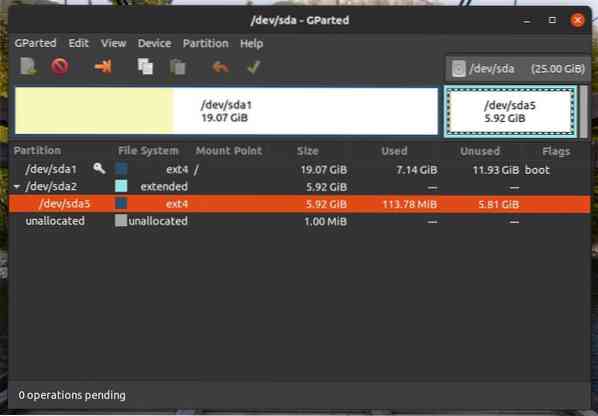
The target partition to format is /dev/sda5. Right click on the target partition, then click “Format to” and select the target filesystem format. For Linux, ext3/ext4 is the most appropriate filesystem format. If you plan to use the partition with other operating systems, then it is better to use fat16/fat32. However, feel free to use a different filesystem formats if it suits your needs.
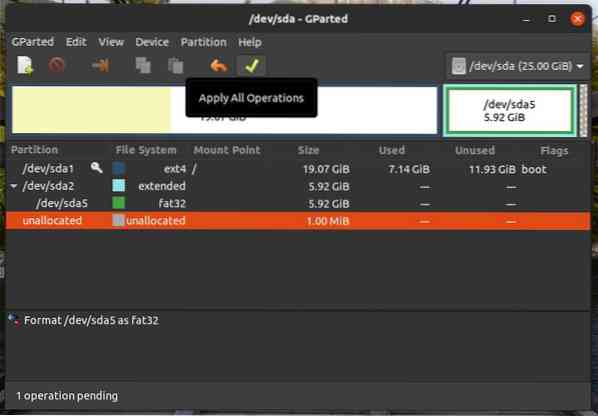
Follow the above steps for all your target partitions. Then, click the “Apply” button. By clicking “Apply,” you can make sure that your configuration is correct before your changes are finalized.
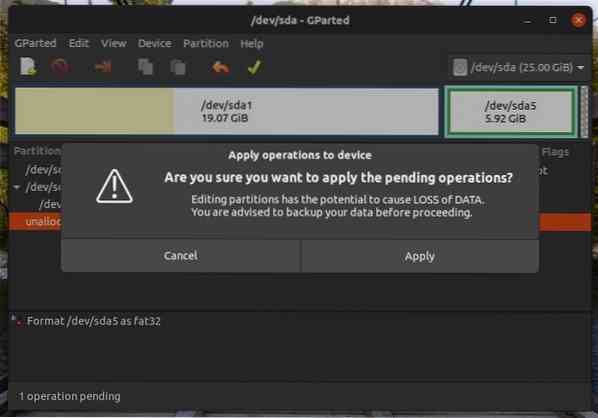
GParted will then ask you whether you are sure you want to run the tasks. Once you have confirmed that it is safe to proceed, click “Apply”.
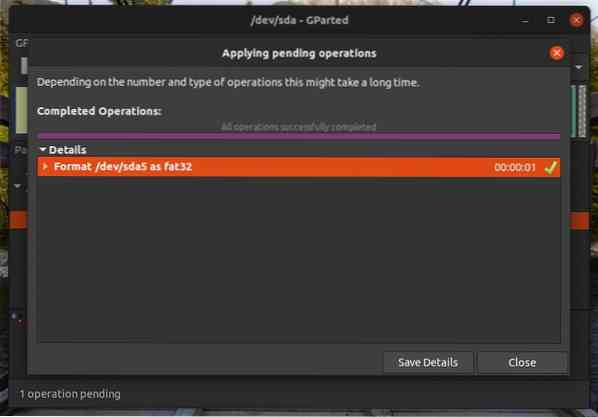
Then, the operation will begin. Click “Close” once the process is completed.
Formatting a partition using CLI
This process is more complex than that using GParted. However, for experts and advanced users, this method might be more convenient.
First, we can list all existing partitions by using the following command:
$ lsblk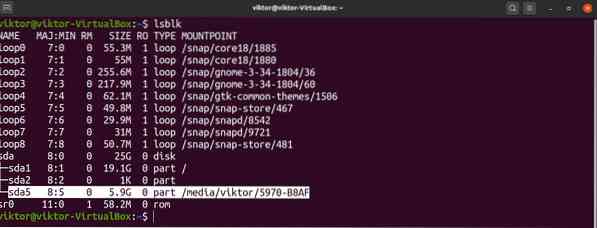
If you want to list all the non-formatted partitions, then run the lsblk command with the the -f flag, as follows:
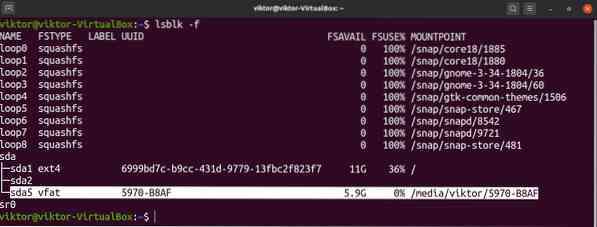
Here, our target partition is /dev/sda5, and as you can see, it is already mounted. You cannot format a partition that is already mounted. To unmount a partition, run the command below. Note that you can get the partition mount point from any of the lsblk commands.

Now, the partition is ready to be formatted. Before proceeding, make sure that there are no important data on the partition. Unlike GParted, the partition will be instantly formatted once the command is run.
Once you are ready, run the following command. Here, we use the mkfs tool to format the partition. The mkfs tool supports a wide variety of filesystems, including ext3, ext4, fat16, fat32, ntfs, apfs, and hfs. In this example, we will make an ext4 filesystem at /dev/sda5.
$ sudo mkfs -v -t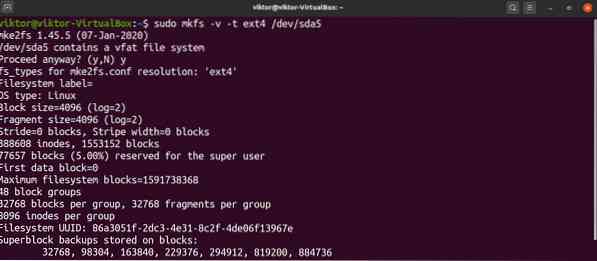
The above command can also be run in a different way. Here, the command will create an ext4 filesystem at /dev/sda5.
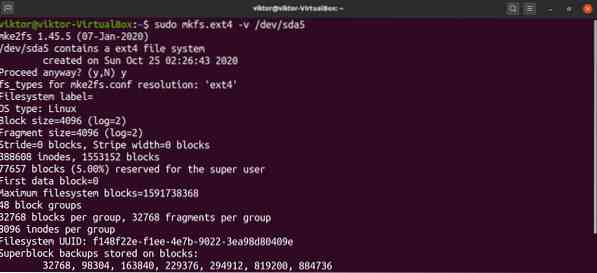
Voila! The partition is successfully formatted! To use it, you have to mount it again. Click here to learn how to use the Linux mount command to mount filesystems.
Final thoughts
Here, we have shown you how to use two convenient methods to format a disk partition. With the right tools and knowledge, disk partition formatting is not an inherently difficult task, but it is important for you to check to see if any important data will be lost in the process.
In addition, you should consider the stress this process may put on a drive. If you are using an SSD or a RAID with multiple HDD/SSD, then the amount of data written can negatively impact the life expectancy of the storage devices. Furthermore, while modern storage devices are fairly resilient, the older the storage device, the riskier the process.


