However, the Internet has also paved way for issues such as data breaches and identify theft, which, as time goes on, have become increasingly more frequent and more hostile. Our data is constantly under threat of becoming exposed and leaked. Even if security breaches do not occur, there are often cases where data is lost due to accidental deletion or hard drive crashing, which can cause users to lose their valuable stored information. It is imperative to implement backup strategies to keep a record of your data and avoid losing all your information. This article shows you how to back up your data in the Ubuntu operating system.
Tools to Use for Backing Up Data
Linux offers a wide array of tools for all kinds of applications and activities, including servers, games, and more. It is the same case with backups. There are numerous collections of excellent tools that allow users to make backups of their data. Some great command-line-based backup tools include rsync and timeshift, which are extremely straightforward to use.
For users who prefer having a graphical interface to work with, Déjà Dup, a powerful GUI tool for backups that comes preinstalled with Ubuntu, is the best option to go with. It has almost every feature that you may require in a backup software. From offering support for local, remote, and cloud backup locations, to having facilities like built-in encryption support and backup scheduling, gives Déjà Dup an edge over the many alternatives. We will use this tool to perform a backup of our system.
Backing Data using Déjà Dup
Déjà Dup comes preinstalled with the latest Ubuntu versions. However, if it does not seem to be present, run the following command in the terminal to install it on your systems:
$ sudo apt-get install deja-dup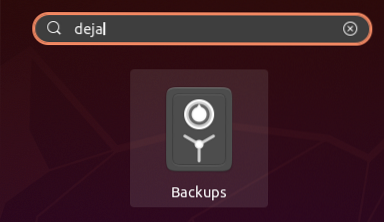
To open Déjà Dup, search for the application in the search bar and an application with the name 'Backups' with a safe icon will appear in the results.
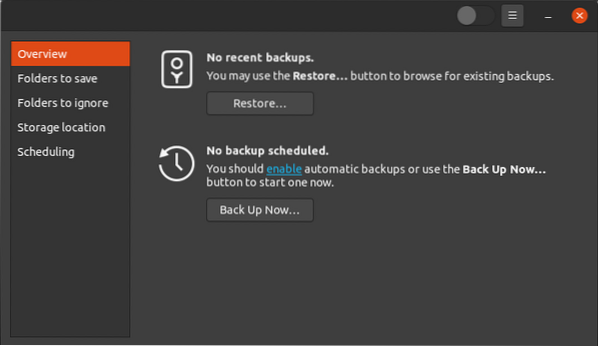
Click on the safe icon to open the application. The window that opens will be the Overview window, which will look something like this:
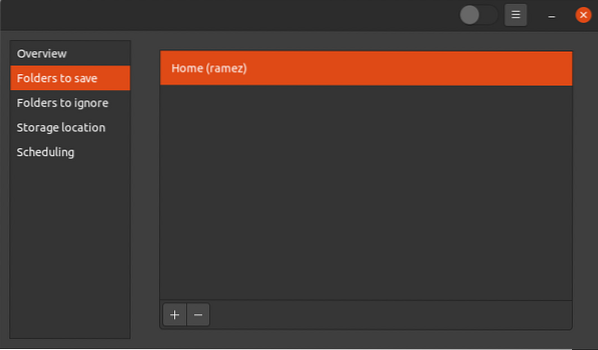
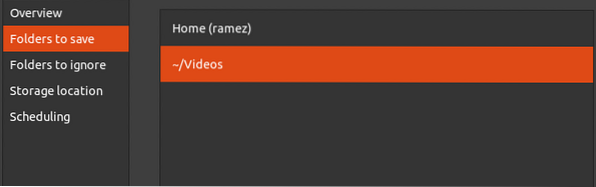
Before clicking the Back Up Now button to start the backup, it is better to specify the folders of which you want to make a backup, first. To do this, click the Folders to save tab under the Overview option, and the following window will open:
As seen in the image above, currently, Déjà will only make a backup of your Home folder. To add more folders to this section, use the plus icon found at the bottom of the window.
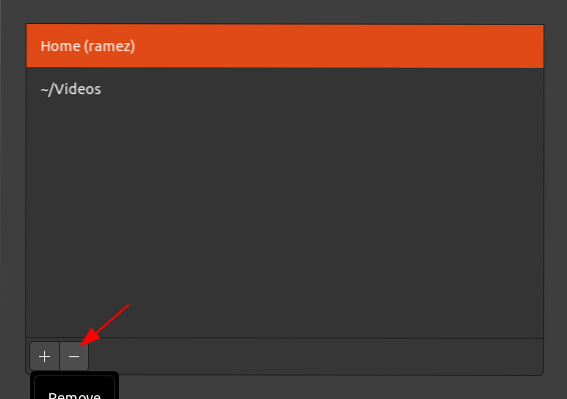
This will then open a new window asking you to choose the folders that you want to add to the backup folder list. After adding a new folder, it will look something like this:
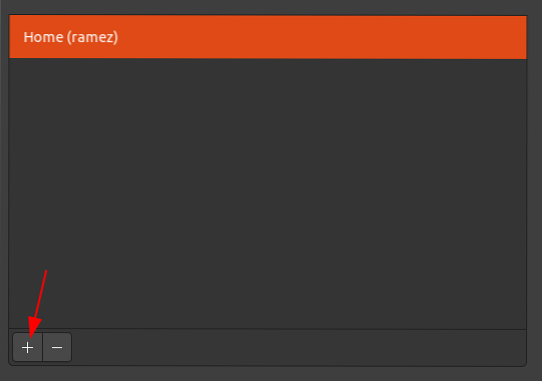
Similarly, you can remove folders from this window using the button with the minus sign icon. For example, in the above image, to remove the Home folder, I will click the Home folder, then press the minus icon button to remove it.
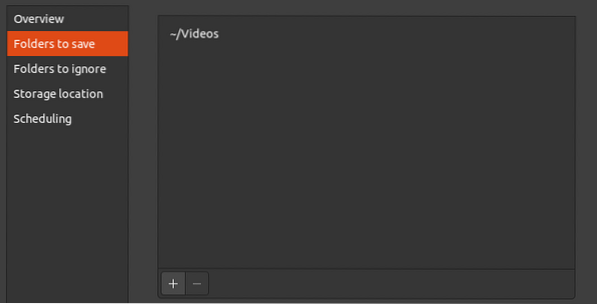
After removing the Home folder, the Folders to save tab will look something like this:
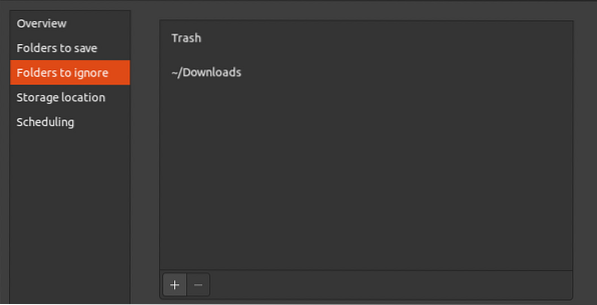
Déjà Dup also allows you to specify folders that you do not want to add to your backup folder list. To do this, click the Folders to ignore tab, and then, just like when we added folders into the backup folder list, the process for adding folders that will be ignored by the backup tool is very similar. Using the plus and minus icon buttons, you can add or remove folders from this tab.
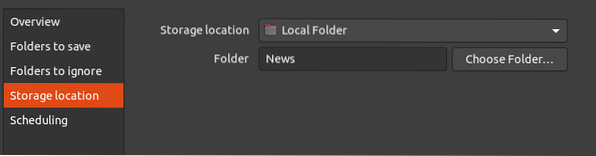
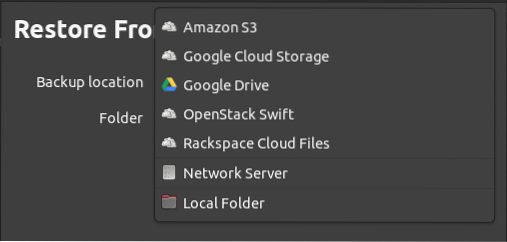
You can also specify the location where you want to store your backup. Déjà Dup offers support for multiple storage locations, including Google Drive, Network Servers with protocols (such as FTP, SFTP, SSH, etc.), as well as locally on your machine.
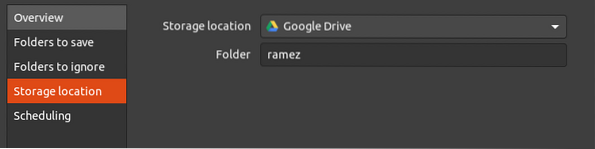
Google Drive:
Local Backup:
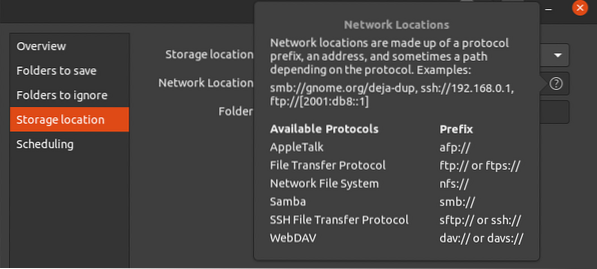
For a network server to be used as a storage location, the server must have a network location that supports the following network protocols:
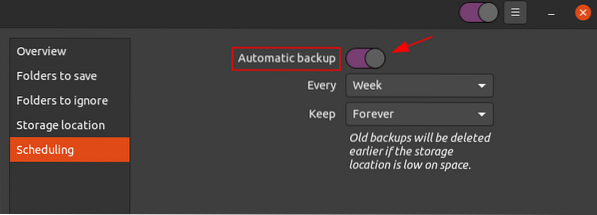
One of the best features that Déjà Dup offers is the option to perform scheduled backups. To do this, go to the Scheduling tab and then click the button next to Automatic backups to turn this feature on.
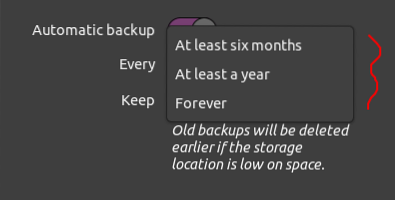
From the options available, you can either choose to perform backups every week or every day. You can also keep a record of your backups forever, or for a period of either six months or a year.
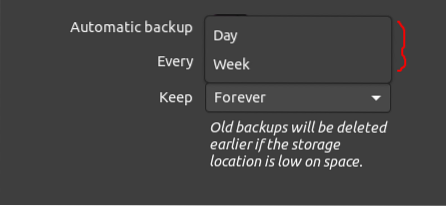
Backup Times:
Record of Backups:
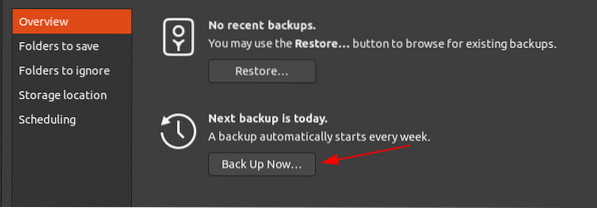
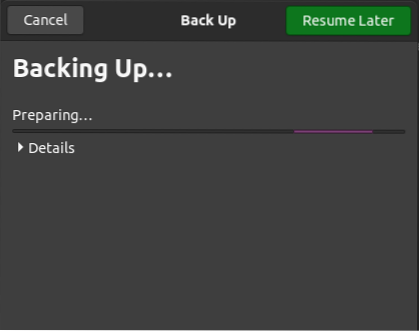
Finally, after adjusting the settings, to start the backup, go to the Overview tab, and then click the Back Up Now button.
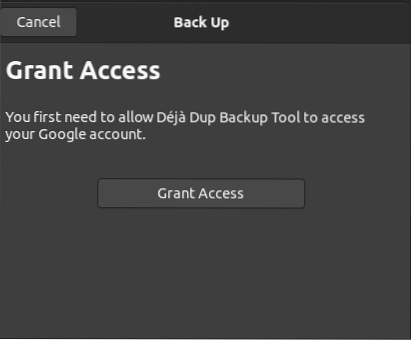
If you have chosen the Google Drive option in the storage location, you will be asked to grant access to your account.
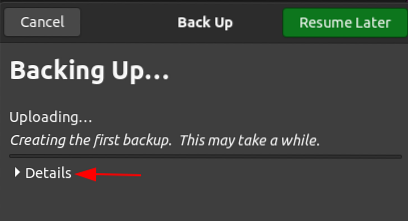
This will start the backup process.
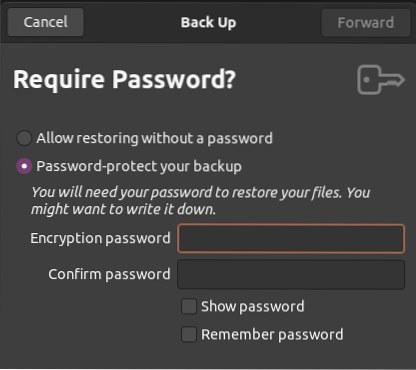
You can also encrypt your backup with a password to keep it secure. However, note that if you forget your password, you will not be able to access your backup.
After setting this up, click Forward to finish the backup process. You can also look at the folders being backed up by clicking the Details button.
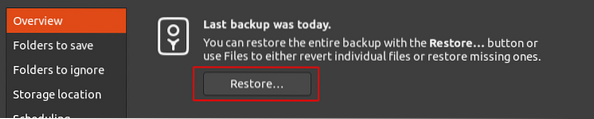
Once your backup is completed, you will receive a notification, and the backup process will close and take you back to the Overview tab. Now, you can simply restore your backup by clicking the Restore button in this tab.
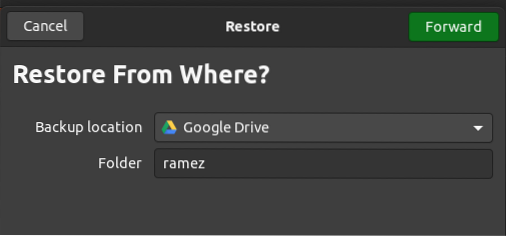
After clicking Restore, you will be asked where you want to restore your backup from.The available backup locations from which you can restore your backup include the following:
Once you have chosen your location, click Forward, after which you will be asked to input the date of the backup from which you want to restore.
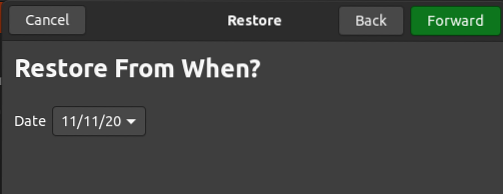

Click Forward after you have chosen the date. In the next window, you must specify where you want to restore your backup to. This can either be to your original location or another folder.
To move to the next step, click the Forward button, which will lead you to the Summary page. Here, verify all your information, and if you are satisfied, click the Restore button to start the restoring process.
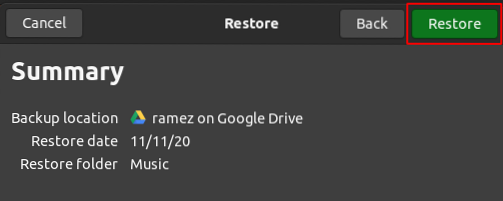
After this, you can find your restored backup inside the folder you specified.
So, Why Should You Backup Your Data?
Backups have become necessary in the last several years, as there is always the threat of ransomware and security attacks looming. Backups allow us to keep all our files safe and helps in restoring them after data loss occurs. I hope you found this article helpful for backing up your own Ubuntu system.


