The WebSocket protocol allows for two-way communication to occur between a client and a server. This process is similar to the way in which calls on your phone take place: first, you establish a connection, and then you can start communicating with one another. The WebSocket protocol is used almost everywhere - from multiplayer browser games to chat applications.
This article shows you how to create a WebSocket protocol and use it to communicate with multiple users.
Prerequisites
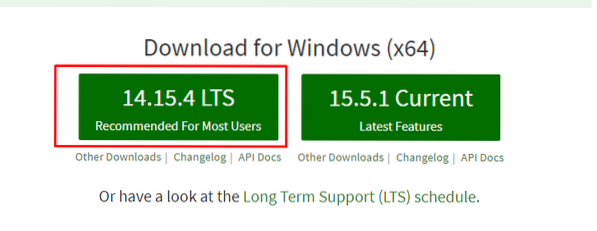
Before moving on to the process of creating and using a WebSocket protocol, you first need to install a few things that are required for this process. The first thing that you need to install is Node.js, a server-side platform that converts the JavaScript programming language into machine code that allows you to run JavaScript directly on your computer. To install Node.js, Windows users can simply go to the official Node.js website and click on the green LTS button found in the center of the screen.
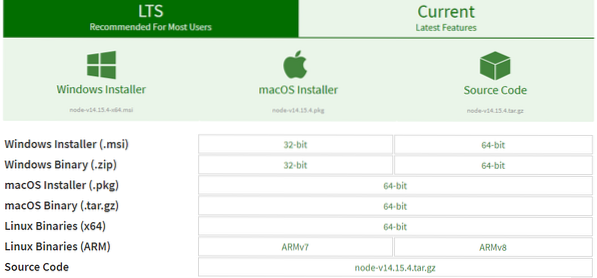
For Linux and macOS users, click on the Downloads section in the sub-header of the website.

After opening the Downloads section, you will see installation files for all three major platforms. Select a package that is supported by your system.
Run the installer that comes with the downloaded files, and Node.js will be installed on your computer. To check whether the program has been installed, open the terminal and issue the following command:
$ node -v
After installing Node.js, you now have access to various JavaScript modules, which will make your work more efficient in the long run. Open the directory in which you want to create your client and server architecture, then open the terminal inside that directory and run the following command:
$ npm init -y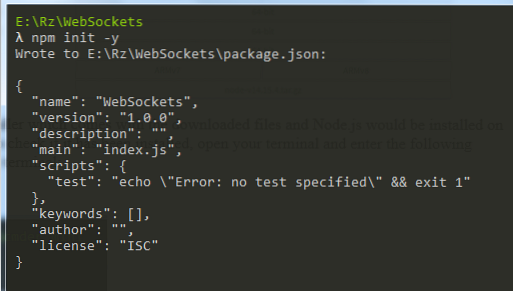
This command is used to create the package.json file that allows you to set up and install different Node.js packages. Install the WebSocket protocol package by issuing the following command in the terminal:
$ npm install ws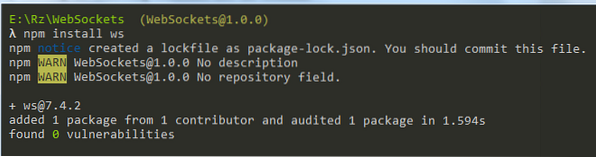
Create three files, called index.html, client.js, and server.js. As indicated by the names, these JavaScript files are the client and server architecture of our WebSocket protocol. Now, we can finally start writing the code of our client and server applications.
Creating a WebSocket Server
To create a WebSocket server, we will start by writing the code for the server. Open the server.js file that you created inside your text editor or IDE in the previous section and enter the following lines inside the file.
const WebSocket = require('ws');const ws = new WebSocket.Server( port: 8080 );
console.log("Server Started");
ws.on('connection', (wss) =>
console.log("A new Client Connected")
wss.send('Welcome to the Server!');
wss.on('message', (message) =>
console.log('Server Received: $message');
wss.send('Got your Message: ' + message);
);
);
Now, we will explain what each line is doing in greater detail.
Code Explanation
As mentioned previously, there are some built-in modules available in Node.js that make your work much easier. To import these modules, we will use the require keyword.
const WebSocket = require('ws');const ws = new WebSocket.Server( port: 8080 );
console.log("Server Started");
The first line is used to import the Node.js WebSocket module. Using this module, in the next line, we create our WebSocket server, which is listening on port 8080. The console.log() line is simply there to let us know that the Server has started. You will see this appear inside your terminal when you run the following command in the terminal:
$ node server
In the next line, we are establishing a connection between the server and the client.
ws.on('connection', (wss) =>console.log("A new Client Connected")
);
After a connection has been established, the wss.send() line sends a message to the client. In this case, the message is “Welcome to the Server.”
wss.send('Welcome to the Server!');Finally, the wss.on ('message') is for the server to receive the message from the client. For confirmation, the server sends this message back to the client in the last line.
wss.on('message', (message) =>console.log('Server Received: $message');
wss.send('Got your Message: ' + message);
);
Creating a WebSocket Client
For the client-side, we need both the index.html file and the client.js file. Of course, you can simply add the content from the client.js file into your index.html file, but I prefer keeping them separate. Let us first look at the client.js code. Open the file and enter the following lines inside of the file:
const socket = new WebSocket('ws://localhost:8080');socket.addEventListener('open', () =>
console.log('Connected to the Server!');
);
socket.addEventListener('message', (msg) =>
console.log('Client Received: $msg.data');
);
const sendMsg = () =>
socket.send('Hows it going amigo!');
Code Explanation
Like with the server.js, we will create a new WebSocket that is listening to port 8080, which can be seen in the localhost:8080 section of the code.
const socket = new WebSocket('ws://localhost:8080');In the next line, addEventListener makes your client listen to any events that are currently happening. In this case, it would be creating and starting the server. Once the connection is established, the client outputs a message to the terminal.
socket.addEventListener('open', () =>console.log('Connected to the Server!');
);
Once again, the client listens to any events currently happening. When the server sends a message, the client receives this and then displays the message in the terminal.
socket.addEventListener('message', (msg) =>console.log('Client Received: $msg.data');
);
The last few lines are simply a function where the client is sending a message to the server. We will connect this to a button in our html file for a better understanding of how this is working.
const sendMsg = () =>socket.send('Hows it going amigo!');
Preparing an HTML File
Finally, open the index.html file and add a reference to your client.js file inside of it. In my case, I will simply add the following lines of code:
As you can see in the lines below, src (inside the script tag) refers to the client javascript file. The sendMsg function, which was created in the client.js file, has also been connected to the button's onClick function.
Putting Everything Together
You can now start testing your Client and Server Architecture. First, open the terminal and run the following command to start your server:
$ node server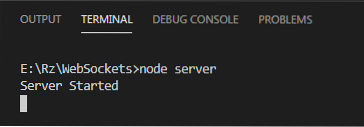
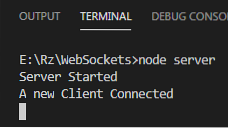
After starting your server, open the directory in which your index.html file is present, and double-click on it to open it in your browser. You will see the following message appear in the terminal stating that a client has connected:
You can also check the messages sent from the server to the client by pressing the right-click button and then opening the Inspect window. In this window, click the Console section, and you will be able to see the messages sent from the server.

Once you click on the button, both the server and client will be able to send and receive messages to and from each other.
Server:

Client:

Voilà, your WebSocket connection has been established!
Conclusion
The WebSocket protocol is an excellent way to establish communication between a client and a server. This protocol is used in several fields, including multiplayer browser games, chat systems of various social media platforms, and even collaboration processes between coders.


