What is Minikube?
Minikube was developed to allow users to run Kubernetes locally. When you install and run Minikube on your computer, it runs a single-node Kubernetes cluster inside a virtual machine.
Why Minikube?
Minikube is intended for both new users and regular developers. Installing Kubernetes is time-consuming and resource-intensive. With Minikube, you get a smaller working version of a single-node Kubernetes cluster on your personal computer.
If you're a learner, it gives you the ability to play around and understand the basic concepts. Once you become regular practitioner you can still use Minikube to test out your ideas locally before you deploy it in your data center or server. It can work as your test environment.
What Can You Do With Minikube?
Minikube is great for learning Kubernetes and testing your concepts and ideas during development.
Prerequisite
Even though it's not necessary for this tutorial, a basic knowledge of containers like Docker is helpful to understand Minikube/Kubernetes.
Basic Definitions of Minikube/Kubernetes Concepts
To use Minikube, you need to understand the basic ideas discussed below. The definitions are not trying to explain the technology in depth. It's only giving you an understanding of the basic concepts of Kubernetes. In this discussion, Kubernetes and Minikube mean the same thing
- Container - In Minikube, containers are used as the building blocks of creating applications.
- Pod - Pod is a collection of one or more containers that share storage and network resources. Pods contain the definition of how the containers should be run in Minikube. Minikube uses these definitions to maintain the necessary resources. For example, you can define you need two pods. During execution, if a pod goes down, Minikube will automatically fire up a new pod.
- Service - Because pods are replaceable, Minikube needs an abstraction layer to keep the interaction between the different pods seamless. For example, if a pod dies and a new pod is created, the application users shouldn't get bogged down in the details of network addresses and related issues. Services are wrappers around the pods to create levels of abstraction.
- Master - Master coordinates the cluster. It's like the brains of the operation.
- Node - Workers who run the pods.
- kubectl - It's the command line interface for running commands on Kubernetes cluster.
To better understand how these concepts fit together in Kubernetes, watch this short video:
How to Install Minikube
Your hardware needs have virtualization enabled in your computer's BIOS. The good news is most modern machine already has this turned on.
Here are the steps to install Minkube on your machine:
- Install VirtualBox
- Install kubectl
- Install Minikube
Simple Example of Deploying on Minikube
Once you have everything installed, you can start Minikube with the following command:
$ minikube startThere is a newer version of minikube available (v0.28.0). Download it here:
https://github.com/kubernetes/minikube/releases/tag/v0.28.0
To disable this notification, run the following:
minikube config set WantUpdateNotification false
Starting local Kubernetes v1.9.0 cluster…
Starting VM…
Getting VM IP address…
Moving files into cluster…
Setting up certs…
Connecting to cluster…
Setting up kubeconfig…
Starting cluster components…
Kubectl is now configured to use the cluster.
Loading cached images from config file.
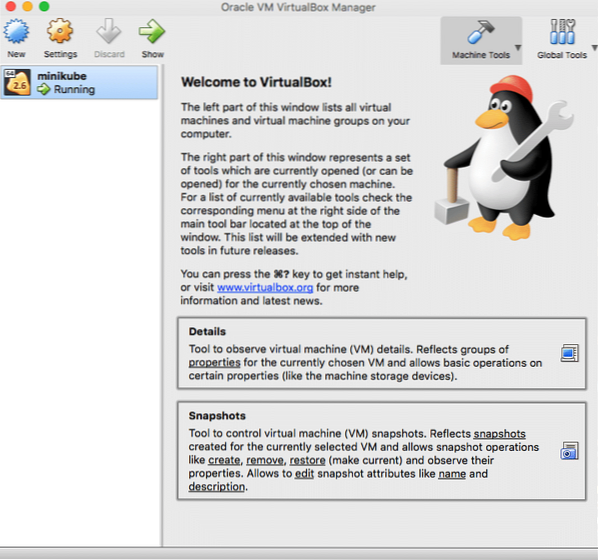
On your first run, it will take time to fire up Minikube as it will build the VM for you. You can check you VirtualBox to see the virtual machine Minikube spins up:
Later when you restart Minikube it will be faster.
You can use the following command to check your Minikube status:
$ minikube statusminikube: Running
cluster: Running
kubectl: Correctly Configured: pointing to minikube-vm at 192.168.99.100
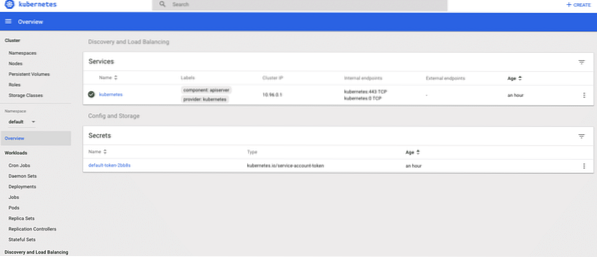
A great feature of Minikube is the dashboard. From the dashboard, you can see everything that is going on in Minikube. You can also control resources in your cluster from the dashboard. Use the following command to start up the dashboard in your default browser:
$ minikube dashboardOpening kubernetes dashboard in default browser…
Here is how the dashboard should look:
Let's deploy an NGINX application on Minikube. Here are the steps:
1. Create a pod:
$ kubectl run mynginxapp --image=nginx:latest --port=80deployment "mynginxapp" created
2. Create a service:
$ kubectl expose deployment mynginxapp --type=NodePortservice "mynginxapp" exposed
3. Check your pod and service status:
$ kubectl get podsNAME READY STATUS RESTARTS AGE
mynginxapp-6d64b788cc-j5crt 1/1 Running 0 4m
$ kubectl get services
NAME TYPE CLUSTER-IP EXTERNAL-IP PORT(S) AGE
kubernetes ClusterIP 10.96.0.1
mynginxapp NodePort 10.97.47.26
You can see that the pod and the service running for mynginxapp.
4. Let's find at what address and port Minikube is running mynginxapp:
$ Minikube service mynginxapp --URLhttp://192.168.99.100:30964
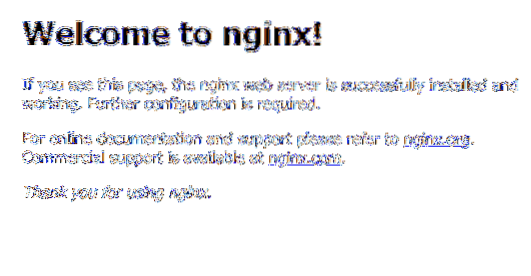
If you go to the returned URL (in this case it is http://192.168.99.100:30964) on your browser, you should see the NGINX service running.
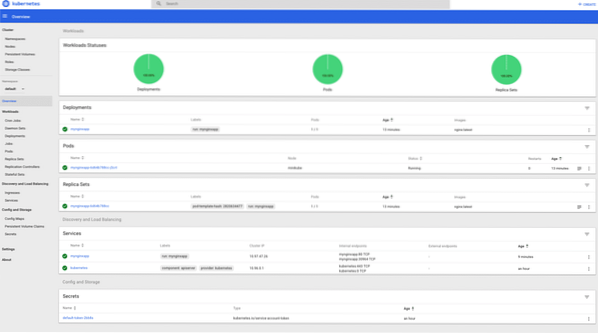
5. Check the dashboard again:
$ Minikube dashboardOpening kubernetes dashboard in default browser…
6. Delete the service and the pod and stop Minikube
$ kubectl delete service mynginxappservice "mynginxapp" deleted
$ kubectl delete deployment mynginxapp
deployment "mynginxapp" deleted
$ Minikube stop
Stopping local Kubernetes cluster…
Machine stopped.
Summary of the Example
In this example, you first deployed an NGINX pod called mynginxapp. The NGINX image was downloaded from Docker Hub. Then you created a service to support the pod. You were able to see the service from the browser. At last, you deleted the pod and the service and then stopped Minikube.
More Detailed Minikube Example
Check out our Kubernetes: Getting Started article that has a more detailed Minikube example.
Quiz - Test Your Knowledge
- Can you explain the concept of containers, pods, and services?
- How do containers, pods, and services interact with each other?
- What is kubectl?
- How many Kubernetes clusters can you start on Minikube?
Further Study
- https://kubernetes.io/docs/tutorials/hello-Minikube
- https://kubernetes.io/docs/home
- https://www.digitalocean.com/community/tutorials/an-introduction-to-kubernetes


