A DNS server resolves domain names such as example.com to IP addresses such 192.168.2.10. Without DNS server, you would have to type in the IP address directly if you wanted to visit example.com, which is of course very hard to remember.
In this article, I will show you how to install BIND version 9 (latest at the time of this writing) and configure it to resolve domain names of your choice on Ubuntu 18.04 LTS. I will also show you how to use dig command to test DNS configuration. Let's get started.
Installing BIND on Ubuntu 18.04 LTS:
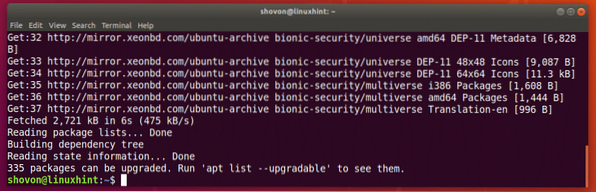
BIND 9 is available in the official package repository of Ubuntu 18.04 LTS. So it is very easy to install. First, update the APT package repository cache with the following command:
$ sudo apt update
The APT package repository cache should be updated.
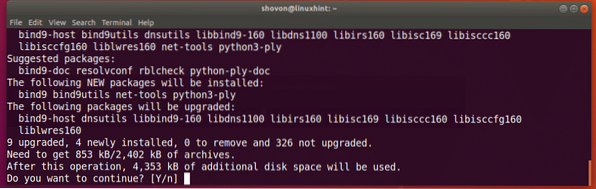
Now install BIND 9 with the following command:
$ sudo apt install bind9
Now press y and then press
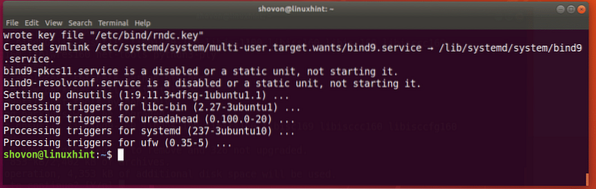
BIND 9 is installed.
Now run the following command to check whether BIND was installed correctly:
$ named -v
Configuring BIND 9:
All the configuration files of BIND 9 is in /etc/bind and /var/cache/bind directory.
The main configuration files are named.conf, named.conf.default-zones, named.conf.local, and named.conf.options as marked in the screenshot below.

You also create many zone files in /var/cache/bind directory. A zone file holds information about a certain domain name and its subdomains. It's a simple text file.
For example, the information about domain/zone example.com would be stored in plain text format in a zone file such as db.example.com in /var/cache/bind directory.
Now I am going to create a simple zone file for example.com and show you how to set up your own DNS names with BIND 9.
First, navigate to the /var/cache/bind directory with the following command:
$ cd /var/cache/bind
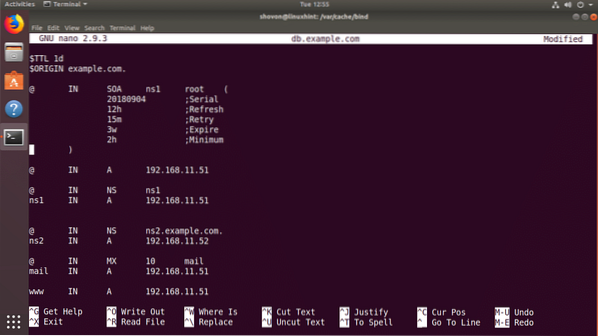
Now, create a new file db.example.com and open it with nano text editor (if you want to follow along) with the following command:
$ sudo nano db.example.com
Now type in the following lines and save the file with
Now run the following command to check whether you've made any mistakes in the zone file:
$ named-checkzone example.com db.example.comNOTE: Here, example.com is the domain name and db.example.com is the zone file for the domain name example.com.
As you can see, the zone file db.example.com is OK.

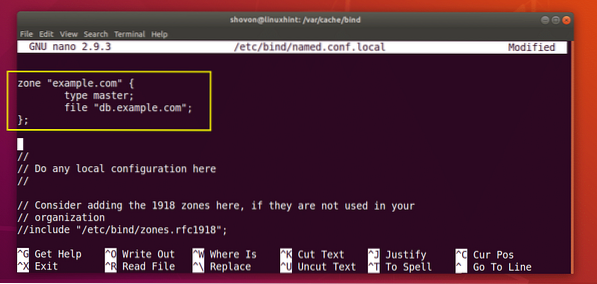
Now you have to tell bind to load the data file db.example.com for the zone example.com.
To do that, open /etc/bind/named.conf.local file with the following command:
$ sudo nano /etc/bind/named.conf.local
Now add the following lines as marked in the screenshot below and save the file.
Now restart BIND 9 service with the following command:
$ sudo systemctl restart bind9
The new zone should be loaded.
Testing BIND 9 Configuration with dig:
dig is used to make request to the DNS server and show the DNS records of any DNS zone.
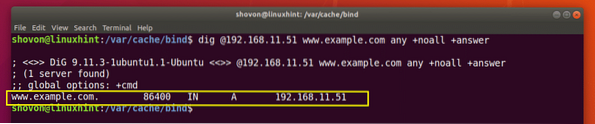
For example, to list all the records of example.com zone we've created earlier, run the following command:
$ dig @192.168.11.51 example.com anyNOTE: Here, @192.168.11.51 is used to tell dig to use the nameserver 192.168.11.51. This is the IP address of my computer where BIND 9 is running. If you don't know the IP address of your computer, run ip addr command to see the IP address of your computer.

As you can see in the marked section of the screenshot below, BIND 9 can resolve example.com domain name to IP addresses correctly.

As you can see, I can also resolve www.example.com using my own DNS server.
Setting Primary DNS Server on Ubuntu 18.04 LTS:
Ubuntu 18.04 LTS uses systemd-resolve to resolve DNS hostnames. It also caches DNS results. In this section, I will show you how to set your own DNS server as the primary DNS server on Ubuntu 18.04 LTS using systemd-resolve.
First, open the configuration file for systemd-resolve with the following command:
$ sudo nano /etc/systemd/resolved.conf
Now, replace #DNS= with DNS=IP_ADDR as shown in the marked section of the screenshot below. Here, IP_ADDR is the IP address of your BIND 9 server.
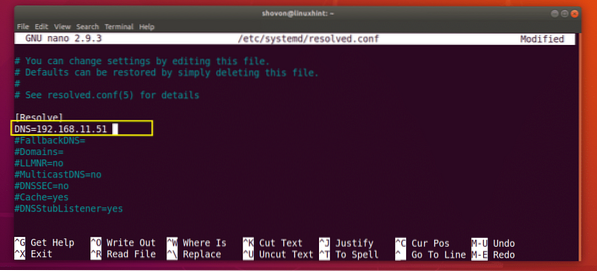
Now save the file and restart your computer with the following command:
$ sudo reboot
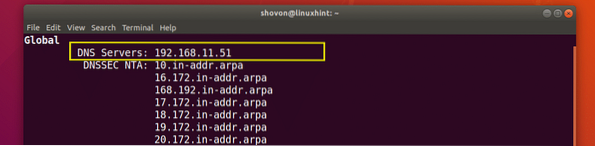
Once your computer start's, run the following command to check your primary DNS server:
$ systemd-resolve --status
As you can see, the primary DNS server is set to 192.168.11.51, the one that I set earlier.
Now I can run dig without saying what DNS server to use and still be able to resolve example.com as you can see in the screenshot below.
$ dig +noall +answer example.com any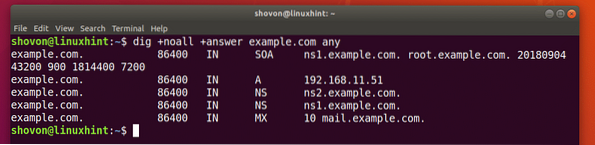
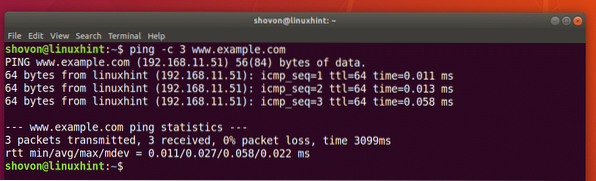
As you can see, I can also ping www.example.com.
Understanding Zone File Format:
Now that your DNS server is working, it's time to learn more about the BIND 9 zone file.
The zone file db.example.com defines how a domain name is resolved and what IP it is resolved to, mail servers of a domain, nameservers of a domain and many more information.
In our earlier zone file for example.com, $ORIGIN defines a value for the @ symbol. Wherever you out @, it will be replaced by the value in the $ORIGIN, which is example.com.
NOTE: Don't forget the dot(.) after example.com as it is required for the domain to be FQDN (Fully Qualified Domain Name) and without it, BIND won't work.
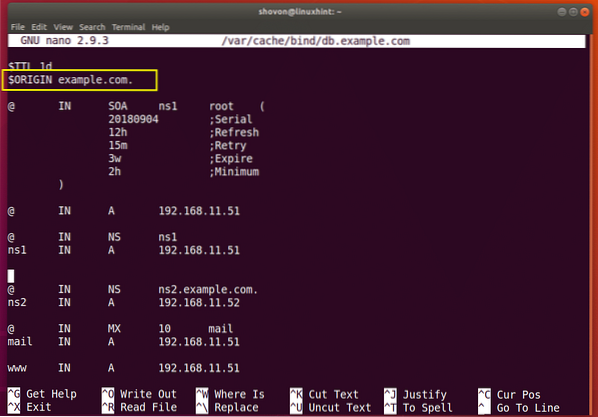
If you don't put a FQDN in BIND zone file, then the value of $ORIGIN will be appended to the name. For example, ns1 is not a FQDN. So ns1 will be ns1.example.com. ($ORIGIN appended at the end).
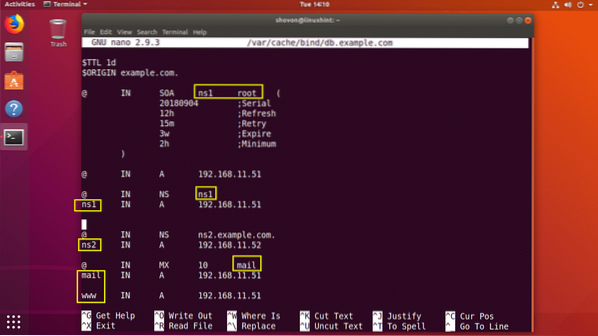
ns1 IN A 192.168.11.51- sets the IPv4 IP address 192.168.11.51 for ns1.example.com.
mail IN MX 10 mail - defines mail.example.com. as the mail server for this zone.
mail IN A 192.168.11.51 - sets the IPv4 IP address 192.168.11.51 for mail.example.com.
So that's the basics of how a BIND zone file works. For more information, please read the BIND documentation at https://www.isc.org/downloads/bind/doc/
Thanks for reading this article.


