PyQt is a popular Python library used to implement graphical applications in Python more easily. This library comes with a GUI (Graphical User Interface) builder tool called Qt Designer. The GUI can be built quickly in Python using the drag-and-drop feature of this library, though this tool has no debugging facility like the standard IDE. This tutorial shows you how to implement the GUI using the Qt Designer class of PyQt.
Prerequisites
You must install the Qt Designer tool before practicing the examples provided in this tutorial. Run the following commands to install the Qt Designer on your system:
$ sudo apt-get install qttools5-dev-tools$ sudo apt-get install qttools5-dev
Open the Qt Designer
Run the following command to change the current directory location to the Qt Designer folder.
$ cd /usr/lib/x86_64-linux-gnu/qt5/bin/Run the following command to open the Qt Designer application.
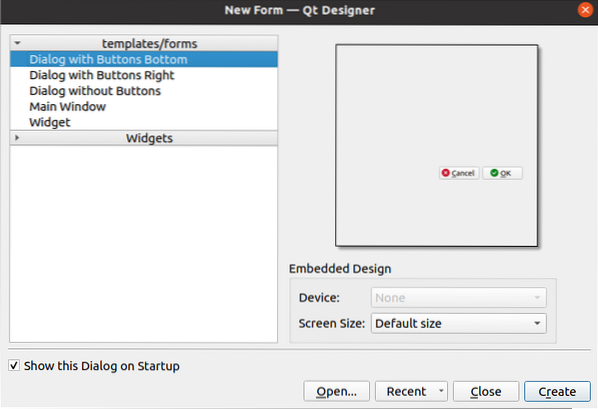
$ ./designerIf the Qt Designer has been installed properly, the following window will appear. The Widget box shown on the left side of the main window contains various widgets that you can use to design the user interface of the application. The New Form window is used to create a new window using the default buttons. The windows shown on the right side of the main window provides information about the widgets that can be read or modified.

Create the First Form Using the Qt Designer
To begin designing the interface for the Python application, we will click the Create button in the following window to open the dialog box with two default buttons.
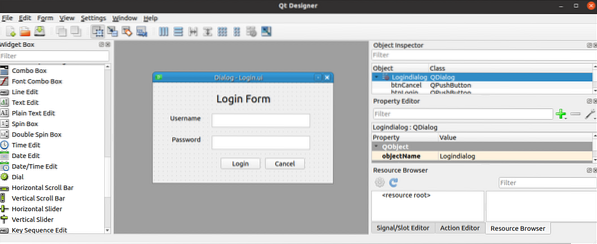
Next, we will design a login form using the Label, Text Edit, and Push Button widgets. The dialog box will be saved with the name Login.ui, which will be used later in the Python script. The QObject name will be changed to Logindialog using the Property Editor Window of this application.
Using the Login Dialog Box
The user interface file created by the Qt Designer can be used in the Python script in two ways. The file can be used directly in the Python script, or the converted Python file of the Qt Designer file can be used in the Python script. Both ways of using the dialog box of Qt Designer are shown in the following section of the tutorial.
Run Qt Designer File Directly
The UIC module of the PyQt library is used to load the file created by the Qt Designer, and the loadUI() method of the UIC module is used to load the UI file. The following script shows how to load the Qt Designer file named Login.ui that we created before. The necessary modules are imported at the beginning of the script. The object of the application is created using the QApplication(), and the Qt Designer file is loaded using the loadUI() method. Next, the exec() method is called to start the event loop of the application.
# Import sys moduleimport sys
# Import QtWidgets and uic modules
from PyQt5 import QtWidgets, uic
# Create app object
app = QtWidgets.QApplication(sys.argv)
# Load GUI form and display
window = uic.loadUi("Login.ui")
window.show()
# Start the event loop of the app or dialog box
app.exec()
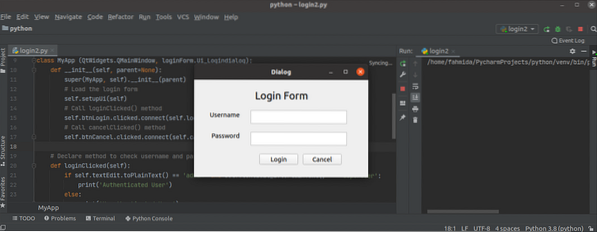
The following dialog box will appear after executing the above script.
Run UI File by Converting into Python File
The UI file created by the Qt Designer can be converted into a Python file using the pyuic5 command. Run the following command to convert the Login.ui file into the loginForm.py file. The Login.ui file must be stored in the current location to run the following command; otherwise, an error will be generated.
$ pyuic5 Login.ui -o loginForm.pyThe following code will be generated in the loginForm.py file after executing the above command.
# -*- coding: utf-8 -*-# Form implementation generated from reading ui file 'Login.ui'
#
# Created by: PyQt5 UI code generator 5.12.3
#
# WARNING! All changes made in this file will be lost!
from PyQt5 import QtCore, QtGui, QtWidgets
class Ui_Logindialog(object):
def setupUi(self, Logindialog):
Logindialog.setObjectName("Logindialog")
Logindialog.resize(400, 224)
self.textEdit = QtWidgets.QTextEdit(Logindialog)
self.textEdit.setGeometry(QtCore.QRect(130, 70, 221, 31))
self.textEdit.setObjectName("textEdit")
self.textEdit_2 = QtWidgets.QTextEdit(Logindialog)
self.textEdit_2.setGeometry(QtCore.QRect(130, 120, 221, 31))
self.textEdit_2.setObjectName("textEdit_2")
self.label = QtWidgets.QLabel(Logindialog)
self.label.setGeometry(QtCore.QRect(140, 20, 131, 31))
font = QtGui.QFont()
font.setPointSize(18)
self.label.setFont(font)
self.label.setObjectName("label")
self.label_2 = QtWidgets.QLabel(Logindialog)
self.label_2.setGeometry(QtCore.QRect(36, 70, 81, 20))
self.label_2.setObjectName("label_2")
self.label_3 = QtWidgets.QLabel(Logindialog)
self.label_3.setGeometry(QtCore.QRect(40, 120, 67, 17))
self.label_3.setObjectName("label_3")
self.btnLogin = QtWidgets.QPushButton(Logindialog)
self.btnLogin.setGeometry(QtCore.QRect(150, 170, 89, 25))
self.btnLogin.setObjectName("btnLogin")
self.btnCancel = QtWidgets.QPushButton(Logindialog)
self.btnCancel.setGeometry(QtCore.QRect(250, 170, 89, 25))
self.btnCancel.setObjectName("btnCancel")
self.retranslateUi(Logindialog)
QtCore.QMetaObject.connectSlotsByName(Logindialog)
def retranslateUi(self, Logindialog):
_translate = QtCore.QCoreApplication.translate
Logindialog.setWindowTitle(_translate("Logindialog", "Dialog"))
self.label.setText(_translate("Logindialog", "Login Form"))
self.label_2.setText(_translate("Logindialog", "Username"))
self.label_3.setText(_translate("Logindialog", "Password"))
self.btnLogin.setText(_translate("Logindialog", "Login"))
self.btnCancel.setText(_translate("Logindialog", "Cancel"))
The following will display the Login dialog box by importing the loginForm.py file created using the pyuic5 command. The object of the application is created using QApplication(), and the Login dialog box is loaded using the setupUi() method. The Login button is attached with the loginClicked() method to check whether the username and password taken from the user are valid. The Cancel button is attached to the cancelClicked() method to quit from application. The exec() method is called to start the event loop of the application.
# Import QtWidgetsfrom PyQt5 import QtWidgets
# Import sys
import sys
# Import login form ui
import loginForm
# Define a class to setup the UI
class MyApp (QtWidgets.QMainWindow, loginForm.Ui_Logindialog):
def __init__(self, parent=None):
super(MyApp, self).__init__(parent)
# Load the login form
self.setupUi(self)
# Call loginClicked() method
self.btnLogin.clicked.connect(self.loginClicked)
# Call cancelClicked() method
self.btnCancel.clicked.connect(self.cancelClicked)
# Declare method to check username and password when Login button will click
def loginClicked(self):
if self.textEdit.toPlainText() == 'admin' and self.textEdit_2.toPlainText() == 'superuser':
print('Authenticated User')
else:
print('Unauthenticated User')
# Declare method to terminate the script when Cancel button will click
def cancelClicked(self):
exit()
# Create app object
app = QtWidgets.QApplication(sys.argv)
# Create class object
form = MyApp()
# Display the form
form.show()
# Start the event loop of the app or dialog box
app.exec()
The following dialog box will appear after executing the above script.
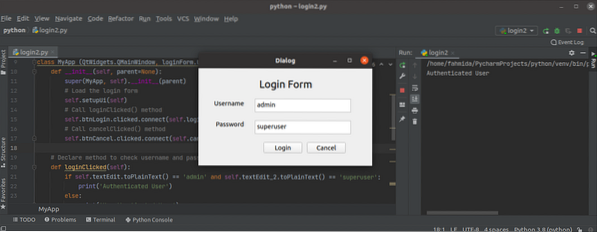
If the user enters the wrong username or password in the Login form, then the following output will appear after clicking the Login button.

If the user enters the correct username and password in the Login form, then the following output will appear after clicking on the Login button.
If the user clicks the Cancel button in the Login form, then the dialog box will disappear.
Conclusion
This tutorial showed you how to install Qt Designer and how to design a simple form using this application. The tutorial also showed you how to load the UI dialog box directly and after converting it into the Python script have shown in the other part of this tutorial. Hopefully, this article helped you to better understand the usage of Qt Designer for building and using the GUI in applications.


