The DHCP protocol is necessary because it prevents network or system administrators from manually configuring IP addresses for new machines added to the network or computer system that are moved from one subnet to another.
Through the 'lease', the DHCP server allocates the IP addresses to the DHCP clients. The lease time depends on how long the client system requires the connection or DHCP configuration.
We will talk about the configuration of a DHCP client on Ubuntu Linux distribution in this article. We have assumed in this article that the DHCP server is already set up on your other machine, or you can also install it from this URL.
DHCP client configuration on Ubuntu
To set up the DHCP client on your Ubuntu system, first, check the network interface name by running the following command:
$ ifconfig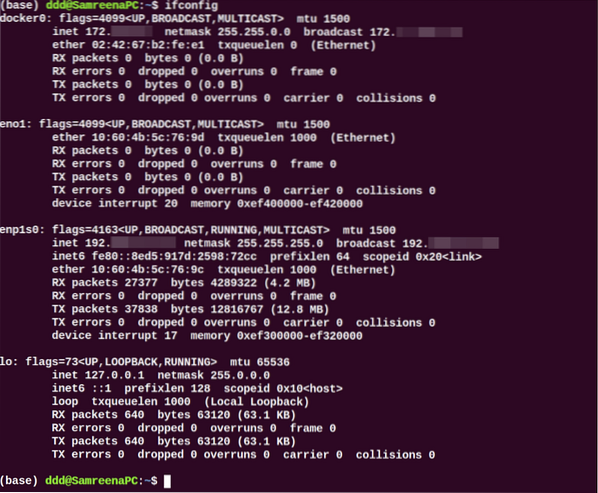
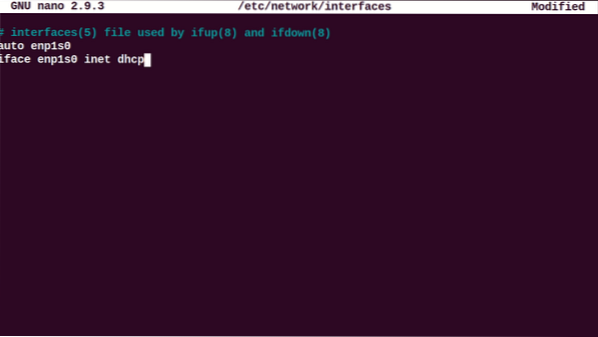
Once the network interface name is identified, you need to make some changes to the network interfaces file for DHCP client configuration. So, open the '/etc/network/interfaces' file in your favorite text editor by using the following command:
$ sudo nano /etc/network/interfacesNow, use the following syntax to configure the dhcp client:
autoiface
Here, the network interface name is 'enp1s0'; we have changed the above lines into the following format:
auto enp1s0iface enp1s0 inet dhcp
Save and close the above configuration file. Now, restart the network manager services by running the following command:
$ sudo systemctl restart NetworkManager.serviceOr
$ sudo systemctl restart networking
Verify the NetworkManager service running status by executing the following command:
$ sudo systemctl status NetworkManager.service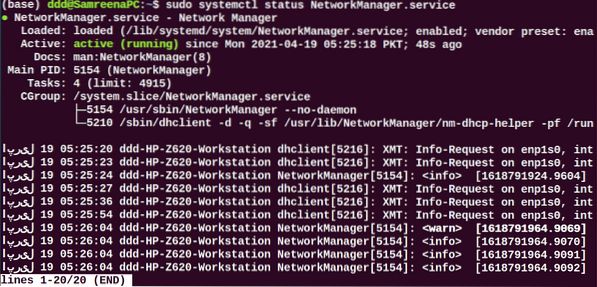
When during the booting process, this system should request network parameters from the DHCP server.
To manually execute the DHCP process, the dhclient command can be used. If the DHCP server assigns no IP to the DHCP client, then use the following command renew or release the IP address. Wait for a while; the DHCP server will automatically assign IP addresses to the client machine.
$ sudo dhclient -rUsing the 'ifconfig' command can view the interface name.
Configure DHCP through netplan
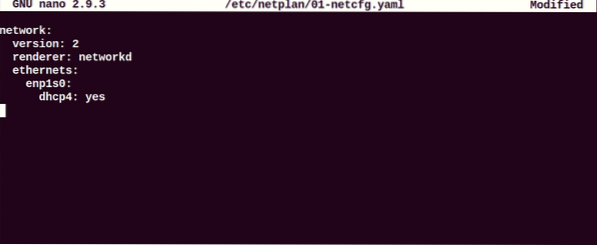
In most Ubuntu distribution, networking is controlled or managed through the netplan program. Therefore, in this situation, you need to edit the netplan configuration files. To edit the appropriate file configuration, navigate into the '/etc/netplan' directory and open that file.
$ sudo nano /etc/netplan/01-netcfg.yaml
Add the following lines in this file:
network:version: 2
renderer: networkd
ethernets:
enp1s0:
dhcp4: yes
Save the above configuration by using 'Ctrl+O' in this file and exit from this window by pressing 'Ctrl+x'.
Now, run the below-mentioned command to apply changes:
$ sudo netplan applyConfigure DHCP client through Ubuntu desktop environment
You can also use another virtual machine with Ubuntu 20.04 Desktop as a DHCP client. In Ubuntu, the default configuration method is set as DHCP. If it does not take an IP director from the DHCP server, change the IPV4 setting of your network. Click go into the 'Setting' and move into the network wired or wireless settings. The following window should display on your system:
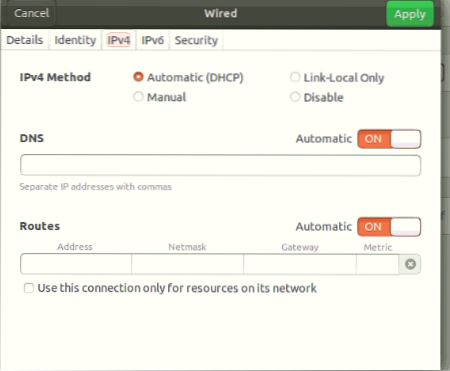
Set your entire IPV4 configuration similar to the above-displayed screenshot.
Now, show the network details by clicking on the 'Detail' tab as follows:
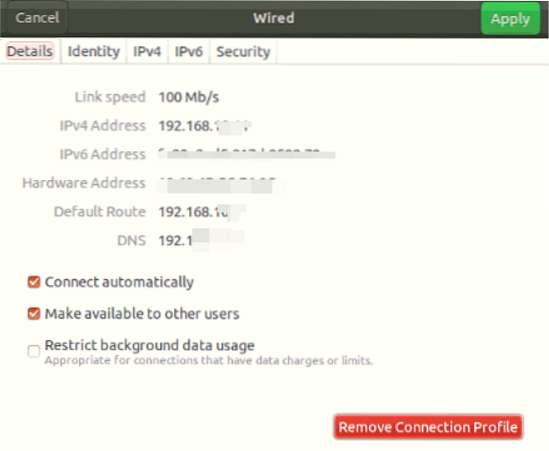
Verify the configuration by running the following command:
$ ifconfigYou will see that the IP is allocated to the network interface.
You can also use the host machine on your system as a DHCP client. However, to get IP, do not reboot your host machine because, in this case, Virtualbox will be powered down, so there is no DHCP running on the system.
It is important to note that if you are using mobile devices or host machines as a DHCP client, most of the chances are that they have already been connected to this network. However, they will request the same IP to the DHCP server that was allocated before. However, if the IP does not fall in your defined range then, a request will be sent to the router.
Conclusion
We have seen in this article how to configure a DHCP client using different ways on Ubuntu distribution. All commands we have implemented on the Ubuntu 20.04 environment. DHCP client configuration is very simple. So that, in just a few minutes, you can easily set up a DHCP client on your system using the above-mentioned steps.


