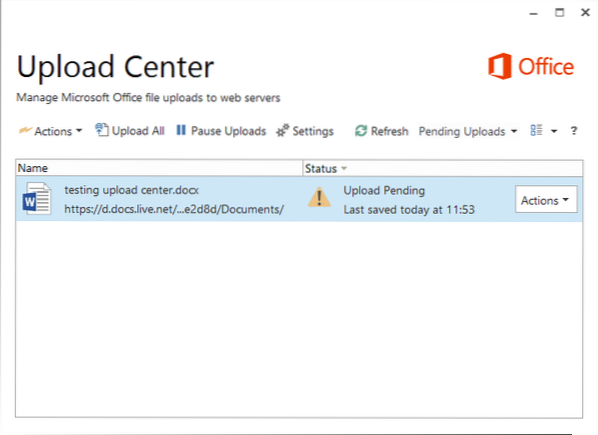
Long time Office users are probably well aware of Upload Center feature present in Microsoft Office 2010, Office 2013, and later versions. Those of you who are new to the word Upload Center probably familiar with the small Upload icon that appears in notification area of the taskbar.
The Office Upload Center feature in Office 2010 and 2013 allows users to easily view the state of files that are being uploaded to a server. That is, the feature is helpful for those users who always save files to their OneDrive (SkyDrive) accounts. For instance, if your internet goes offline when you are editing a file saved in your OneDrive account, Upload Center will temporarily save the file offline so that it can automatically upload the file once your internet connection is up again.
Those of you who don't use Upload Center might want to just get rid of it. Since Microsoft Office doesn't offer an easy way to turn off or disable Upload Center, you can follow the given below workarounds to complete disable Upload Center and remove the icon from the notification area of taskbar.
Hide the Upload Center without disabling Upload Center
If you're looking for a way to always hide the Upload Center icon that appears in the notification area of taskbar without actually disabling the Upload Center, please follow the given below instructions.
Step 1: Click the small Up arrow icon on the right of the taskbar (see picture) and then click Customize link to open Notification Area Icons window.

Step 2: Here, locate the entry named Microsoft Office Document Cache or Microsoft Office Upload Center, and then select Hide icon and notifications option from the drop-down box next to it.
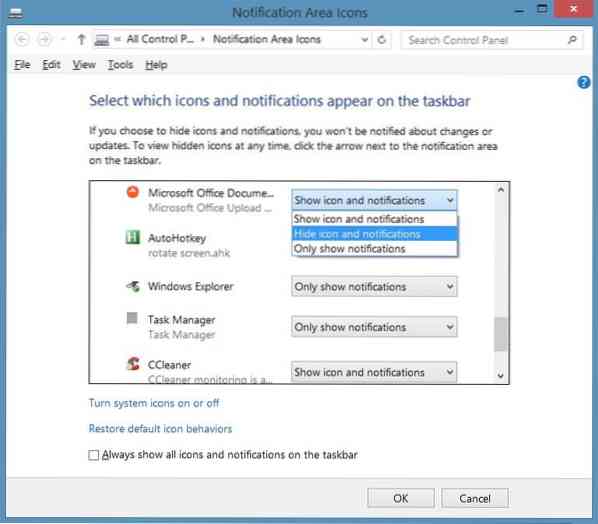
Click OK button.
To completely disable Office Upload Center
Note that I am sure if this method will work with Office 2010.
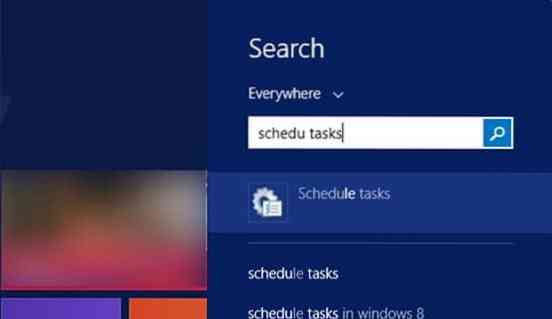
Step 1: Type Task Scheduler or Schedule Task in the Start menu or Start screen search box and press enter key to open Task Scheduler.
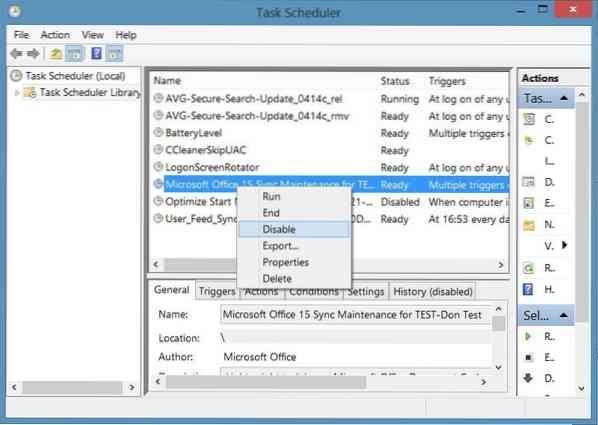
Step 2: On the left-pane of Task Scheduler, click Task Scheduler Library.
Step 3: Now, on the right-side, look for the entry named Microsoft Office 15 Sync Maintenance, right-click on the same, and then click Disable option.
That's it!
Disable Office 2010 Upload Center using Registry
Note that this method is only for Office 2010 and might not work for Office 2013.
Please backup your Registry or create a manual system restore point before editing the Registry.
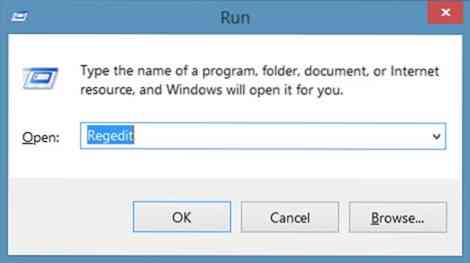
Step 1: Open Registry Editor by typing Regedit in Start menu search or Start screen search. Alternatively, you can type Regedit in the Run command box and then press Enter key to open Registry Editor.
Step 2: In the Registry Editor, navigate to the following key:
HKEY_CURRENT_USER\Software\Microsoft\Windows\CurrentVersion\Run

Step 3: On the right-side, look for the entry named OfficeSyncProcess and delete the same. That's it!


