A couple of days ago, when I connected one of my external hard drives to my Windows 10/8.1 machine, the USB drive didn't show up in My Computer or This PC. After reconnecting the drive, I noticed that the drive was not having a drive letter.
While assigning a drive letter to the external hard drive, I accidentally clicked on the next option labelled Mark partition as active instead of clicking the Change drive letter and paths option.
After realizing that I have set an external drive as active, I decided to change the same before shutting down the PC at the end of the day but I somehow forget to set the drive containing Windows as active and ended up with Operating system not found error the next day when I turned on my desktop.
Even though I could have easily changed the active boot partition with the help of live CD/DVDs and I didn't have much time and hence, decided to use my ready-to-use bootable USB to set Windows drive as active partition.
If you're also in the same situation and want to set the drive containing Windows as the active on an unbootable PC, please follow the given below instructions. Note that you must have either bootable DVD of Windows or bootable USB of Windows in order to follow the instructions in this guide.
Warning: Changing the active partition should be done only if you know what you're doing. You must know the drive containing the Windows installation files in order to follow the instructions in this guide.
This method works great on both Windows 10 as well as Windows 8.
Change the active partition without booting into Windows
Step 1: Connect your Windows bootable USB to the PC or insert the Windows DVD into the optical drive and boot from the bootable media. As you likely know, you need to change the boot order under BIOS/UEFI in order to boot from a bootable media.
If you're unable to boot from the bootable USB, please go through our Fix: Can't boot from bootable USB guide.
Step 2: Boot from the bootable media. In a couple of seconds, you'll see the following screen:
Step 3: Once you see the above screen, simultaneously press Shift + F10 keys to open Command Prompt.

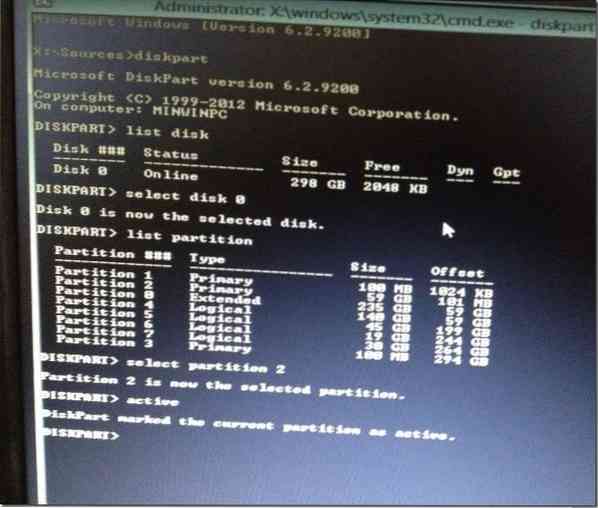
Step 4: In the Command Prompt window, execute the following commands:
Diskpart
List disk
Select disk X (if you have multiple disks, be sure to select the correct one)
(In the above command, replace X with the drive number)
Select disk X
List partition
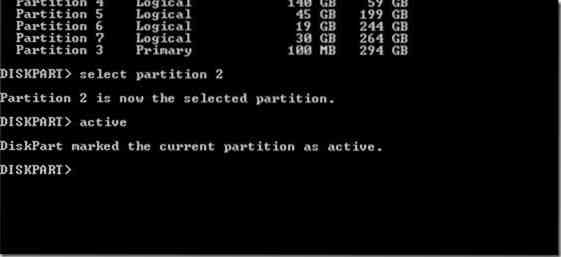
Select partition X
(Replace X with the partition number of your Windows drive)
Active
Exit
Step 5: Restart your PC. You PC should start normally without any errors now. Good luck!
How to backup data from unbootable PC guide might also interest you.


