Skype helps you proactively stay connected to your peers. For this, it runs a number of services in the background and keeps running in the background even when closed using the X button. This feature can sometimes become troublesome for some and hence, they might want to disable or completely uninstall Skype for Business from Windows 10. We have already seen how to uninstall the Skype app - now in this article, we will be checking some working methods to uninstall Skype for Business.
Completely uninstall Skype for Business
The following methods have worked effectively to disable or completely uninstall Skype for Business from Windows 10:
- Disable it via Skype Settings
- Uninstall using the Control Panel & Registry Editor.
- Silent-uninstall using a custom config.
- Use a third-party uninstaller.
1] Disable it via Skype Settings
You can disable Skye for Business and prevent it from startup up by opening its Settings > Tools > Options.
Next, select Personal, and uncheck Automatically start the app when I log on to Windows and Start the app in the foreground option.
2] Using the ControlPanel & Registry Editor
Open Skype for Business. Make sure you sign out of the application.

Select the button that says Delete my sign-in info.
This will clear all the user profile cache for the Skype for Business account and will disable the auto sign-in when the application opens.
Close Skype for Business.
Uninstall Skype for Business like any other software on your computer. Open Control Panel and select Skype for Business > Uninstall.
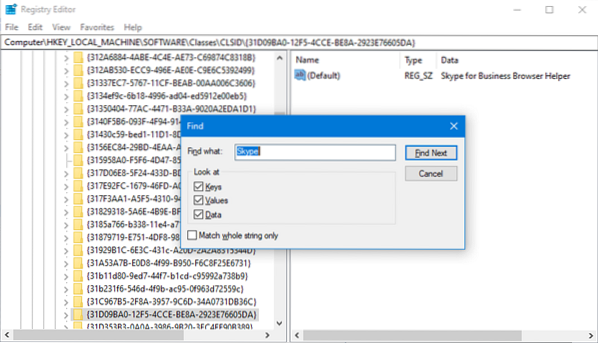
Now start the main part. You need to open the Registry Editor.
Next, open Edit > Find.

Search for 'Skype' and make sure that you select all the found entries in the Registry Editor and hit the Delete button.
Select Yes or OK for any prompt you get.
Reboot your computer to completely remove Skype for Business from your computer.
3] Silent-uninstall using a custom config
Right-click on the Skype icon in the System tray and select Exit.
Uninstall Skype for Business like any other application on your computer.
Get the Office Deployment Tool.
For the configuration.xml file, replace the current configuration with the following:
Run Windows Command Prompt command line with Admin level rights and execute this command:
cd c:\ODT2016
This will be the path where you saved the Office Deployment Tool directory.
To download the installation files, execute this command:
setup.exe /download configuration.xml
Wait for the files to get downloaded. It depends all on your Internet connection.
And finally to install those downloaded installation files, execute the following command:
setup.exe /configure configuration.xml
Every allowed application of the Microsoft Office suite will now be installed but Skype for Business.
3] Use a third-party uninstaller
You can also make use of any third-party uninstaller software as they are capable of removing all the residual files after uninstalling the application.
All the best!

 Phenquestions


