An IDE is a complete package tool that is built to be specialized in certain languages and offers multiple features for users to work with. These features include the ability to not only read and write programs but also compile and debug them. Text Editors, on the other hand, offer a broader approach as in they allow users to create and modify the contents of all types of programming language files. From the huge collection of these tools out there, VS Code has made quite a name for itself and has become one of the most popular editors on the market, particularly for the C++ Language. Hence today we'll be looking at how one can install VS Code in Ubuntu and configure it in such a way that users will be able to run and debug C++ programs.
What actually is VS Code?
Before moving onto the specifics, let us first give an overview over what actually is VS Code and the benefits that come along with it.
VS Code, developed by Microsoft, is a cross platform open-source editor, that is packed to the brim with a wide set of features and support for multiple extensions that offer even more functionality to the already powerful editor. It cannot be classified as an IDE but it is also much more than what a traditional text editor appears to be. With features that allow users to organize their files and folders and create multiple tabs to work on as well as the ability to debug their programs and check their code makes it a fascinating and fully-equipped editor. Moreover, it is highly customizable as in users can configure themes according to one's tastes, change the workspace settings or even set up new keyboard shortcuts. And what makes it even better is the fact that it is completely free.
Let us now finally look at how we can install VS Code on Ubuntu.
1) Checking to see which version of Ubuntu you have
As there are 32 bit & 64-bit flavors of VS Code available, the first thing you'll want to do before getting started is checking to see which version of Ubuntu you currently are using. To do this, first open the Terminal through either Ubuntu Dash or by pressing Ctrl+Alt+T shortcut. After the Terminal is opened, type the following command:
$ lscpu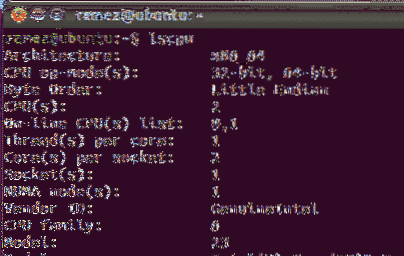
The CPU op-mode(s) entry tells you which bit version of Ubuntu you are currently running.
2) Installing VS Code in Ubuntu
Ubuntu offers multiple ways for users to install VS Code on their computer. Let us look at some of them:
a) Installing VS Code using Snap
Snap is management system developed by Canonical that allows users to install softwares and packages onto their systems. Snaps are popular because they work across almost all Linux distributions and provide the latest version to users. Users can simply install VS Code by running the following command in the command line:
$ sudo snap install --classic codeOnce this is done, you can find VS Code in your list of installed applications.
b) Installing VS Code through Debian Files
Some users, however, have found the snap versions of VS Code to be less stable and buggier. Thus, another way of installing VS Code is by downloading and installing the Debian files either through the graphical interface or the command line. We will be looking at both ways.
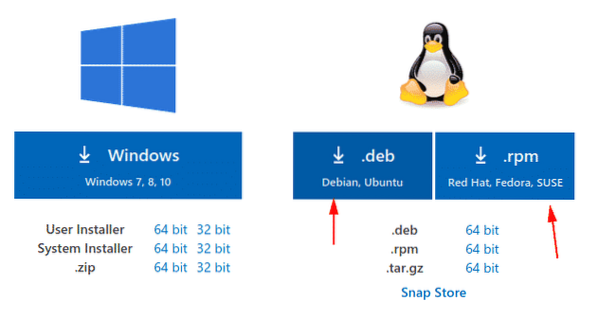
First of all, go to the website of VS Code and click on downloads. There you will see multiple download options. Choose the one that meets the requirements of your system. (Image below)
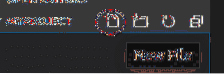
Once the file is downloaded, simply double click on it and a window will open.

By clicking on the Install Button, VS Code will be installed.
For installing Debian files using the command line, the following command needs to be inputted into the terminal:
$ sudo apt install
In my case it would be:
For older distributions however, the following command needs to be entered:
$ sudo dpkg -i$ sudo apt-get install -f
3- Configuring VS Code for C++ Development
First of all, open the terminal and enter the following command to check whether the Mingw tool is installed in your system or not:
$ g++ --version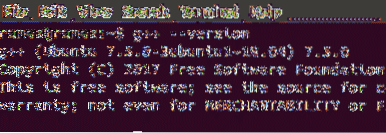
If you do not see the g++ information in the terminal, then please install it from the Mingw website.
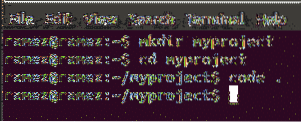
Next, we will create a new folder and then open that folder in VS Code. All of this can be done by running the following commands:
$ mkdir folderName$ cd folderName
$ code .
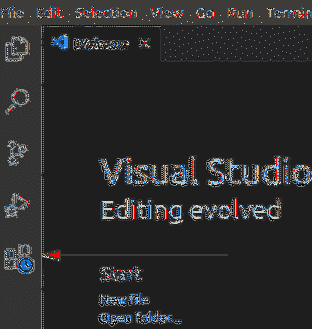
Next click on the new file option and give the file the name helloworld.cpp
Now click on the Extensions tab (Image below)
Next enter C++ into the search bar and click on the first option that appear. This will open a new window which has some good instructions for getting started with C++ on VS Code. On this window, click on the install option under the C++ heading which will start installing the C++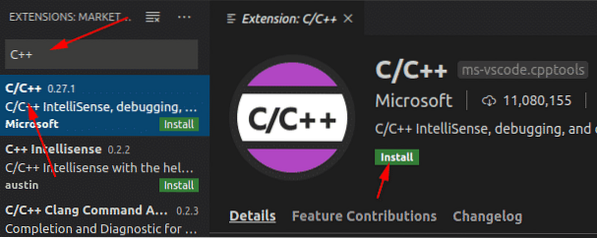
extension on VS Code.
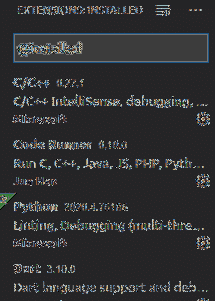
Similarly, search for the Code Runner extension and install it. To verify whether these has been installed, head to the installed extensions tab
Now open your helloworld.cpp file and paste the following source code inside it:
#includeusing namespace std;
int main ()
cout << "Hello World" << endl;
return 0;
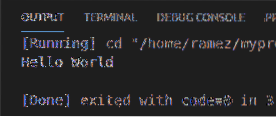
On the top right of VS Code, you will see a play button. This is the Code Runner extension that we installed before. Simply click on it and your C++ program will run.

You can now see your output in the Output tab found below.
So Why VS Code?
VS Code is a sophisticated program that has everything that a developer expects from a code editor. In addition to that, it provides some additional powerful features along with an easy to use interface that many experienced developers can modify according to their needs. It is thus by no surprise that it has risen so much in popularity in recent times.


