For example, let's say, your network topology connects 2 computers with a Cisco Router. When you run this configuration to test whether it works or not, the computers and the cisco router image will run as virtual machines in the background. You can pick an operating system for your virtual computers. Install any software you want on these computers. So you get the feel of working with real hardware.
You can add VMware, VirtualBox, KVM guests on your GNS3 project. You can also add Docker containers on your GNS3 project.
From the networking side, you can add many of the Cisco IOS on your GNS3 project. GNS3 also supports Cisco IOU images. You can also add Juniper networking products on your GNS3 project.
Well, you can add a lot of things on GNS3. But the thing is, all these Cisco images, Juniper images etc etc don't come preinstalled with GNS3. You have to add these manually.
In earlier days, the manual process of adding these images on GNS3 was complicated and at times were really painful to get everything to work. Now we have GNS3 Marketplace which makes everything a lot easier. Each of these images are called GNS3 appliances in GNS3 Marketplace.
In GNS3 documentation, they clearly stated and I quote, “The GNS3 appliances are using GNS3 recommended settings and have been thoroughly tested. You will most likely have a much better user experience using the appliances. You will also encounter fewer errors if you use an appliance rather than trying to configure settings yourself and using untested images.”
Here is how it works. Let's say you want to install Cisco IOU L2 and L3 images on GNS3. You go to GNS3 Marketplace and download Cisco IOU L2 and Cisco IOU L3 appliances. Then you import it to GNS3 and follow through the setup wizard. GNS3 will guide you on what files you need and what to do to get it to work. Once the setup wizard is complete, you will have fully functional Cisco IOU L2 and Cisco IOU L3 images on GNS3 for use. Also, you can be certain that these will work.
In this article, I will show you how all these works practically using GNS3. Let's get started.
Downloading Appliances from GNS3 Marketplace:
You can access GNS3 marketplace and download GNS3 appliances from your web browser. To do that, visit https://www.gns3.com/marketplace/appliances and click on any GNS3 appliances you like.
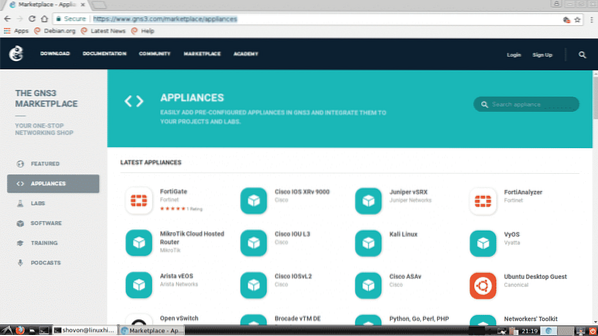
You can also search for a GNS3 appliance from here. Just type in what you're looking for in the search appliance input box and the results should be displayed below.

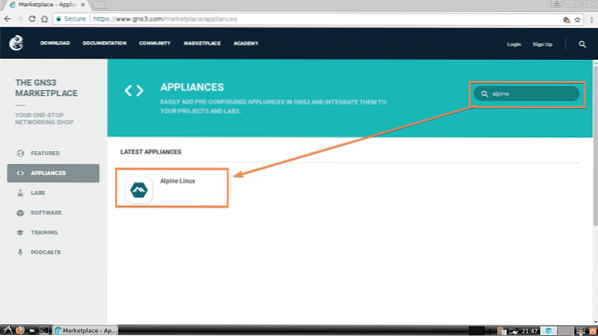
Let's say, you want to download the Alpine Linux GNS3 appliance. Now, search for Alpine here and click on the Alpine logo.
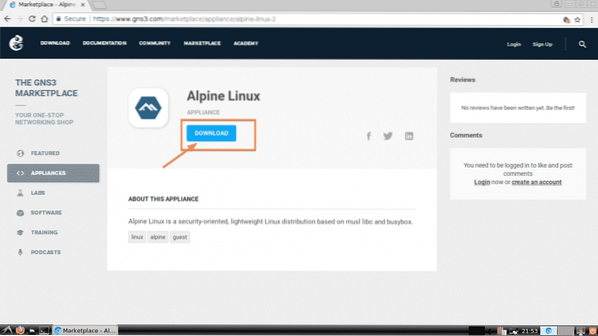
More information about your selected GNS3 appliance will show up here. Once you're certain that this is what you're looking for, click on the DOWNLOAD button as marked in the screenshot below.
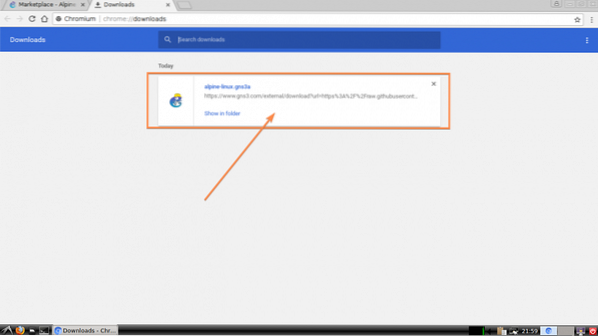
The Alpine Linux GNS3 appliance installer is downloaded.
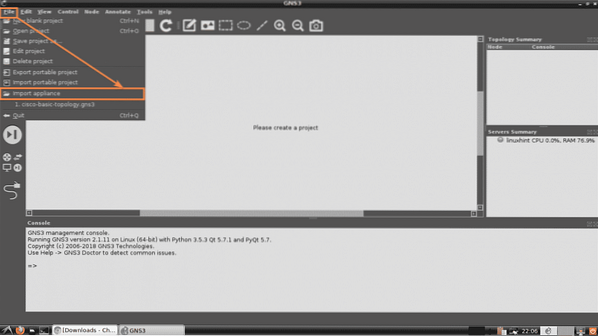
Now open GNS3 and go to File > Import appliance as marked in the screenshot below.
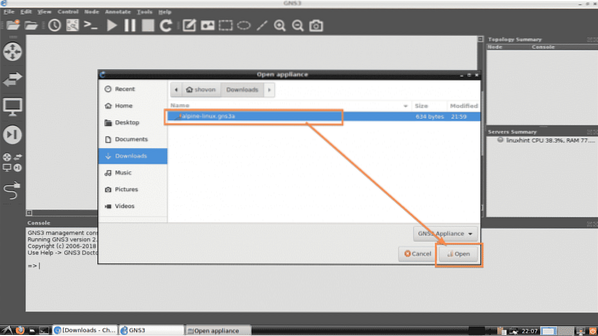
Now select the GNS3 appliance file that you've just downloaded from the File Picker and click on Open.
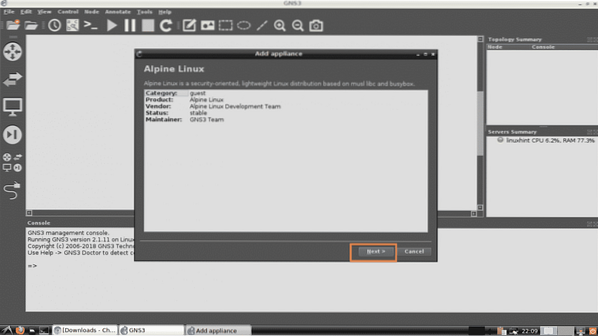
Now GNS3 Add appliance wizard should show up. Click on Next.
Now select how you want the GNS3 appliance to work. The default is, Run the appliance on your local computer. This option will run the GNS3 appliance in your local computer. If you're using GNS3 VM, then you should be able to pick Run the appliance on the GNS3 VM. If you're using GNS3 from a remote machine, then you should be able to pick Run the appliance on a remote server. Once you're done selecting your desired Server type, click on Next.

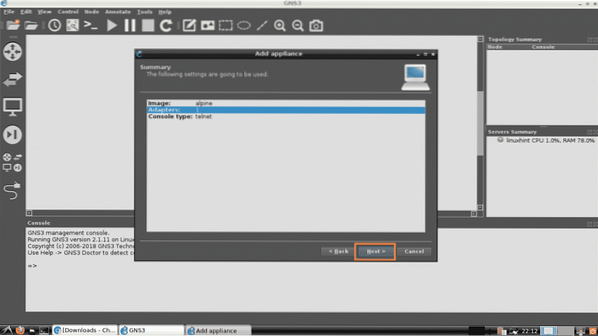
Now click on Next.
Finally, click on Finish.

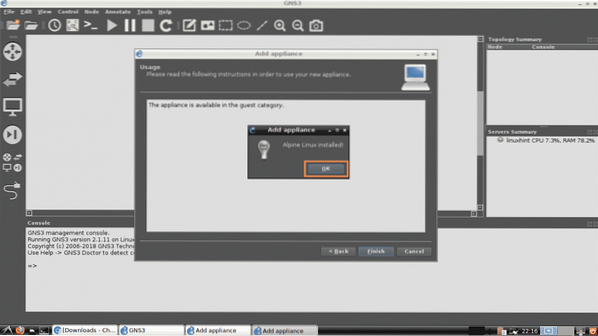
The Alpine Linux GNS3 appliance should be added. Now click on OK.
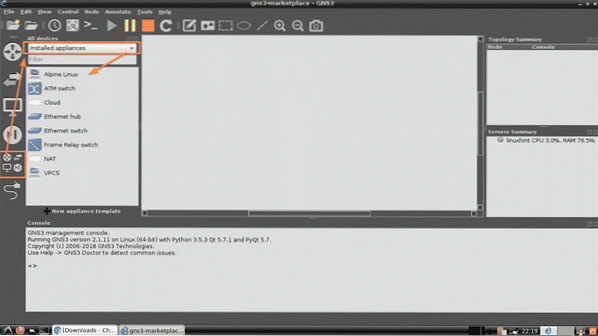
Now, create a new GNS3 project. You should be able to find your newly added GNS3 appliance. As you can see in the screenshot below, the Alpine Linux GNS3 appliance I just added is available for use.
Downloading Appliances using GNS3:
You can also download and install GNS3 appliance from within GNS3 itself. Just click on Browse all devices icon and set it to show Installed & Available appliances. All the installed and the appliances that are available in the GNS3 marketplace should show up in the list below.
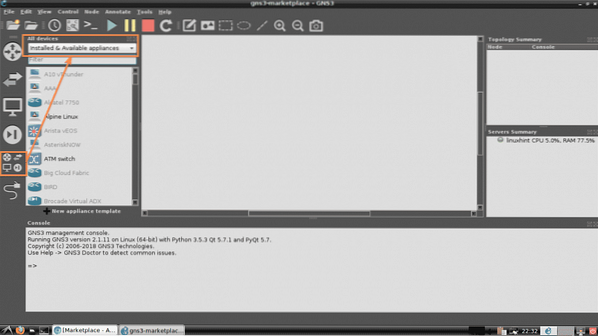
You can also filter the list as follows. As you can see, I searched for cisco, and all the GNS3 appliances related to cisco showed up. To install a GNS3 appliance (Let's say Cisco 2691 Router) from here, just try to drag it to the project workspace.

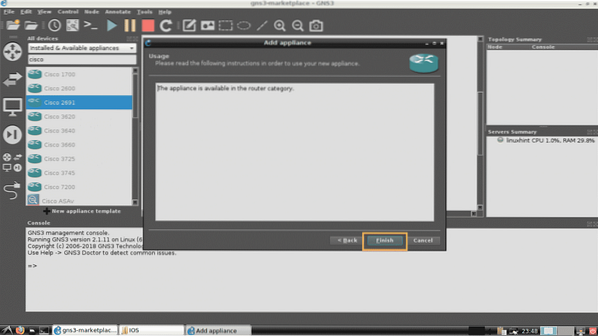
Now follow the Add appliance wizard as you did on the earlier section of this article above.
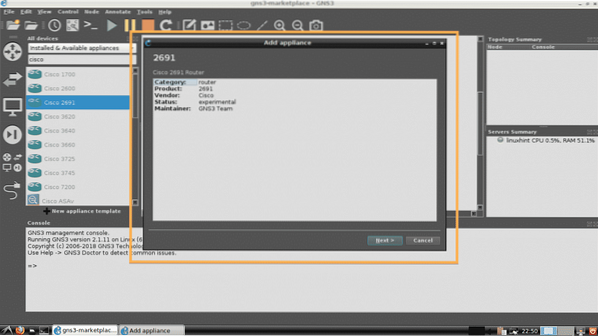
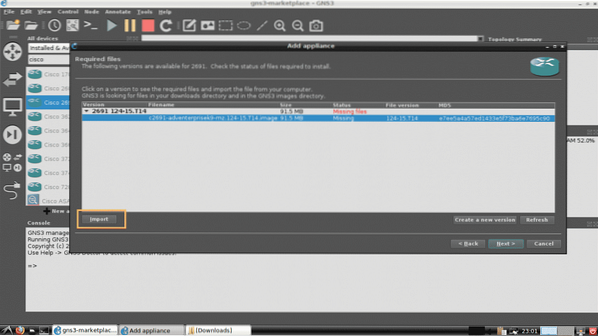
If you're trying to install GNS3 appliance that needs proprietary licensed files, the wizard should ask you to add required files. As you can see, the wizard asked me to add the file c2691-adventerprisek9-mz.124-15.T14.image, which is the image file for Cisco 2691 router. If you have a valid license for this router, you can download it from Cisco and add it here.

To add required files, click on Import.
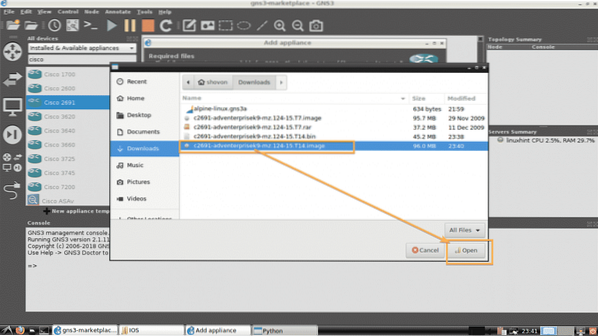
Now select the required file and click on Open.
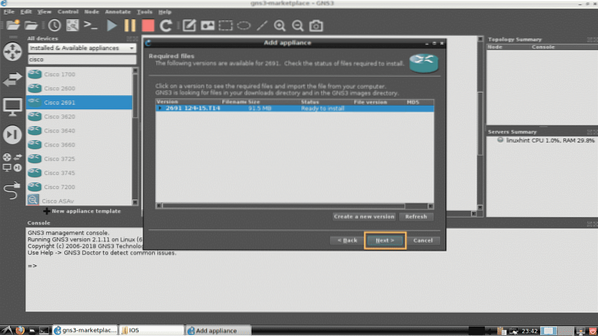
As you can see, the status has changed to Ready to install. Now click on Next.
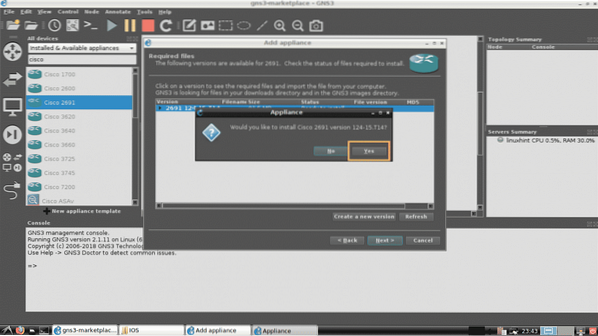
Now click on Yes.
Now click on Next.

Finally, click on Finish.
The Cisco 2691 GNS3 appliance should be installed as you can see. Now click on OK.

So, that's how you install GNS3 appliances from the GNS3 marketplace. Thanks for reading this article.