If the temperature of the processor of your Raspberry Pi is above 80 degrees Celsius, you will see a thermometer icon on the top right corner of the screen. Officially, the Raspberry Pi Foundation recommends that the temperature of your Raspberry Pi device should be below 85 degrees Celsius for it to work properly. That's the maximum limit. But it would start throttling at 82 degrees Celsius.
In this article, I will show you how to monitor the temperature of your Raspberry Pi. I will be using Raspbian operating system on my Raspberry Pi 3 Model B device. But it should work on any Raspberry Pi SBC with Raspbian operating system installed.
Measuring the Temperature of Raspberry Pi SBC:
You can measure the core temperature of your Raspberry Pi device with the following command:
$ vcgencmd measure_tempThe current core temperature is 48.3 degrees Celsius as you can see in the marked section of the screenshot below.

As you can see, each time I run the command shows different temperature value.

Parsing the Temperature Data:
The temperature data that we get from the vcgencmd command is a string. You can't perform any calculation on it. We can easily use Regular expression to extract only the temperature data and perform any type of calculation on it.
If you want to use the temperature data in a Bash shell script, then you can extract the temperature data with egrep command as follows:
$ vcgencmd measure_temp | egrep -o '[0-9]*\.[0-9]*'As you can see, only the temperature data is printed. There is nothing before or after it.

You can use it on your shell script (let's say print_temp.sh) as follows:
$ nano print_temp.sh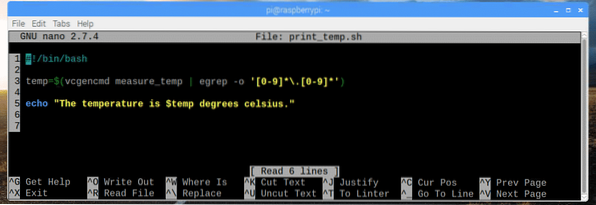
Here, on line 3, I set the temp variable to the parsed temperature data that I get from the vcgencmd and grep command.
On line 5, I used echo to print the content of the temp variable on the screen.
Line 1 is used to tell Linux that the script should be executed with /bin/bash by default.
Now, make the script executable with the following command:
$ chmod +x print_temp.sh
Now, run the script as follows:
$ ./print_temp.shAs you can see, the desired output is printed on the screen.

Writing a Raspberry Pi Temperature Monitoring Script:
Now that we can parse the temperature data that we get from the vcgencmd command, we can easily write a temperature monitoring script for Raspberry Pi. The temperature monitoring script will print the current timestamp and core temperature every second on the screen in a nicely formatted way.
First, create a new script tempmon.sh with the following command:
$ touch tempmon.shNow, edit the tempmon.sh script with the following command:
$ nano tempmon.sh
Now, type in the following lines of codes and save the file with
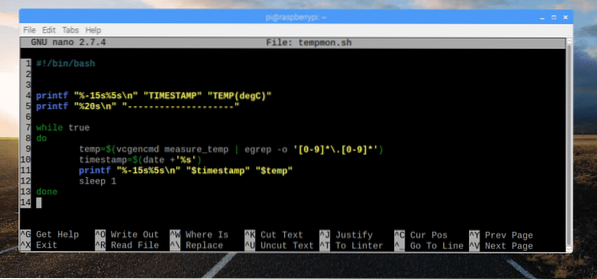
Here, on line 4, printf is used to print the TIMESTAMP and TEMP(degC) strings as fixed width column.
On line 5, I used printf again to print a dashed line just to make the output more readable and appealing.
On line 7-13, I ran an infinite loop to print the temperature data every second.
On line 9, I stored the parsed temperature data on the temp variable.
On line 10, I stored the timestamp data that I got from the date command on the timestamp variable.
On line 11, I printed the date and time in timestamp format and the temperature data in fixed width column format.
On line 12, I used the sleep 1 command to hold execution of the script for a second. Afterwards, the loop will continue.
Now, make the script tempmon.sh executable with the following command:
$ chmod +x tempmon.sh
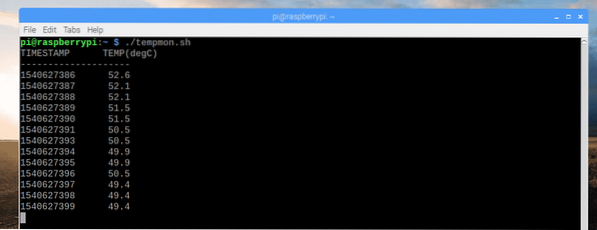
Finally, run the script tempmon.sh with the following command:
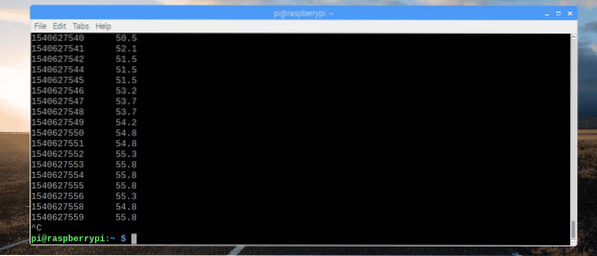
$ ./tempmon.shAs you can see, the temperature monitor script is working perfectly. It's printing the temperature data every second.
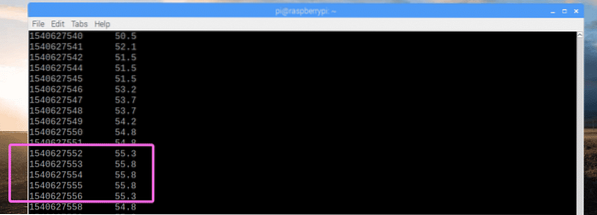
As you can see, as I increased the system load, the temperature increased slightly.
If you want to stop the temperature monitoring script, press
Now that the temperature monitoring script is working, let's copy it to /usr/bin directory. That way, you can run it like any other Linux commands.
To copy the script tempmon.sh to the /usr/bin directory, run the following command:
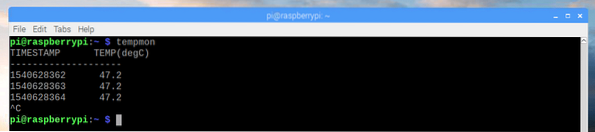
$ sudo cp tempmon.sh /usr/bin/tempmon
As you can see, I can run the temperature monitoring script just as I run standard Linux commands.
Modifying tempmon for Printing Temperature Data in Fahrenheit:
You can easily convert the temperature data from Celsius to Fahrenheit.
The widely known formula for calculating temperatures in Fahrenheit from Celsius is,
F = (9/5)* C + 32Or
F = 1.8 * C + 32
But the problem is, bash shell don't have necessary functions to perform floating point calculations. So, you have to rely on some other programs such as bc.
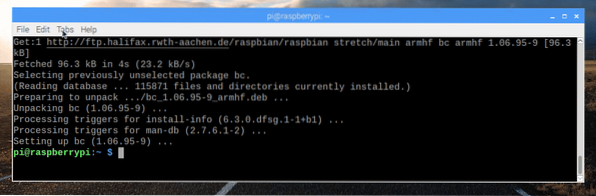
bc is not installed on Raspbian by default. But you can easily install it with the following command:
$ sudo apt install bc
bc should be installed.
Now, you have to modify the temperature monitoring script and make necessary calculations to convert the temperature to Fahrenheit from Celsius with bc.
Edit the tempmon.sh script with the following command:
$ nano tempmon.sh
Now, make the modifications as marked in the screenshot below.
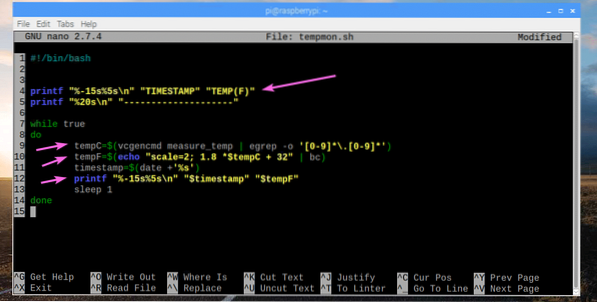
Here, on line 4, I printed TEMP(F) instead of TEMP(degC).
On line 9, I changed the variable from temp to tempC.
On line 10, I added the result of the Celsius to Fahrenheit conversion to a variable tempF.
Finally, I printed the value of tempF variable instead of temp on line 12.
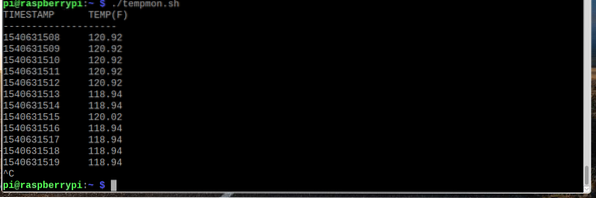
Now, run the script as follows:
$ ./tempmonAs you can see, the temperature is printed in Fahrenheit unit.
So that's how you monitor temperature in Raspberry Pi. Thanks for reading this article.


