OpenVAS is the open source version of Nessus, which emerged after Nessus became a closed source scanner. Nessus was among the first vulnerability scanners (of course Nmap is older and it can be used to scan holes as well). OpenVAS. It is considered one of the best security scanners, in this article I will show you how to install it on Ubuntu and give you a introduction to getting it setup and running your scans on Ubuntu systems. Lets get started.
OpenVAS Installation
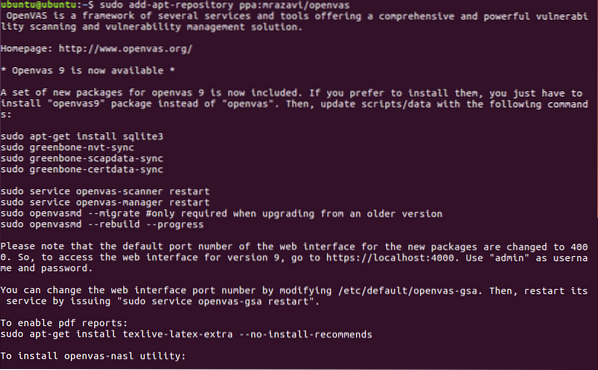
First of all we'll need to modify our repositories as shown in the image:
Then run :
apt-get update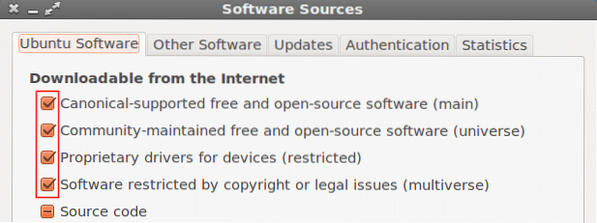
Now let's continue by downloading openvas9
sudo apt-get install openvas9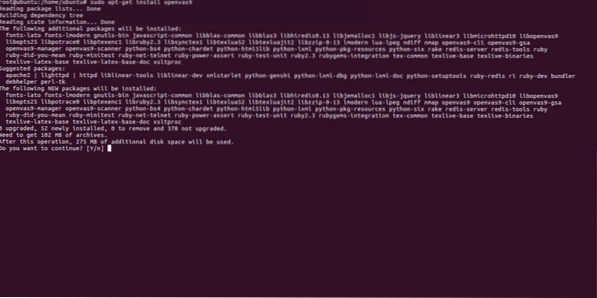
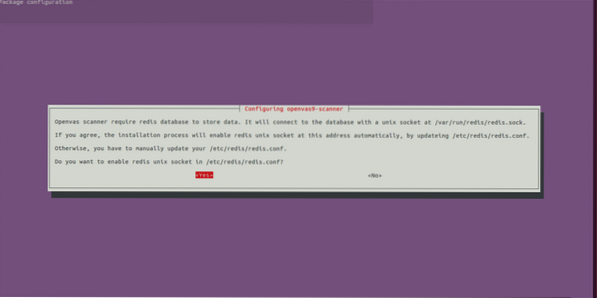
When asked if to proceed answer yes and continue the installation, a new screen asking YES or NO will prompt, just select yes and continue
After Openvas9 is installed, run the following commands:
sudo greenbone-nvt-syncsudo greenbone-scapdata-sync
sudo greenbone-certdata-sync
It may take an hour or more until the database updates.
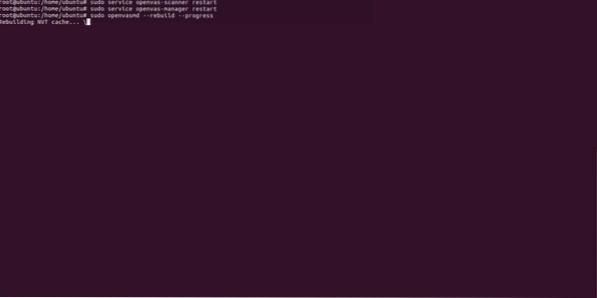
After the sync ends restart the services and rebuild the vulnerabilities database by running
service openvas-manager restart
openvasmd --rebuild --progress
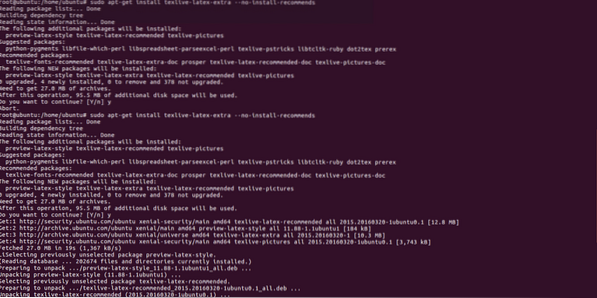
Last step to end the installation process:
sudo apt-get install libopenvas9-dev
Aftter installing we'll open https://localhost:4000 and we must see the following screen:
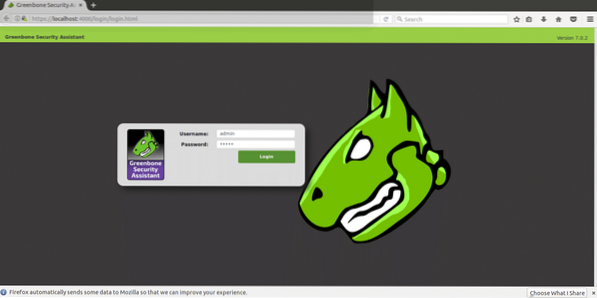
IMPORTANT: If you see an SSL error when opening the page, ignore it and continue ahead.
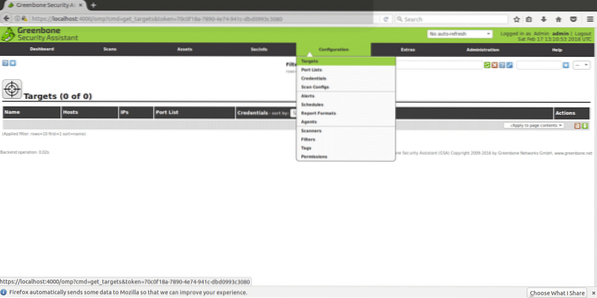
Login using “admin” both as user and password and once inside go to “configuration” and “target”.
Configuring our target and scanning requirements
Openvas can be used both from command line and through our browsers. In this tutorial I'll explain to use it's web version which is totally intuitive.
After logging in click on CONFIGURATION and then TARGET as shown in the following screenshot:
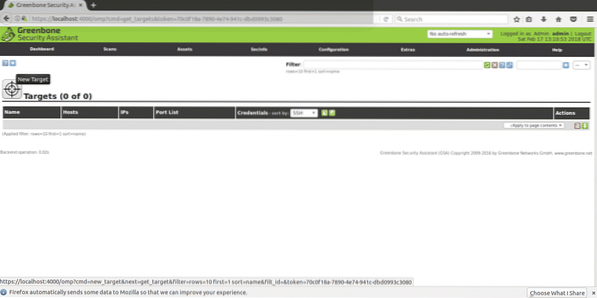
Once in “TARGETS” you'll see a little icon of a white star within a light blue square, click there to add your first target.
In the next window we'll see the following fields
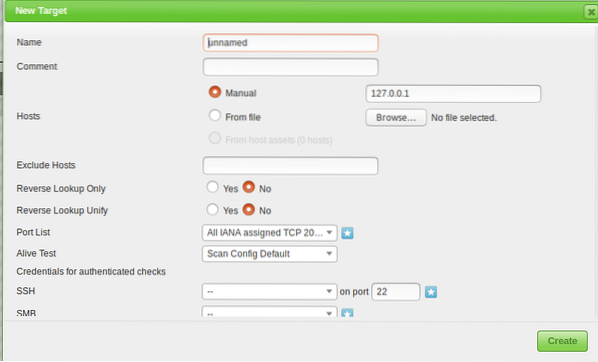
Name: Here you write the name of your target.
Comment: no comment
Hosts Manual / From file: You can set the IP or load a file with different hosts, you can also write a domain name instead of an IP.
Exclude hosts: If in the step above you defined a range of IPs here you can exclude hosts.
Reverse Lookup: I guess, I only guess these options are to discover domains linked to an IP if you input an IP instead of a domain name. I left this option NO as by default.
Port List: Here we can choose what ports we want to scan, I recommend to leave all ports both TCP and UDP if you have time.
Alive test: Leave as default, but if your target does not return ping (like Amazon servers for example) you may need to select “consider alive” to carry out the scan despite the lack of ping.
Credentials for authenticated checks: You can add your system's credentials to allow Openvas check for local vulnerabilities.
You need to input an ip address or domain name, the range of ports you want to scan and credentials only if you want to check for local vulnerabilities, and a name to identify the task.
To continue, in the main menu (the same menu bar in which we found CONFIGURATION) you'll find “SCANS”, click there and select “TASK” from the submenu and in the following screen you'll see again a white star within a light blue square on the top left side of your screen (exactly like when we created the target).
The window shown below will prompt
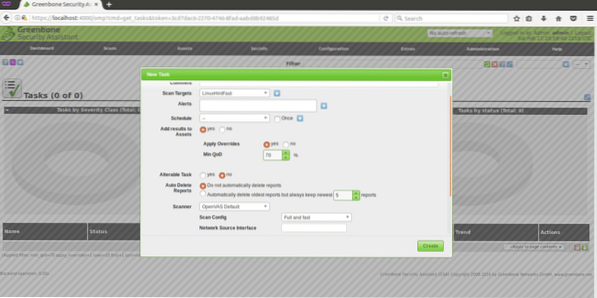
Scan Targets: here we'll choose the target we want to scan, it is a drop down menu which will display all targets we define.
Alerts: sends a notification under specific conditions, you can get email notifications for example, it is not useful to us now.
Override: This is useful to modify the reporting behaviour of Openvas. Through this feature you can prevent false positive or get Openvas to notify conditions otherwise it wouldn't.
MIn QoD: This mean “Minimal quality of detection” and with this option you can ask OpenVas to show only real potential threats. If you set 100% and Openvas detects a hole, it is for sure a functional security hole, an exploitable one, for this tutorial I left the default 70%.
Autodelete: This option allows us to overwrite old reports, you can choose how many reports do you want to save per task, by default if you mark to autodelete Openvas will save the last 5 reports but you can edit this.
Scan Config: This option is to select the intensity of the scan, to try Openvas select a fast scan before going with a real target. The most deep and ultimate scan may take days…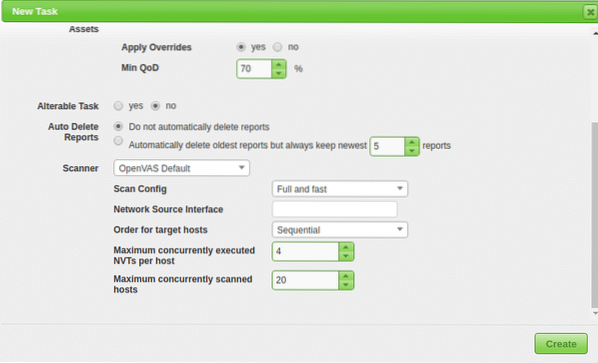
Network source interface: Here you can specify the network device.I didn't for this tutorial.
Order for target hosts:Touch this option if you selected an IP range or several targets and you have priorities regarding the order in which targets are scanned.
Maximum concurrently executed NVT per host: Here you can define the maximum of vulnerabilities checked for each target simultaneously.
Maximum concurrently scanned hosts: If you have different targets and tasks, you can run simultaneous scans, here you can define the maximum of simultaneous executions.
Scanning the target
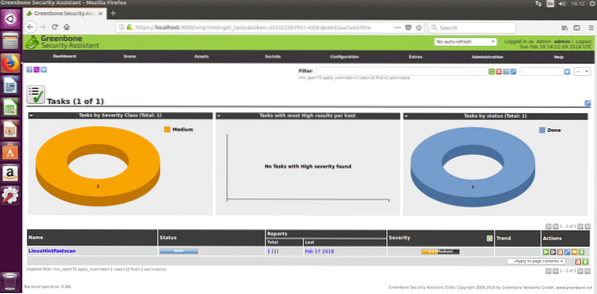
After all the steps above, we'll receive the following screen, in order to start the scan we need to press the white play button within a green square at the bottom of the page, where our task “LinuxHintFast” appears.
You can wait there or optionally click on your task's name and you'll get the following screen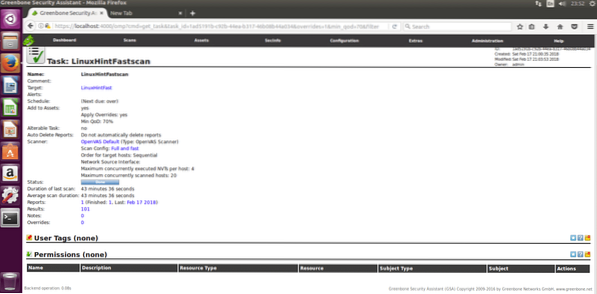
You'll need to refresh the page to see the progress. Once the scan is completed you can click on “RESULTS” to see them, and optionally you can download them as XML, I attach the XML reports of a scan against https://www.linuxinstitute.org as example (with the webmaster's approval).
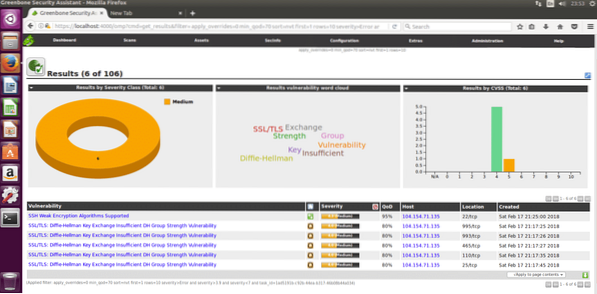
After clicking on results you'll see the following, in which 6 medium warnings appear. Click on the marked area (the yellow one,which can be red if the warnings are severe) to see details.
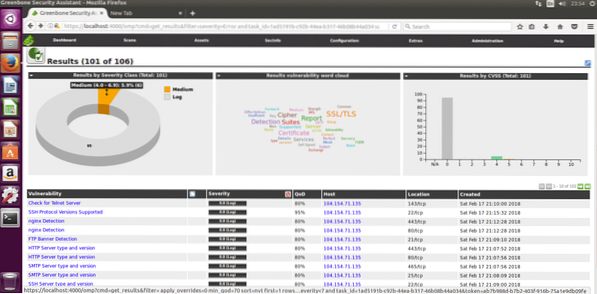
Here the detailed list of the 6 medium vulnerabilities detected:
I hope this introduction to OpenVas and installation guide will get you started with this very powerful security scanning solution.


