Kaisen Linux is a rolling Linux distribution which is based on Debian GNU/Linux testing. As Kaisen Linux is a rolling release, you can always use up to date software/tools on Kaisen Linux.
One of the best things about Kaisen Linux is that you can boot it from a USB thumb drive and do what you need to do to rescue a broken system without needing to install Kaisen Linux on your computer. Kaisen Linux also provides you with all the necessary drivers like wifi/video/sound/bluetooth etc., to ensure that you don't have to install anything after booting it from the USB thumb drive. Kaisen Linux can also boot on BIOS/UEFI hardware.
You can load the entire Kaisen Linux into your computer's RAM/memory while you boot Kaisen Linux from the USB thumb drive. You can remove the USB thumb drive from your computer once Kaisen Linux has booted in Live mode. This feature will save a USB port on your computer if you're short on USB ports.
In this article, I will show you how to download Kaisen Linux and make bootable USB thumb drives of Kaisen Linux from Windows and Linux operating systems. I will also show you how to boot Kaisen Linux from the USB thumb drive and install Kaisen Linux on your computer. So, let's get started.
Downloading Kaisen Linux:
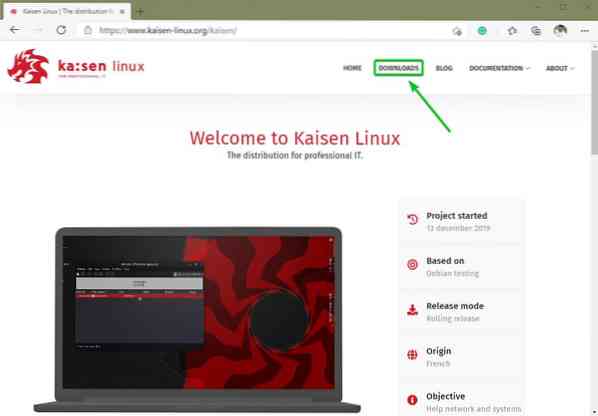
You can download Kaisen Linux from the official website of Kaisen Linux.
Visit the official website of Kaisen Linux from a web browser and click on DOWNLOADS once the page loads.
You can download different flavors of Kaisen Linux from here.
Kaisen Linux ISO image is available with the following desktop environments:
- MATE Desktop Environment
- KDE Plasma 5 Desktop Environment
- XFCE 4 Desktop Environment
- LXDE Desktop Environment
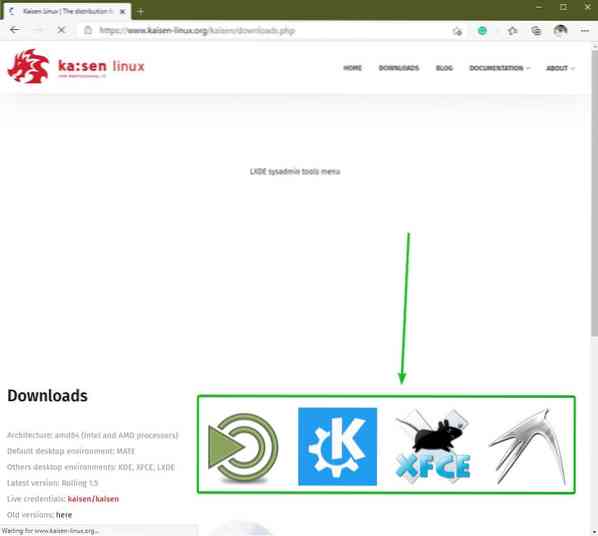
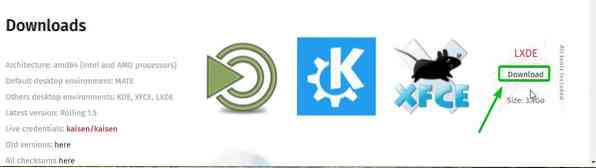
Click on the desktop environment icon you like, and a Download link should appear. Click on it to download the ISO image of Kaisen Linux with your desired desktop environment.
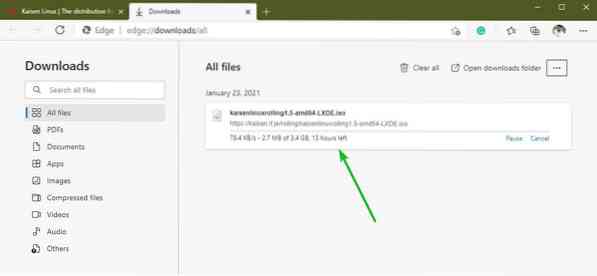
Your browser should prompt you to save the Kaisen Linux ISO image. Click on Save.
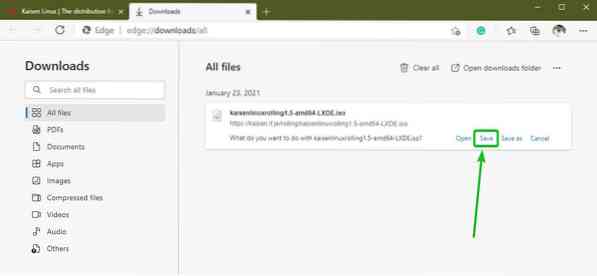
Your browser should start downloading the ISO image of Kaisen Linux. It may take quite a while to complete.
Making a Bootable USB Thumb Drive of Kaisen Linux on Windows:
Once the Kaisen Linux ISO image is downloaded, you can make a bootable USB thumb drive of Kaisen Linux.
On Windows 10, you can use Rufus to make a bootable USB thumb drive easily.
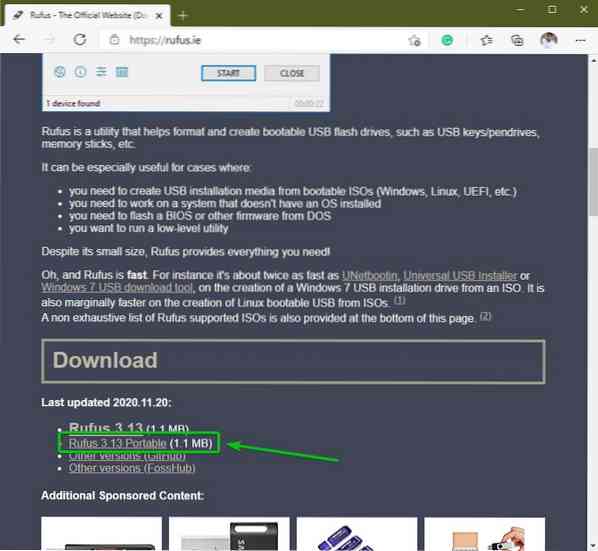
Rufus is a free program that you can download from the official website of Rufus.
Visit the official website of Rufus from your favorite web browser. Once the page loads, scroll down a little bit and click on the Rufus Portable link as marked in the screenshot below.
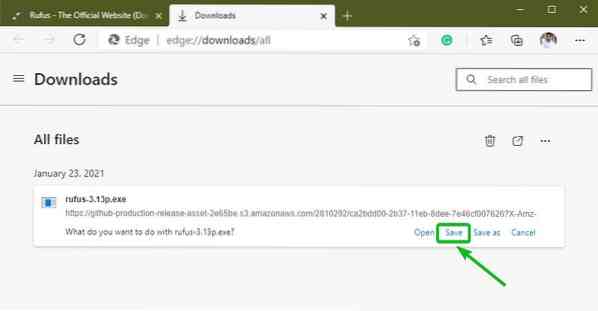
Your browser should prompt you to save the Rufus Portable executable. Click on Save.
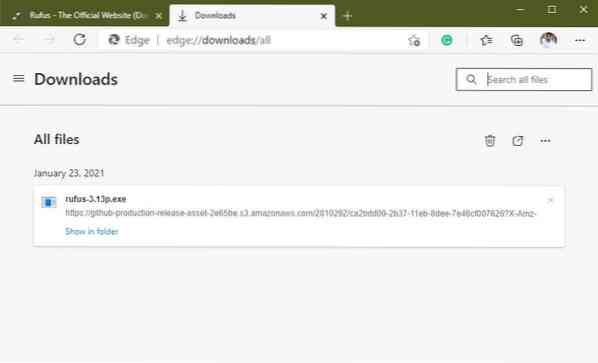
Rufus should be downloaded. It's a small piece of software (about 1 MB in size).
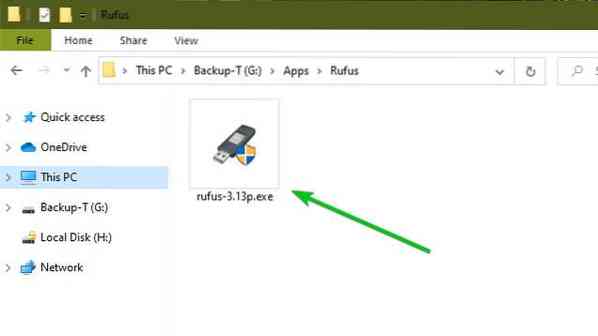
Once Rufus is downloaded, plug in the USB thumb drive on your computer and run Rufus.
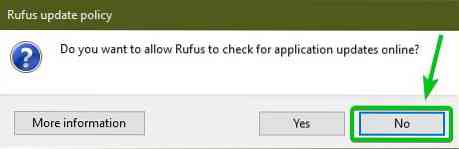
You will see the following prompt if you're starting Rufus for the first time. Click on No.
Rufus should start.
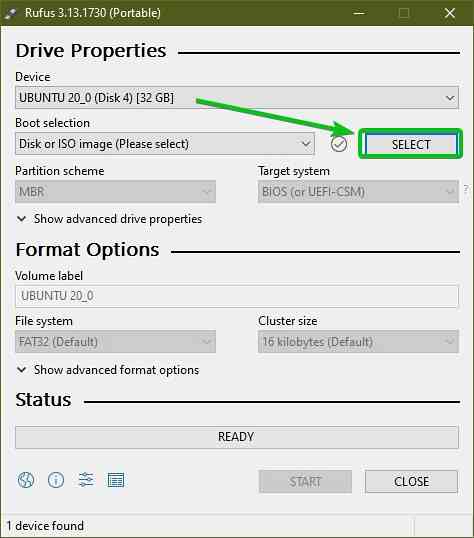
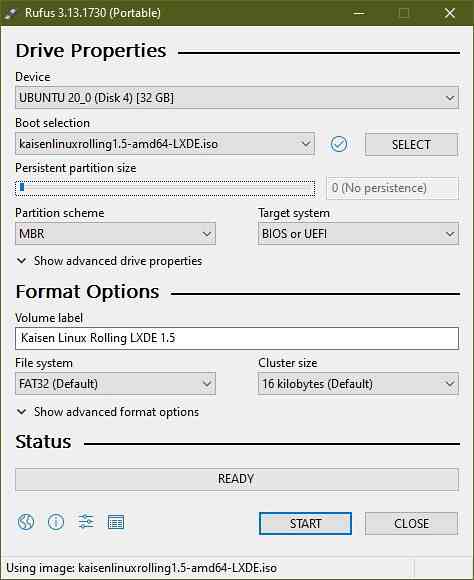
Make sure your USB thumb drive is selected in the Device section. Then, click on SELECT to select the Kaisen Linux ISO image that you've downloaded.
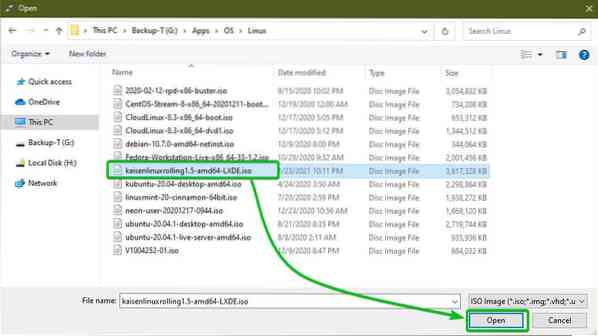
A file picker should be opened. Select the Kaisen Linux ISO image that you've downloaded and click on Open.
The Kaisen Linux ISO image should be selected.
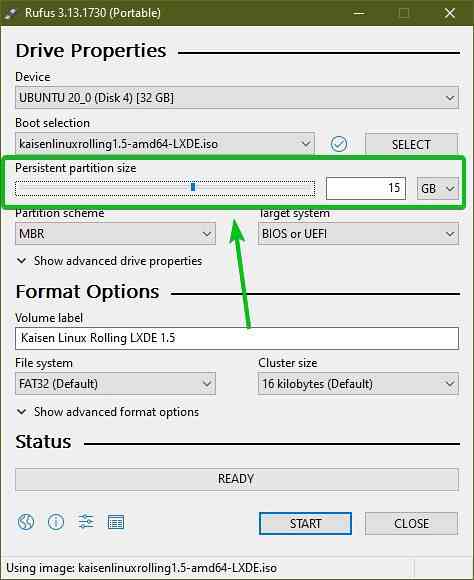
If you want to save the changes, you will make to the Live Kaisen Linux OS, set the persistence partition size from the Persistent partition size section as shown in the screenshot below.
You can either drag the slider or type in the amount of disk space (in GB) to set the persistence partition size.
I will not create a persistence partition in this article. I just wanted to show you how to do it. That's all.
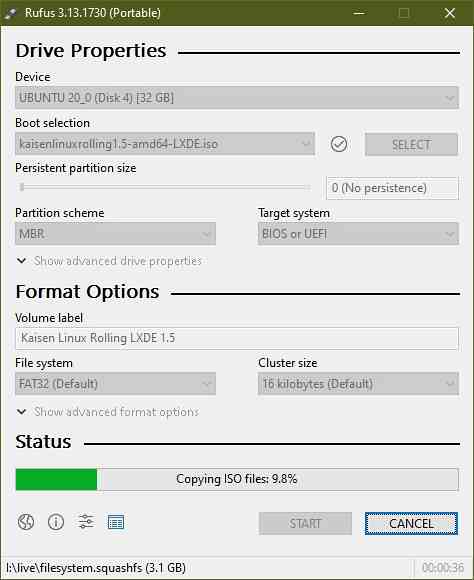
To start flashing the USB thumb drive with the Kaisen Linux ISO file, click on START.

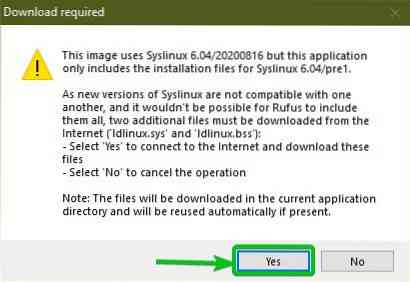
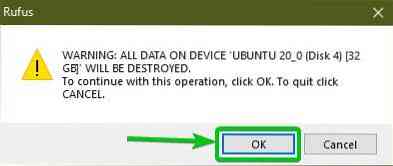
Click on Yes.
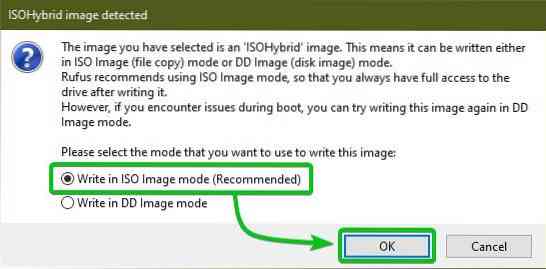
Select Write in ISO Image mode (Recommended) and click on OK.
Click on OK.
Rufus should start copying all the required files from the ISO image to the USB thumb drive. It may take a while to complete.
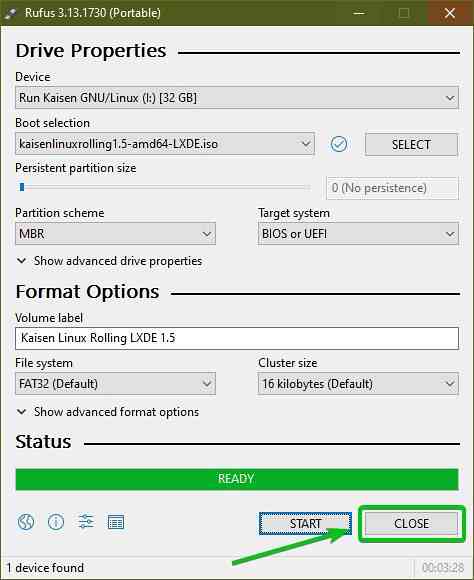
Once your USB thumb drive is READY, click on CLOSE.
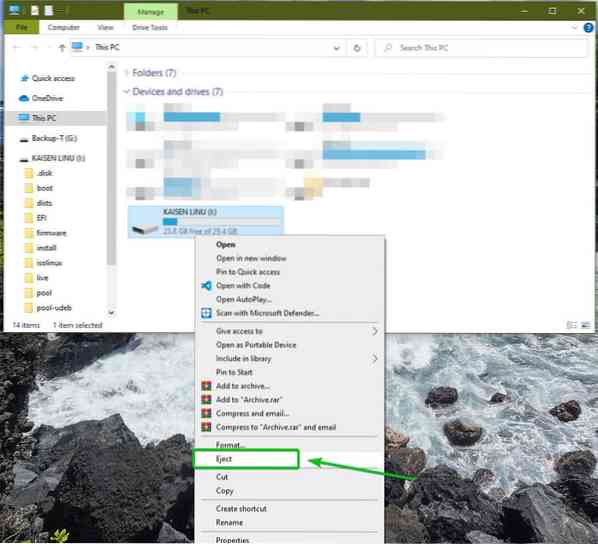
Now, right-click (RMB) on your USB thumb drive and click on Eject to safely remove the USB thumb drive from your computer. Your USB thumb drive should be ready to use.
Making a Bootable USB Thumb Drive of Kaisen Linux on Linux:
You can also make a bootable USB thumb drive of Kaisen Linux from any Linux distribution. You don't have to download any extra software to do so. Every Linux distribution already has the dd command-line program that you can use to make bootable USB thumb drives from an ISO image.
Let's say you have downloaded the Kaisen Linux ISO image (kaisenlinuxrolling1.5-amd64-LXDE.iso) in the ~/Downloads directory of your computer.
$ ls -lh ~/Downloads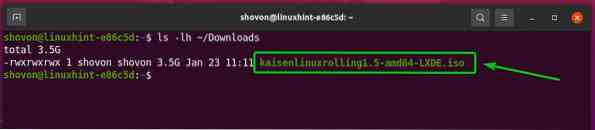
To flash the Kaisen Linux ISO image to the USB thumb drive, you need to know the USB thumb drive's device name.
To do that, run the following command once before and after you plug in the USB thumb drive on your computer.
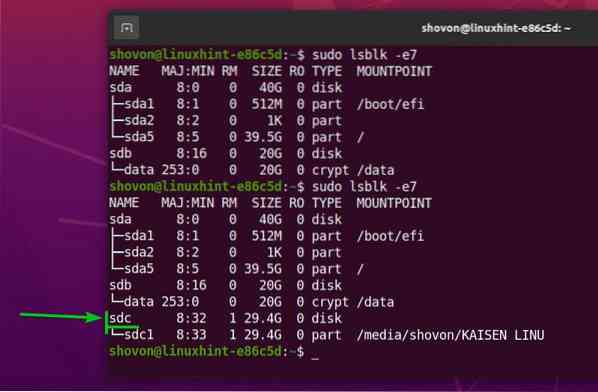
$ sudo lsblk -e7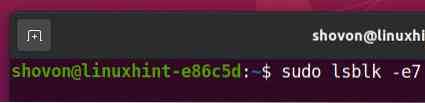
You should see a new device if you compare the output.
In my case, the new device name is sdc, as you can see in the screenshot below. It may be different for you. So, make sure to replace it with yours from now on.
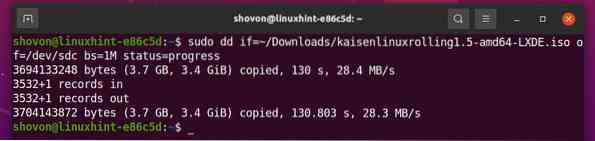
To flash the Kaisen Linux ISO image to the USB thumb drive sdc, run the following command:
$ sudo dd if=~/Downloads/kaisenlinuxrolling1.5-amd64-LXDE.iso of=/dev/sdc bs=1M status=progress
The Kaisen Linux ISO image is being flashed on to the USB thumb drive. It may take a while to complete.

At this point, the Kaisen Linux ISO image should be flashed on to the USB thumb drive.
Now, eject the USB thumb drive sdc with the following command:
$ sudo eject /dev/sdc
Enabling Persistence on Kaisen Linux Bootable USB Thumb Drive from Linux:
On Windows, you have used Rufus to create a bootable USB thumb drive of Kaisen Linux. It was really easy to add persistence support from Rufus. But, on Linux, you have to create a persistence partition manually to enable persistence.
First, plug in the bootable USB thumb drive of Kaisen Linux, which you've created earlier on your Linux computer.
Then, unmount all the mounted partitions of your USB thumb drive with the following command:
$ sudo umount /dev/sdc1,2
As you can see, the Kaisen Linux bootable USB thumb drive currently has 2 partitions (sdc1 and sdc2).
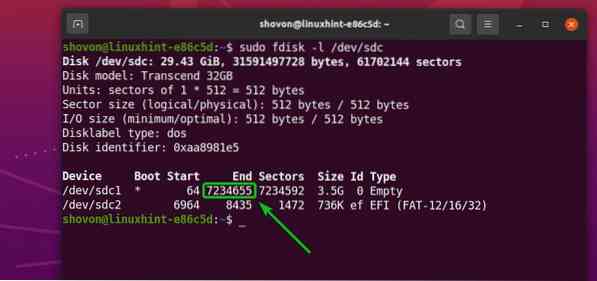
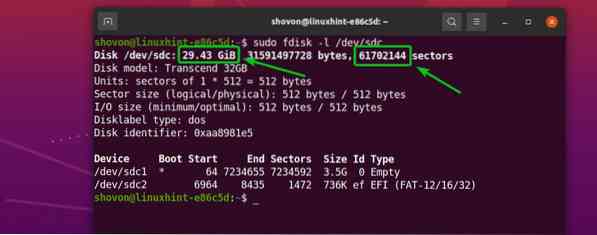
$ sudo fdisk -l /dev/sdc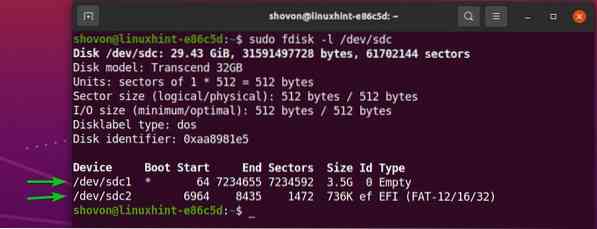
The sdc1 partition is the main partition. The sdc2 partition is a partition within the sdc1 partition.
Notice that the sdc1 partition ends in sector number 7234655. So, if you want to create a new partition, it will have to start from sector number 7234655 + 1 = 7234656.
Also, notice that the Kaisen Linux bootable USB thumb drive (in my case) is 29.43 GiB in size. In total, the USB thumb drive has 61702144 sectors.
So, the new partition will have to end in sector number 61702144 - 1 = 61702143 if you want to use all the free space of your USB thumb drive for persistence.
NOTE: If you want to create a smaller partition for persistence, you can do so. You don't have to use all the free space of your USB thumb drive like I am doing in this article.
So, if you want to use all the free disk space of the USB thumb drive, the new persistence partition will have to,
- Start from sector number 7234656
- End in the sector number 61702143
NOTE: These numbers will change for you as you will be using a different USB thumb drive than mine. Also, the Kaisen Linux ISO file may have a different size by reading this article. So, always make sure to do the necessary calculations and adjust the numbers as required.
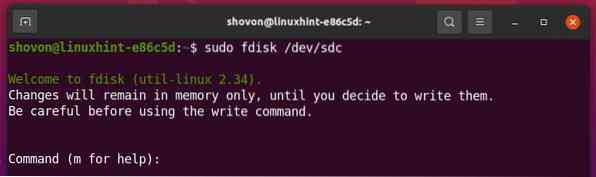
Now, open the Kaisen Linux bootable USB thumb drive sdc with the fdisk partitioning program as follows:
$ sudo fdisk /dev/sdc
fdisk should be opened.
To create a new partition, press n, and press
We want to create a primary partition. So, press p and then press
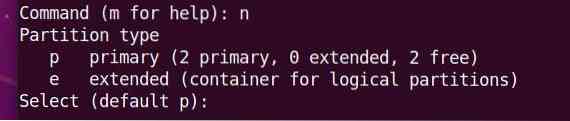
We want to create a 3rd partition. So, press 3 and then press

Type in 7234656 as the first sector number and press

Type in 61702143 as the last sector number and press

A new partition should be created.
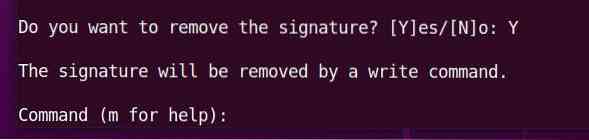
At the same start sector, you may already have a partition. If you do, fdisk will show you the following prompt.
If you see the following prompt, press Y and then press

The existing partition signature should be removed.
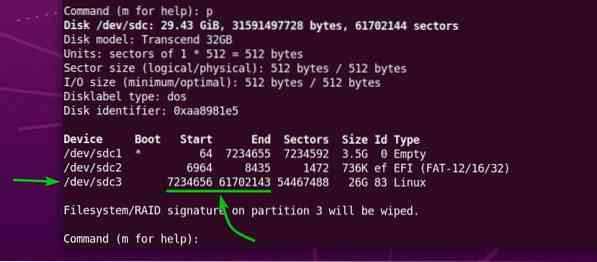
Press p and then press
As you can see, a new partition sdc3 is created. The start sector is 7234656, and the end sector is 61702143, just like we wanted.
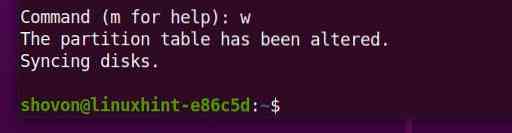
To write the changes to the partition table of your USB thumb drive, press w and then press
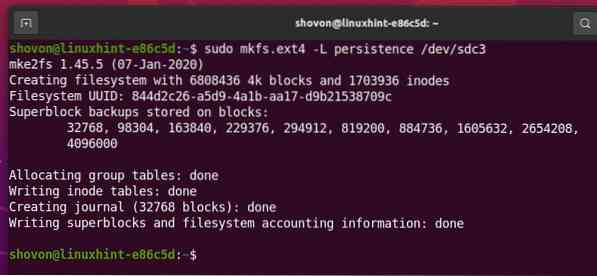
Now, create an EXT4 filesystem on the newly created partition sdc3 of your USB thumb drive and add the label persistence to the EXT4 filesystem as follows:
$ sudo mkfs.ext4 -L persistence /dev/sdc3
An EXT4 filesystem with the label persistence should be created on the sdc3 partition of your USB thumb drive, as you can see in the screenshot below.
Mount the partition sdc3 in the /mnt directory as follows:
$ sudo mount /dev/sdc3 /mnt
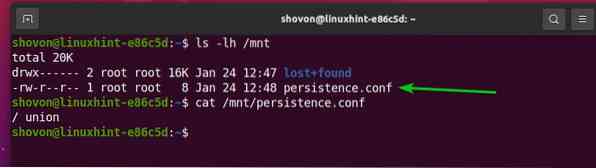
Create a new file persistence.conf on the filesystem root of the sdc3 partition with the content '/ union' as follows:
$ echo "/ union" | sudo tee /mnt/persistence.conf
A new file persistence.conf with the content '/ union' should be created in the sdc3 partition, as you can see in the screenshot below.
$ ls -lh /mnt$ cat /mnt/persistence.conf
Now, unmount the newly created partition sdc3 as follows:
$ sudo umount /dev/sdc3
Finally, eject the Kaisen Linux bootable USB thumb drive sdc from your computer with the following command:
$ sudo eject /dev/sdc
Booting Kaisen Linux from the USB Thumb Drive:
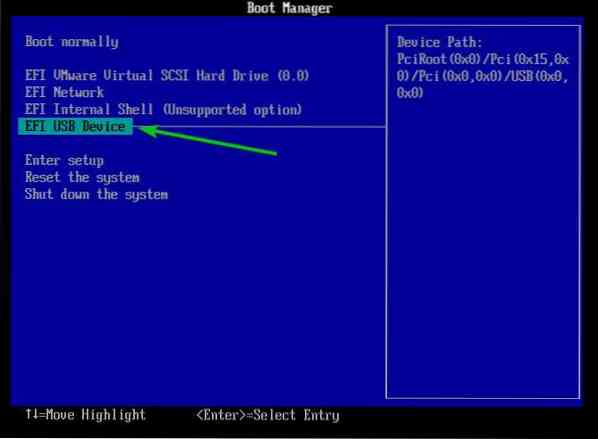
To boot Kaisen Linux from the USB thumb drive, plug the USB thumb drive in your computer and go to your computer's BIOS. You usually keep pressing the
From the BIOS of your computer, boot from the USB device (the one you've flashed with the Kaisen Linux ISO).
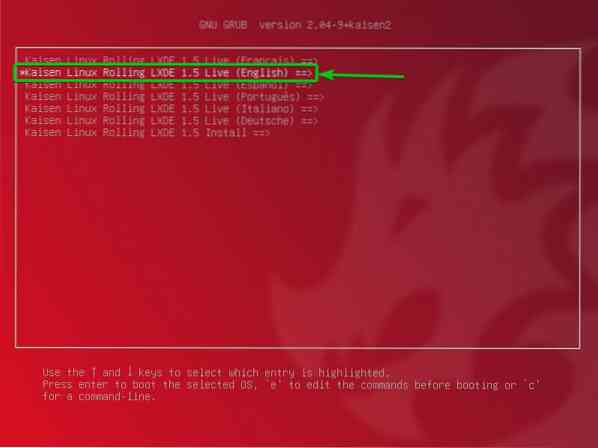
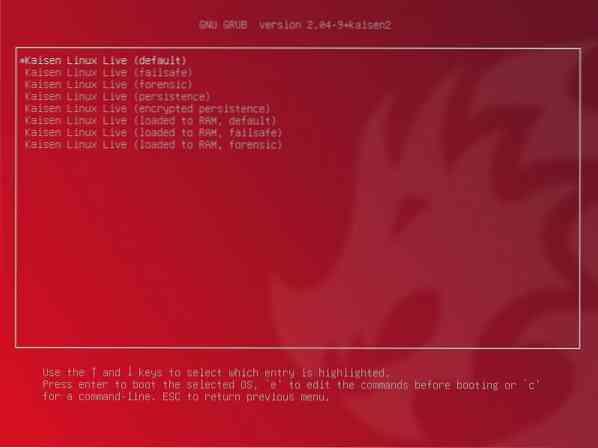
You should see the Kaisen Linux GRUB menu as in the screenshot below.
Select Kaisen Linux Rolling LXDE 1.5 Live (English) and press
From here, you can select how you want Kaisen Linux Live to run on your computer.
default: Start Kaisen Linux without any special options.
failsafe: Start Kaisen Linux in repair mode. This mode disables certain features (i.e., multi-threading and direct access to RAM) to facilitate the detection of different problems.
forensic: Start Kaisen Linux with some security features. This mode deactivates some USB equipment, NVIDIA and AMD GPUs, a swap partition, etc.
persistence: Start Kaisen Linux with persistence enabled. By default, the changes you made to Kaisen Linux in Live mode is erased when you power off or restart your computer. Persistence mode allows you to store the changes to your USB thumb drive. You need to set up your USB thumb drive in a very specific way to enable persistence.
encrypted persistence: This mode is the same as persistence mode. The only difference is that the persistence partition will be encrypted with cryptsetup and LUKS.
loaded to RAM, default: Copy the contents of the USB thumb drive to the RAM and boot Kaisen Linux Live in default mode. This mode allows you to remove the USB thumb drive from the computer once Kaisen Linux boots.
loaded to RAM, failsafe: Copy the contents of the USB thumb drive to the RAM and boot Kaisen Linux Live in failsafe mode. This mode allows you to remove the USB thumb drive from the computer once Kaisen Linux boots.
loaded to RAM, forensic: Copy the contents of the USB thumb drive to the RAM and boot Kaisen Linux Live in forensic mode. This mode allows you to remove the USB thumb drive from the computer once Kaisen Linux boots.
Once you select an option, Kaisen Linux Live should be loading. It may take a few seconds to complete.
Kaisen Linux should start in Live mode.
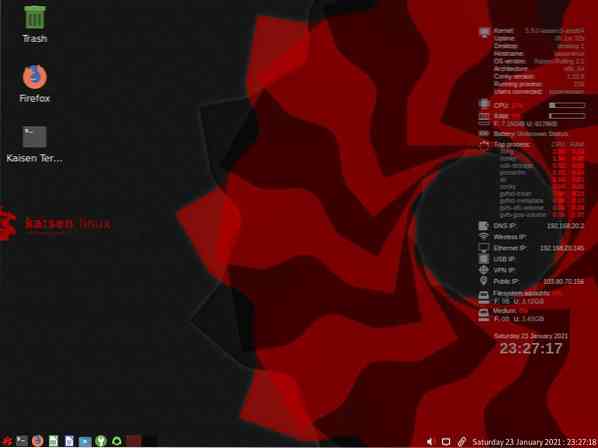
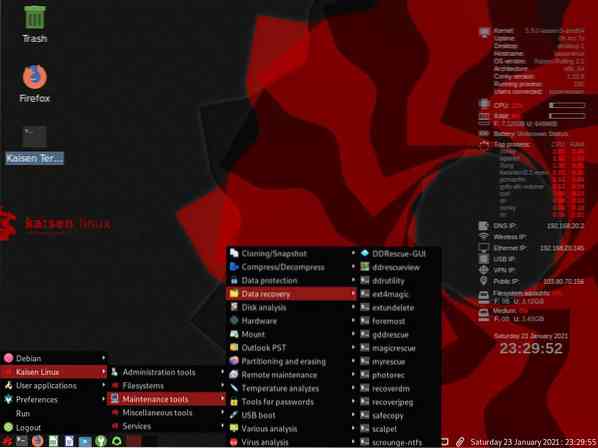
Kaisen Linux has many pre-installed software and tools to help you rescue a broken system, recover data, and many more.
Installing Kaisen Linux:
You can install Kaisen Linux on your computer and use it as a regular Linux distribution if you want.
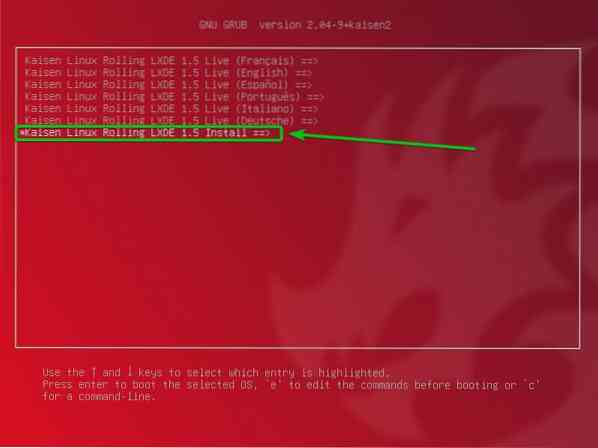
To install Kaisen Linux, boot Kaisen Linux from the USB thumb drive and select Kaisen Linux Rolling LXDE 1.5 Install from the Kaisen Linux GRUB menu as marked in the screenshot below.
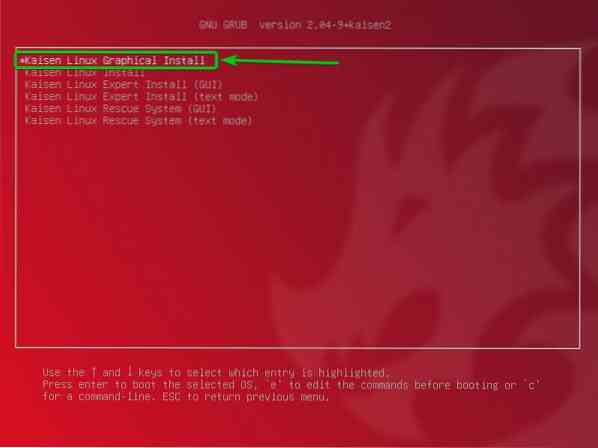
Select Kaisen Linux Graphical Install and press
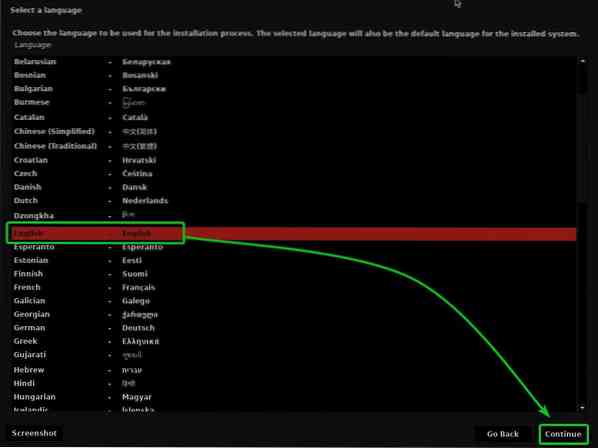
The Kaisen Linux Graphical Installer should start. You can install Kaisen Linux on your computer from here.
First, select your language and click on Continue.
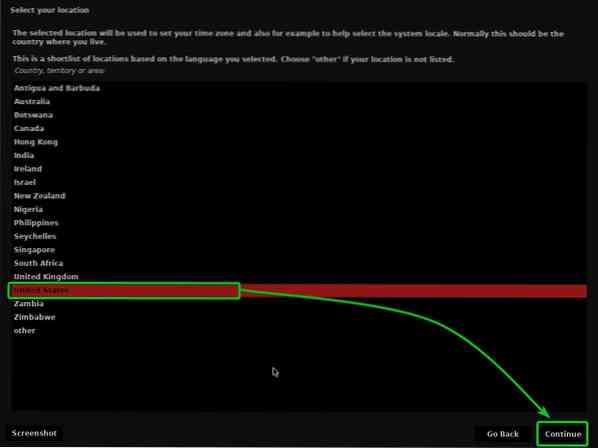
Select your location and click on Continue.
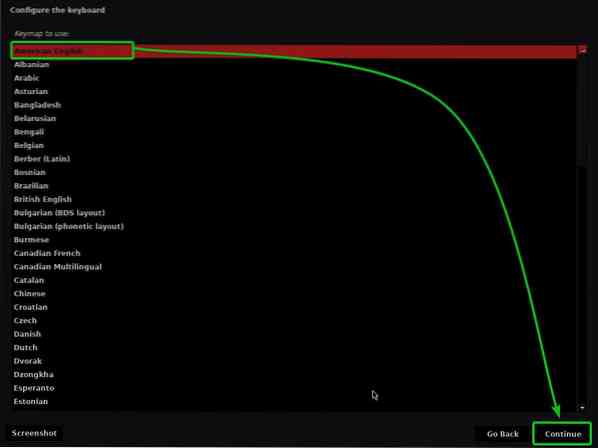
Select your keyboard layout and click on Continue.
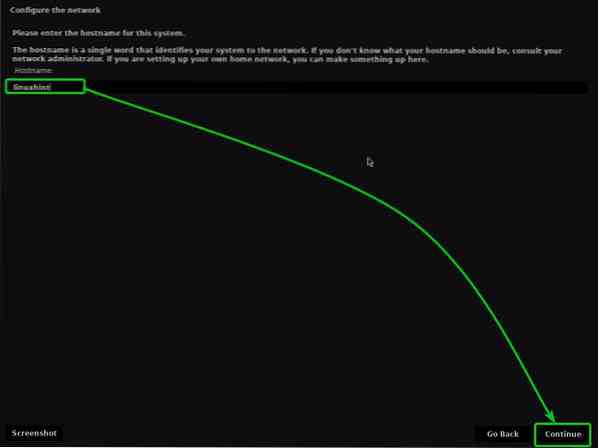
Type in a hostname or computer name and click on Continue.
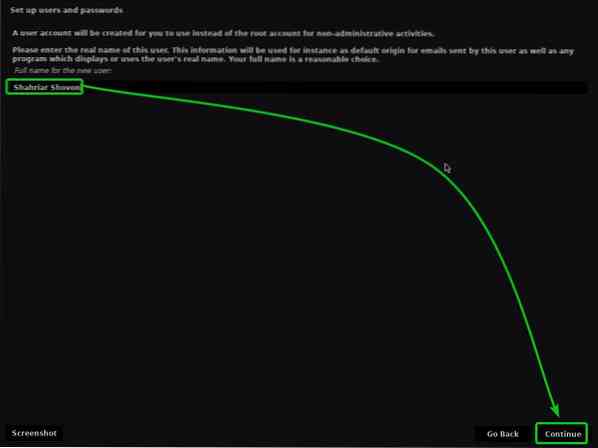
Type in your full name and click on Continue.
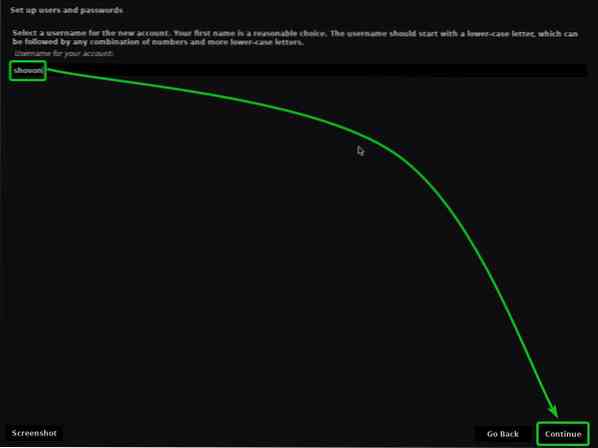
Type in your username or login name and click on Continue.
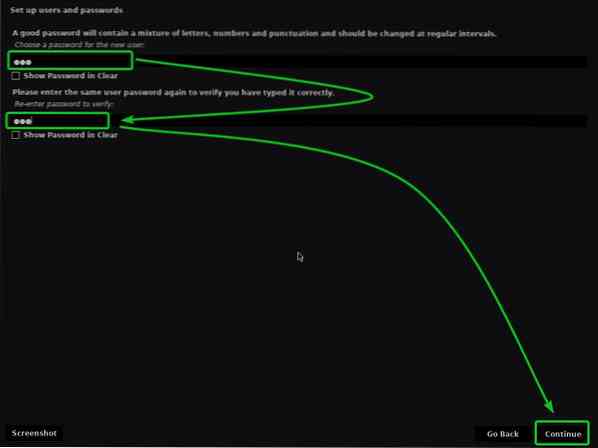
Type in a password and click on Continue.
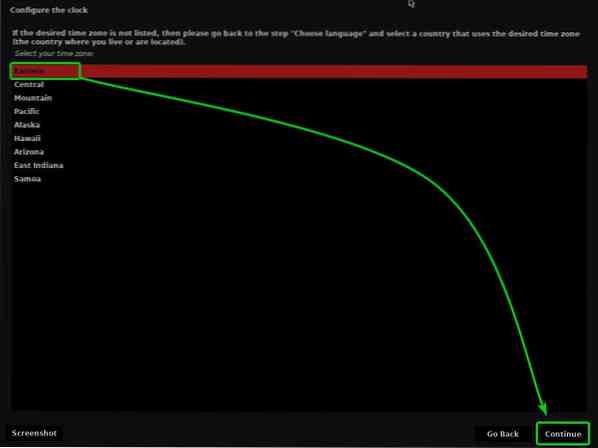
Select your timezone and click on Continue.
Now, you have to partition your HDD/SSD.
You can select Guided - use entire disk and click on Continueto let Kaisen Linux use the entire HDD/SSD and create required partitions automatically.

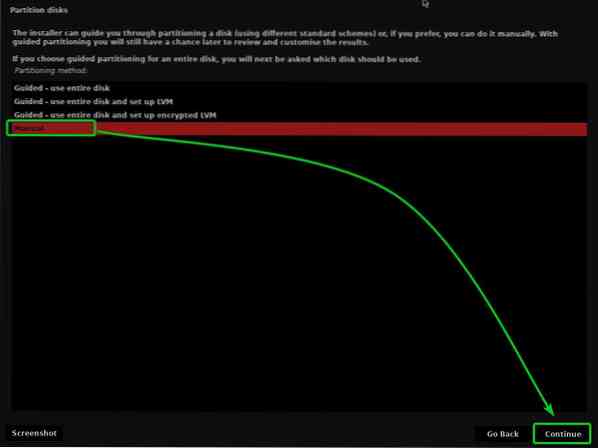
If you want to manually partition your HDD/SSD, select Manual and click on Continue.
In this article, I will show you how to do manual partitioning for installing Kaisen Linux.
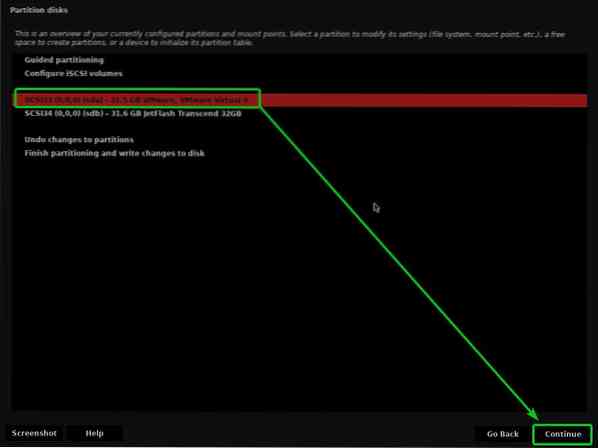
Once you select the Manual partitioning method, you will be asked to select an HDD/SSD which you want to partition.
Select the HDD/SSD you want to partition manually and click on Continue.
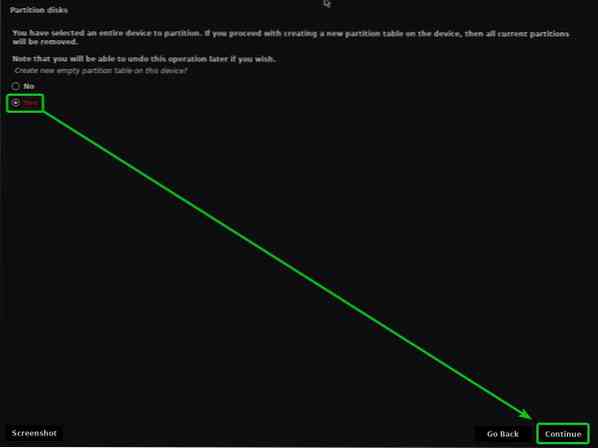
If you're using a new HDD/SSD, you most likely won't have a partition table. In this case, you will see the following prompt.
Select Yes and click on Continue to create a new partition table on your HDD/SSD.
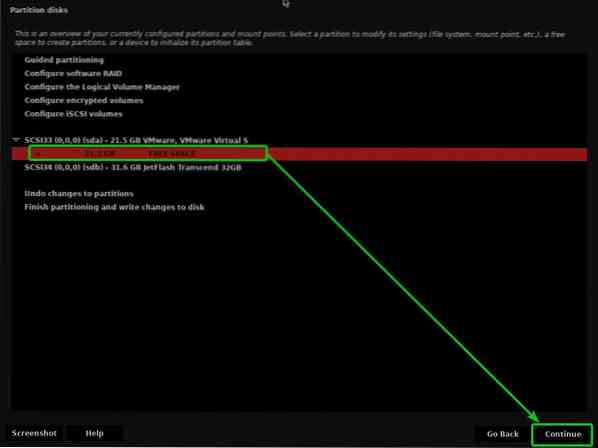
Once the partition table is created, you can create as many partitions as you want.
To install Kaisen Linux, we need at least 2 partitions.
- A 256 MB Reserved BIOS boot area partition or EFI System Partition for keeping the bootloader files.
- A root (/) partition for keeping all the system files and data.
Let's create the boot partition first.
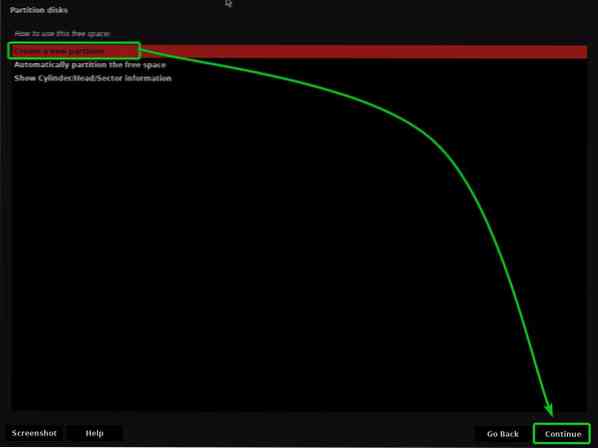
To create a new partition, select the FREE SPACE and click on Continue to create a new partition.
Select Create a new partition and click on Continue.
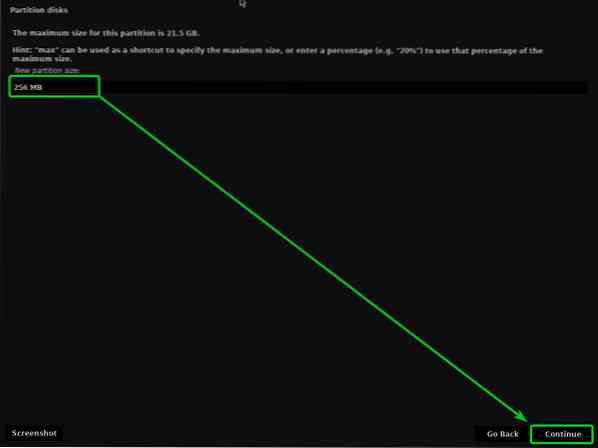
As you're creating a boot partition, type in 256 MB as the new partition size and click on Continue.
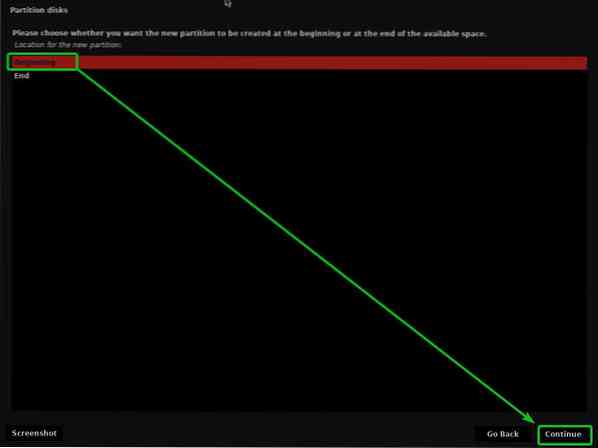
Select Beginning and click on Continue.
Select Use as and click on Continue.
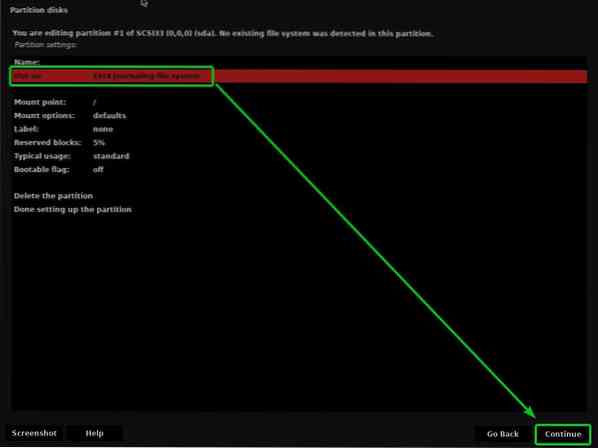
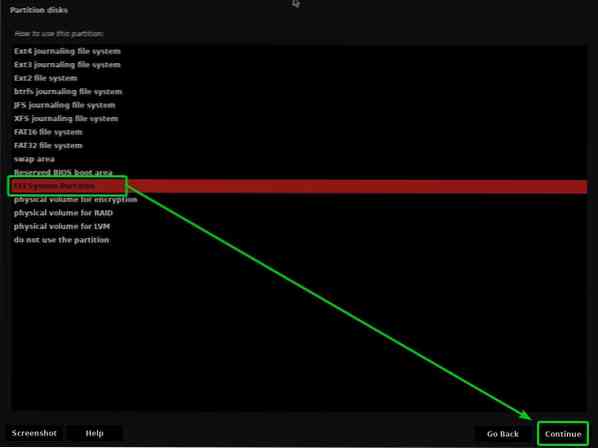
Now, if you're using a UEFI compatible motherboard (most likely you're), select EFI System Partition and click on Continue.
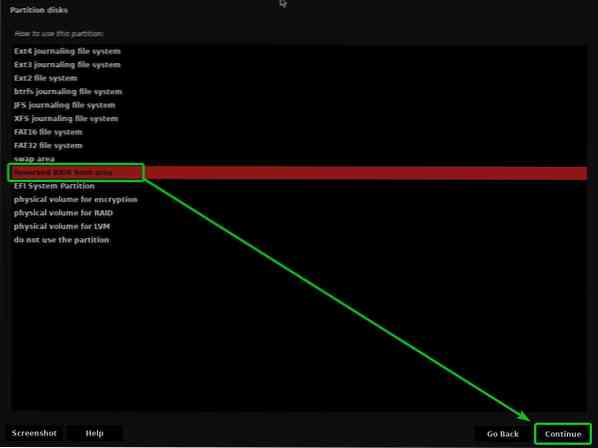
If you're trying to install Kaisen Linux on a very old computer that only supports BIOS, then select Reserved BIOS boot area and click on Continue.
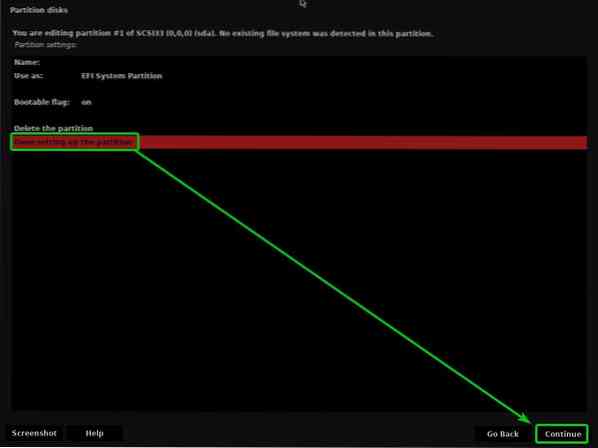
Then, select Done, setting up the partition, and click on Continue.
The boot partition should be created.
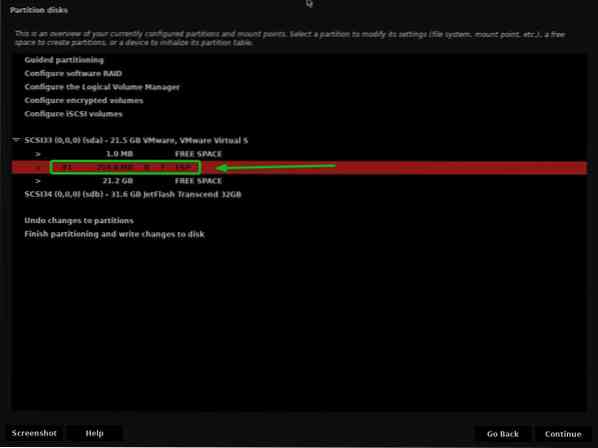
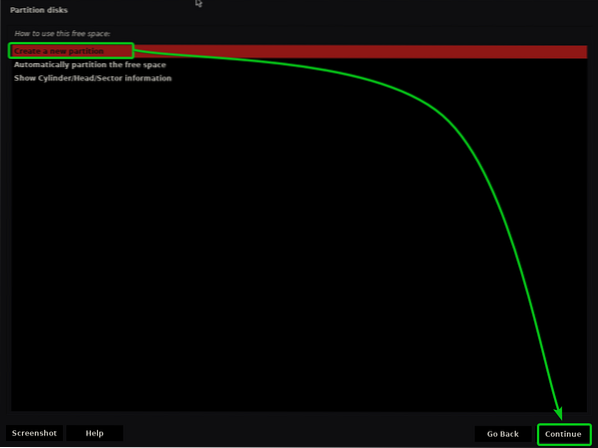
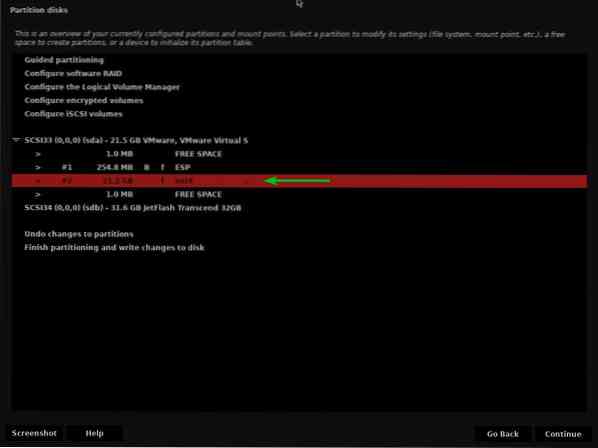
To create the root (/) partition, select the FREE SPACE and click on Continue.
Select Create a new partition and click on Continue.
Type in the size of the root partition you want and click on Continue.
If you want to allocate all the available free space to the root (/) partition, you can use the keyword max instead of a specific partition size as well.

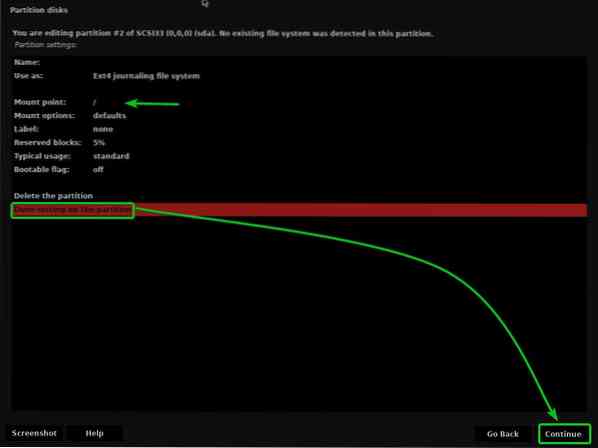
Make sure that the Mount point is set to /.
Then, select Done setting up the partition, and click on Continue.
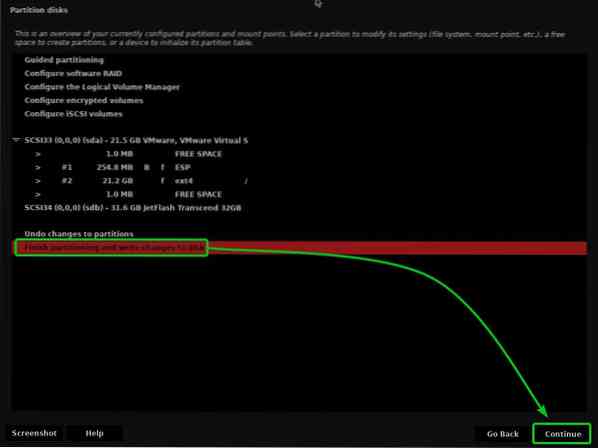
The root (/) partition should be created.
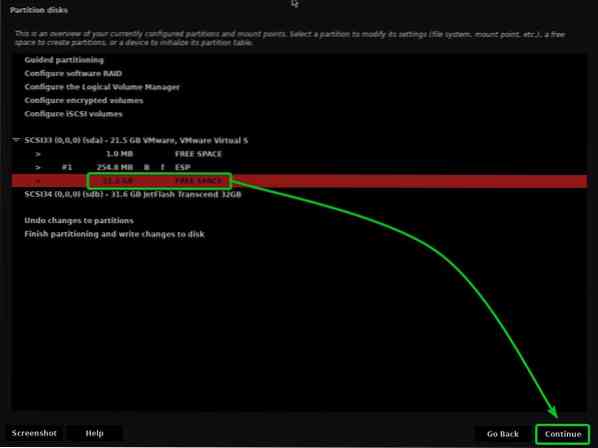
Now, select Finish partitioning and write changes to disk and click on Continue.
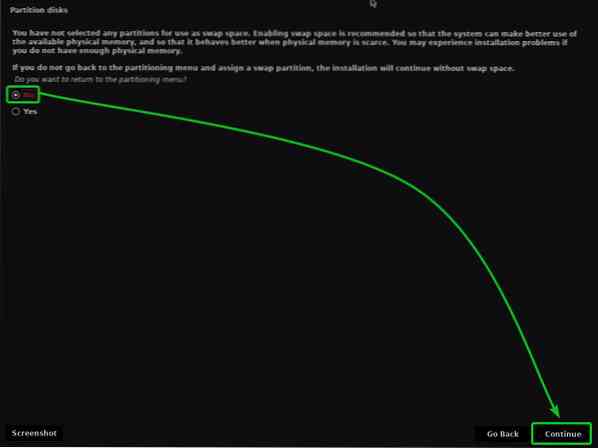
If you haven't created a Swap partition, you will see the following prompt asking you to go back and create one.
I am not going to create a Swap partition. So, I will select No and click on Continue.
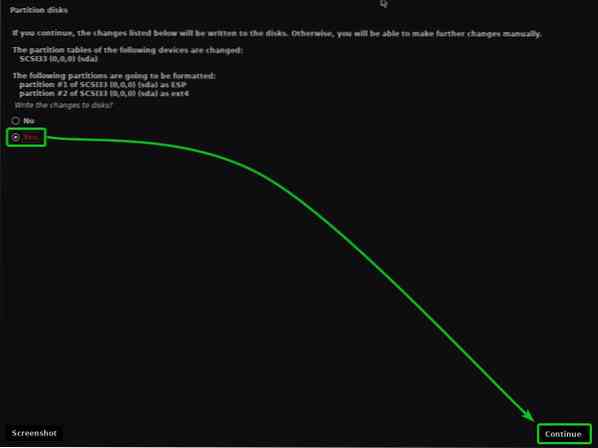
To save the changes to the partition table, select Yes and click on Continue.
Kaisen Linux installer should start installing Kaisen Linux on your HDD/SSD. It may take a while to complete.
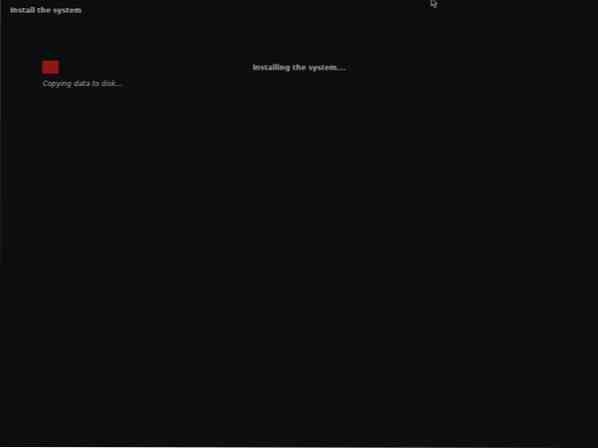
Kaisen Linux is being installed.
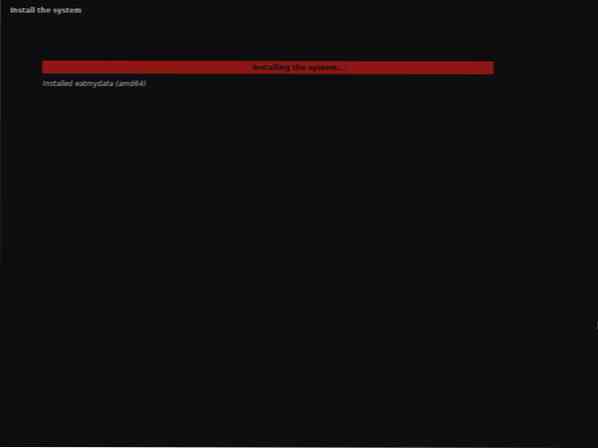
Kaisen Linux is being installed.
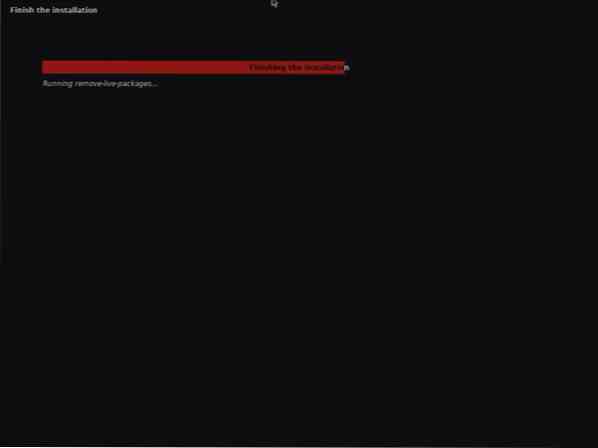
Once the installation is complete, your computer should reboot.
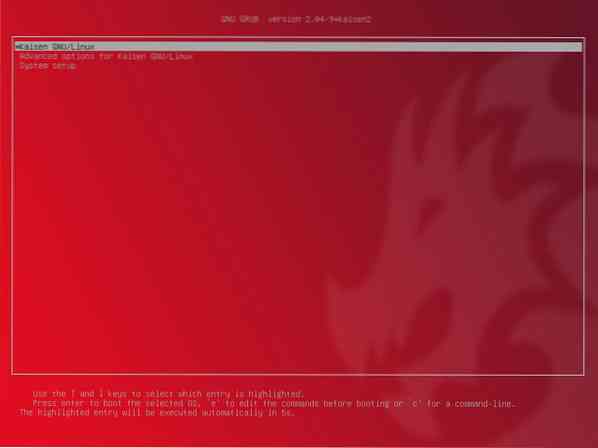
Once you boot from the HDD/SSD where you've installed Kaisen Linux, you should see the following GRUB menu.
Select Kaisen GNU/Linux and press
Kaisen Linux is being loaded from the HDD/SSD. It may take a few seconds.

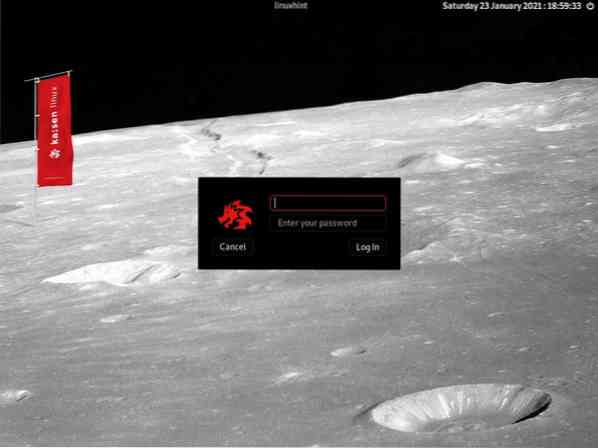
Kaisen Linux login window should be displayed.
You can use the login username and password you've set during the installation to log in to Kaisen Linux.
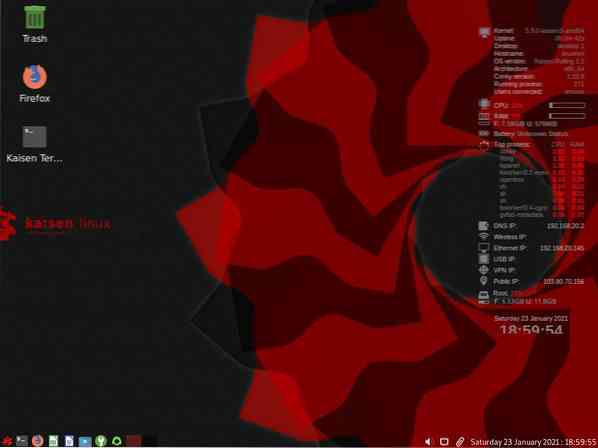
Kaisen Linux is running from the HDD/SSD.
Conclusion:
In this article, I have shown you how to download Kaisen Linux and make a bootable USB thumb drive of Kaisen Linux from Windows and Linux operating systems. I have shown you how to boot Kaisen Linux from the USB thumb drive and install Kaisen Linux on your computer as well.
References:
[1] Live informations - Kaisen Linux -https://docs.kaisen-linux.org/index.php/Live_informations


