A cloud infrastructure is not as simple as having multiple 40 core Xeon servers with a hypervisor installed on them to spin up virtual machines. No, we need a lot more than just plain virtual machines. Customers may want block storage, object storage, floating IPs, firewall, periodic backups and many other features. You may have to manage different boot images for the VMs, mirror the official package repositories to reduce latencies and ensure 24/7 uptime.
To get all of this done in a sane and clean manner you need OpenStack. Organizations with their own Infrastructure may use OpenStack to create their own private cloud instead of relying on AWS, Google Compute Engine or any of the other public cloud services.
OpenStack is then an infrastructure management tool. Whenever you need resources for a VM, you would request the resources like 2 virtual CPUs, 4GB of RAM and a static IP with certain firewall rules and OpenStack would do all of it for you.
It is important to note that OpenStack is not a hypervisor like KVM or Xen. It is a management utility that integrates well with most popular hypervisors but it does a lot more than that. It turns servers into a Cloud.
Prerequisites
Understandably, not all of us who want to understand the technology behind OpenStack will have large servers lying around for the sake of experimentation. Therefore, we will be using the cloud itself to build our 'experimental' cloud.
A project under official OpenStack umbrella, called DevStack will be used to simulate OpenStack environment on a single VM. In our case, the VM is running on DigitalOcean. If you have a fast-enough internet connectivity at home with the capability of spinning up a VM with at least 4GB of RAM and 2 vCPUs you can use something like VirtualBox on your own computer.
The VM is running Ubuntu 16.04 LTS.
It should be noted here that, installing OpenStack or DevStack on your main computer is not a good idea. Instead, use a clean install of Ubuntu on a VM either local or on a VPS provider of your choice.
Installing DevStack
To make the process of installation easier, DevStack community has made available a cloud-init script which pulls the latest version of their repo for building a single node cloud.
This is a copy of the cloud-init script:
#cloud-configusers: - default - name: stack lock_passwd: Falsesudo: ["ALL=(ALL) NOPASSWD:ALL\nDefaults:stack !requiretty"]
shell: /bin/bashwrite_files: - content: |
#!/bin/sh DEBIAN_FRONTEND=noninteractive sudo apt-get -qqy update || sudo yum update -qy
DEBIAN_FRONTEND=noninteractive sudo apt-get install -qqy git || sudo yum install -qy git
sudo chown stack:stack /home/stack cd /home/stack
git clone https://git.openstack.org/openstack-dev/devstack
cd devstack
echo '[[local|localrc]]' > local.conf
echo ADMIN_PASSWORD=password >> local.conf
echo DATABASE_PASSWORD=password >> local.conf
echo RABBIT_PASSWORD=password >> local.conf
echo SERVICE_PASSWORD=password >> local.conf
./stack.sh path: /home/stack/start.sh
permissions: 0755runcmd:
- su -l stack ./start.sh
You may want to replace the string 'password' with an actually safe password.
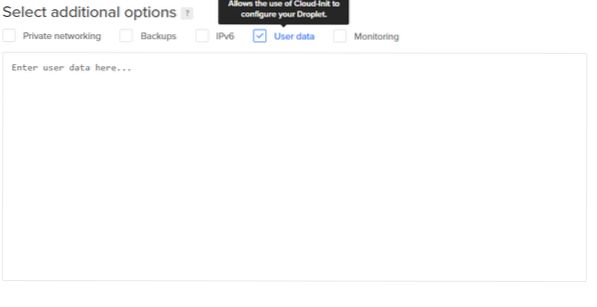
Now copy the above text to your cloud-init file. On DigitalOcean, this is done while you are creating your VM (or a Droplet). Click on the user data option while in the droplet creation page.
This sets up a new user named stack and updates the system depending on what package manager is being used (both yum and apt are acceptable), creates a home directory for the stack user and clones the latest scripts for installing DevStack from their official repository. Login as the user stack by using the command:
$su -l stackNow as a last step we would run the start.sh script as this user. It is stored at the home directory of the user. To execute the script, just enter the path to the file:
$/home/stack/start.shThis is a really long process and it may take anywhere from 20 minutes to 45 minutes to finish. But once you are done, you are ready to login, using the Web panel.
Admin Dashboard
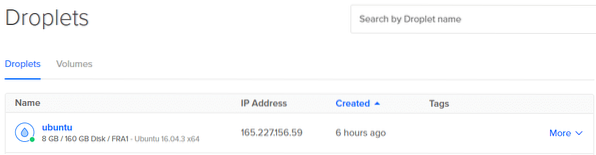
The dashboard is accessible on the public IP of your DigitalOcean droplet. Grab that public IP by going to the DigitalOcean panel.
Copy the IP to your browser's address bar and you will be greeted by a login prompt.
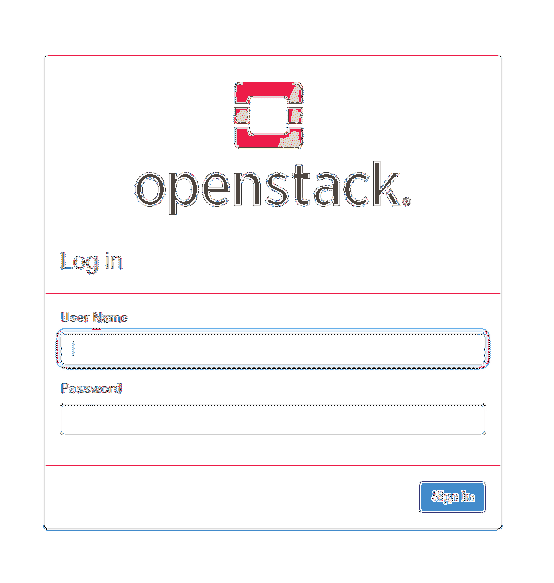
You can login in by using the default usernames admin and demo. admin is the administrator of the cloud, the decision-making authority whereas the demo user is a typical user of the cloud you are setting up. The default password for both the users is password.
Let's login as admin.
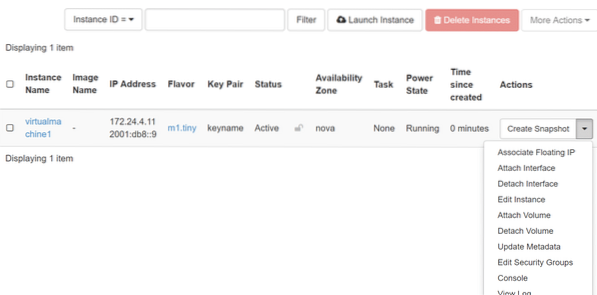
Once you have logged in, you will see a lot of options are available. Under the projects category (left column) if you click on Compute and then on Instances you will see something similar to this:

Click on Launch Instance option on the right side of the interface.

Here you can give the instance a name and select on which zone it will be launched. Since this is not a full-fledged datacenter we just have one location and that's nova.
On the right-hand side, you can see multiple options available for networking, SSH-keys, metadata and a whole array of features. But we will just focus on the ones with an asterisk on them.
On the source option you get to decide what boot media will your VM boot off of.

OpenStack comes with a very light-weight installation of cirros which will be using. Click on the up-arrow button on the bottom right-side, to select cirros as our boot image. In a more common cloud, it would instead offer images of Ubuntu, Fedora or CentOS but cirros is preferred here for being extremely lightweight.

Lastly, we will select what resources will be dedicated to the cirros instance. Select the one which seems most comfortable to you, depending on the resources your hardware has made available to you.
Now you can click on the Launch Instance button on the bottom right-hand of the menu to launch a cirros installation. Now going back to your Compute instances in the main menu you can access the cirros installation by selecting the console option next to your VMs name.
Conclusion
A cloud is much more than just a bunch of virtual machines. It requires network connectivity, storage, back up and many other features. OpenStack has a different project name for each of these elaborate features and you can explore each of them in great depth here.
I hope that this introduction was exciting enough that more people would contribute to cloud technologies like OpenStack.


