- Managing user accounts
- Managing packages
- Setting up Apache, DNS, or DHCP servers
- Setting up file sharing
- Setting up disk quotas
- Setting up backup
In this article, we will explain how to install and use the system configuration tool Webmin in the Ubuntu 20.04 system. Note that for installing Webmin, you must be the root user or any user with sudo privileges.
Install Webmin
Webmin is not included in the official Ubuntu repositories. So, we will need to manually add the Webmin repository into the Ubuntu local repositories list. Follow the steps below steps to install Webmin on the Ubuntu system.
To install Webmin, we will use the command line Terminal application. To open the command line Terminal, use the Ctrl+Alt+T keyboard shortcut.
Step 1: Import and Add Webmin Repository Key
In this step, we will import and add the Webmin repository key using the repository, which is signed. This step is required for the system to trust the Webmin repository.
Issue the following command in Terminal to import the Webmin repository key:
$ wget http://www.webmin.com/jcameron-key.ascNext, issue the following command in Terminal to install the key:
$ sudo apt-key add jcameron-key.asc
Step 2: Add Webmin Repository
In this second step, we will add the Webmin repository in the /etc/apt/sources.list file. In this way, we will be able to install Webmin via the APT. Use any text editor to edit the /etc/apt/sources.list file as sudo:
$ sudo nano /etc/apt/sources.listThen, add the Webmin repository to the /etc/apt/sources.list file by adding the following line in the editor:
deb http://download.webmin.com/download/repository sarge contrib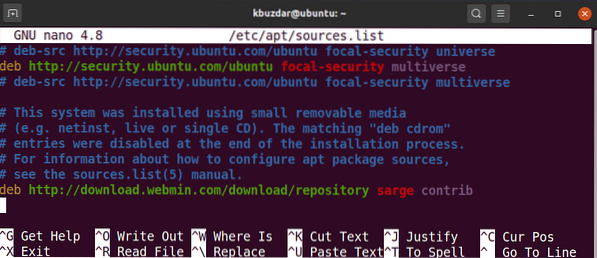
Once you have added the above line, use the Ctrl+O and Ctrl+X keyboard shortcuts to save and exit the file, respectively.
Step 3: Update Repository Index
Next, issue the following command in Terminal to update the repository index with that of the newly added Webmin repository.
$ sudo apt updateStep 4: Install Webmin
Install the Webmin package as sudo via the following command:
$ sudo apt install webmin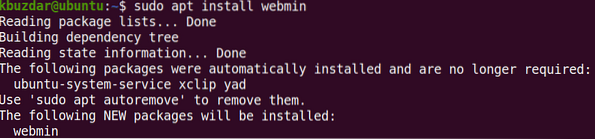
The system might prompt you for confirmation by providing you with a y/n option. Hit y to continue the installation process. Once installation is complete, you will see the following lines at the end of the output explaining how to access Webmin:

Configure Firewall
By default, the firewall blocks the port 10000 that is used by Webmin. You will need to allow the port 10000 on the firewall; otherwise, you will not be able to log in to Webmin.
If you are running a firewall on your system, allow the port 10000 using the following command:
$ sudo ufw allow 10000/tcpAccess Webmin
To access Webmin, open any web browser, and type https:// followed by localhost and the port 10000.
https://localhost:10000To access Webmin from another system on the network, replace localhost with hostname, or simply the IP address of the system which you want to access the program.
https://hostname or IP-address:10000If you want to access Webmin remotely, from the outside the network, you will need to use a public IP address and set up port forwarding on your router.
Once the login page appears, enter credentials for the root or any other user that has sudo privileges. Webmin uses a self-signed certificate, so you will receive a warning about the untrusted connection from your browser when you log in to the web interface. You may ignore this message, as it does not pose a security threat to you.

Once authenticated, you will be presented with the Webmin Dashboard.

Using Webmin
The system configuration tool Webmin is very simple to use. On the left side of the Webmin interface, you will see categories containing plenty of tools that can be used to manage the Linux system, including the following:
- Webmin
- System
- Servers
- Networking
- Hardware
- Cluster
- Others
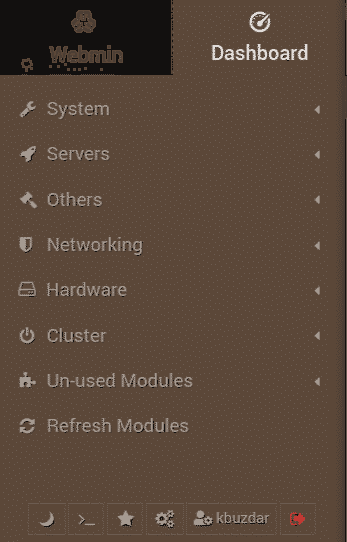
If you click any of the categories, you will see a number of options under it.
Example: Create a User via Webmin
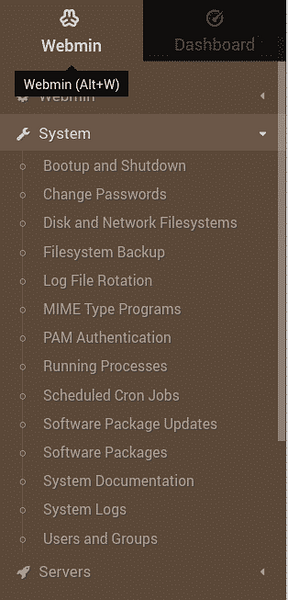
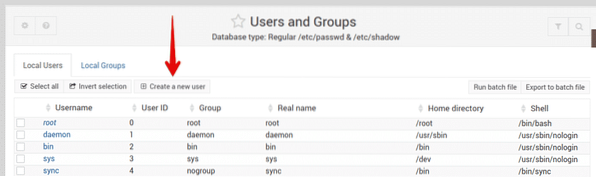
To create a new user account using Webmin, go to System > Users and Groups. Otherwise, you can search Users and Groups using the search bar at the top. When the program opens, you will see a list of all user accounts on your system. From here, you can choose to create a new user, remove an existing one, change the user's password, modify user privileges, and more.
You can create a new user account simply by clicking the Create a new user button in the Users and Groups window.
This will open the user creation form, where you can enter all the required details necessary for creating a user account.
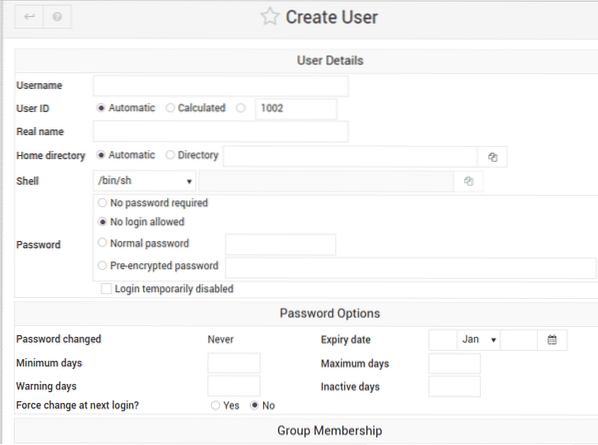
Once you are finished, click on the Create button at the bottom left of the form, after which the new user account will be created. Beyond creating a user account, you can manage almost anything on your Linux system with Webmin.
Uninstall Webmin
In the case that you wish to remove Webmin from your system, issue the following command in Terminal:
$ sudo apt remove webminConclusion
In this article, you have learned how to install and use the system configuration tool Webmin in the Ubuntu 20.04 system. Webmin is an incredibly simple and easy tool that includes a lot of options to manage and streamline management tasks.


