This article will demonstrate how to set up FreeBSD 12.0, the latest version, on Zettabyte File System, or ZFS. The method we'll employ is going to use BSDinstall and consequently allocate all of the disks to host the FreeBSD system.
FreeBSD
FreeBSD is one of the many free and open-source Unix-like distributions of the Berkeley software distribution (BSD) kernel. It originated from the research Unix, along with its contemporary distributions, among which are the OpenBSD, NetBSD, and DragonFly BSD. It has come a long way since its release in 1993 and has earned a reputation for being more reliable than Linux.
FreeBSD has some considerable advantages over Linux distributions(Ubuntu, Fedora, etc.), such as lower latency, which provides a faster experience. Manufacturers often use it as an alternative to Linux to get around the Licensing issue, which obligates them to open-source their works.
Z file system (ZFS)
Also known as the Zettabyte file system, ZFS is an innovative volume manager/file system utility released by Sun Microsystem back in 2001. It comes with high scalability, optimal data compression, integrity checking, a system with proper check and balance to prevent data corruption, and file repair features to salvage corrupted data. It is supported on NFSv4 ACLs, RAID-Z, and the FreeBSD system started ZFS support with a new release in 2008.
Install FreeBSD on ZFS
Here's how to install FreeBSD operating system on ZFS.
Prerequisites
To demonstrate how to install FreeBSD 12.x, we will use a virtual machine. The specs for this VM is as follows:
RAM: 2GB,
No. of CPUs: 2
Hard-disk space: 25GBs.
These are the minimum specs, and you should definitely allot more resources to your ZFS.
Also, if you don't have the FreeBSD image ready, you can download it from the link below:
https://download.freebsd.org/ftp/releases/
Step 1: Select base component for installation
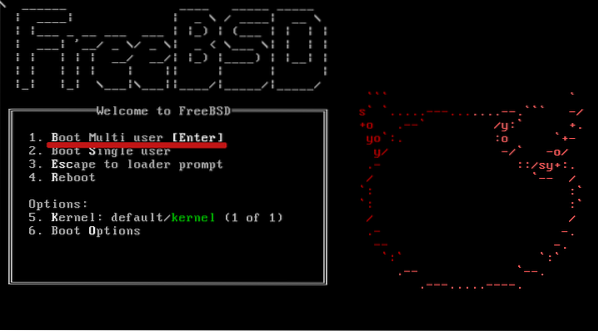
Boot your system with the FreeBSD setup CD/media in it and press enter to further the install.
Then select Install out of the options you're displayed.

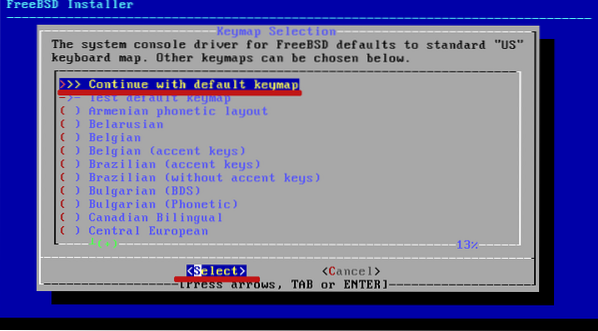
Then select one of the keyboard maps, one that you're using. In this tutorial, we'll need the 'US' keyboard map, and if you're using it too, click the first option and hit select.
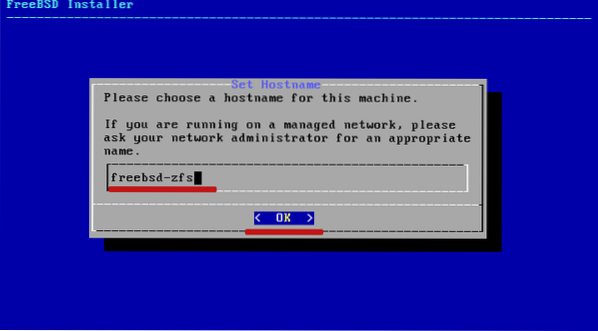
Then type in the hostname for your system, and click OK.
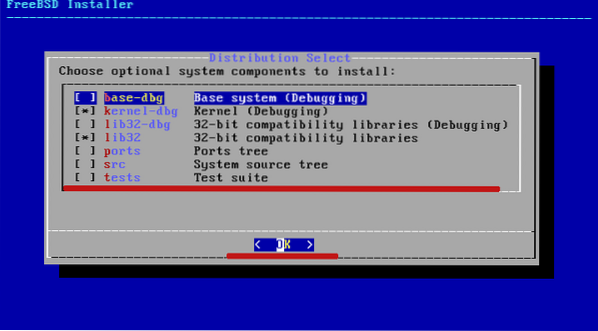
Then pick out the system components to meet your requirements. To add to the components, pick them out by pressing the spacebar and clicking OK.
Step 2: Configure for ZFS on your system
This is where you'll be making partitions on your disk drive. Just select the 'Auto (ZFS),' a partitioning method that automates this, and click on OK.
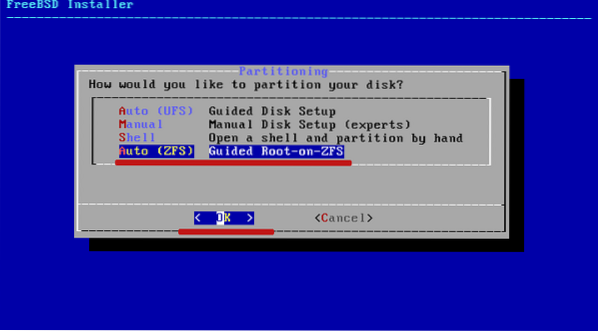
You should go with the manual/shell option if you wish to partition disks by yourself.
The BSDinstall, by default, creates a ZFS partition. It is given the zpoll name zroot along with the GPT partition scheme and 2GB swap space.
Just leave it as is and click select.
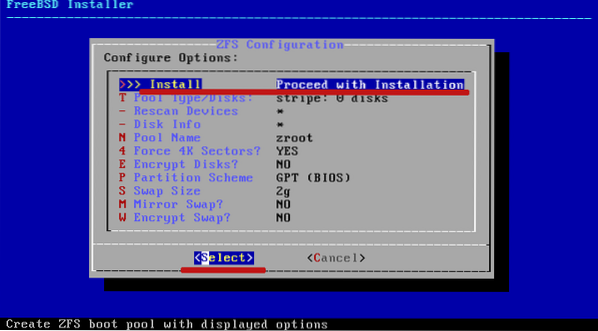
This process is further sped up by the raidX options, for which you'd have to be using Raid.
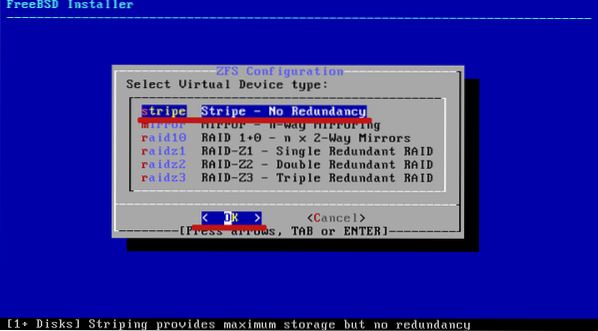
Select the first 'no redundancy' option and click OK.
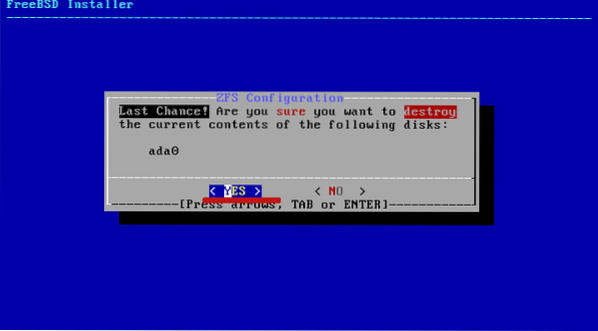
Then click on your drive and click the OK button
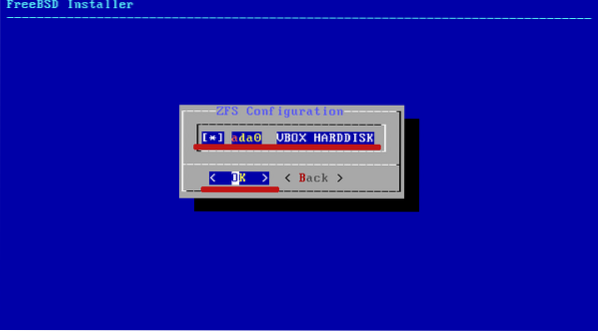
When asked if you want to 'destroy' the contents of the disk, just select Yes.
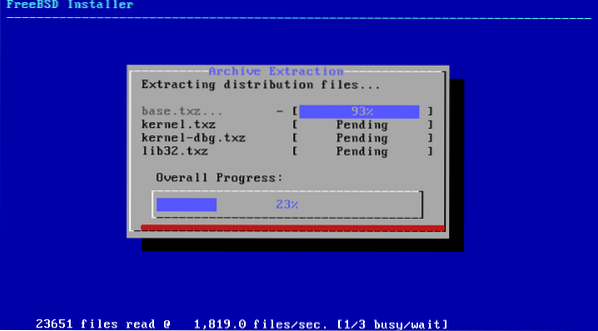
Then wait for the installation of base components to finish.
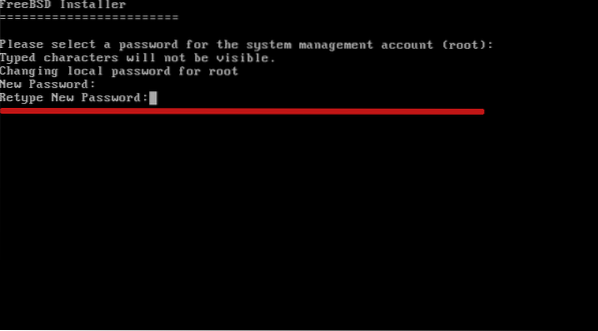
Step 3: Change the root password
Upon the installation of base components, you'll need to set the root password. Make sure to select a strong, multicharacter password.
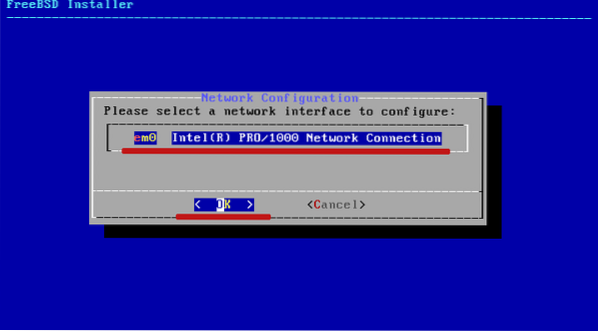
Step 4: Configure Networking options
Select your network interface as follows, then click OK.
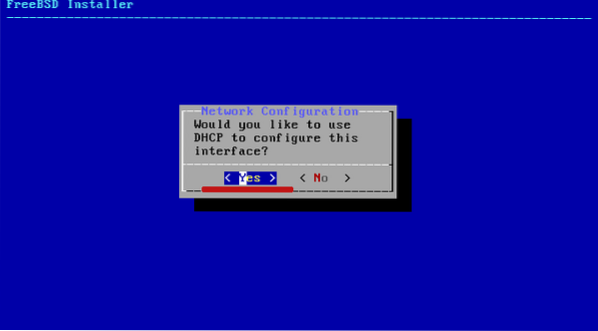
Then select the ipv4 address and click on yes.

Just click yes if you're using DHCP, and FreeBSD will retrieve the ip address from the gateway.
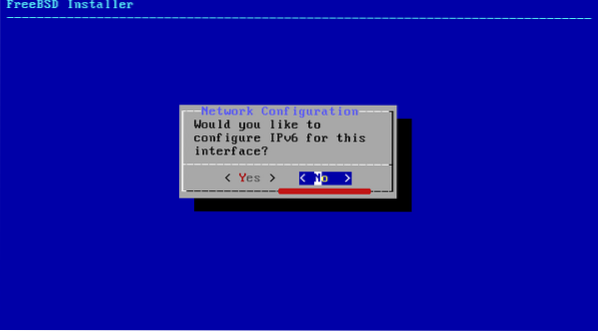
And if you're using Ipv6, choose NO.
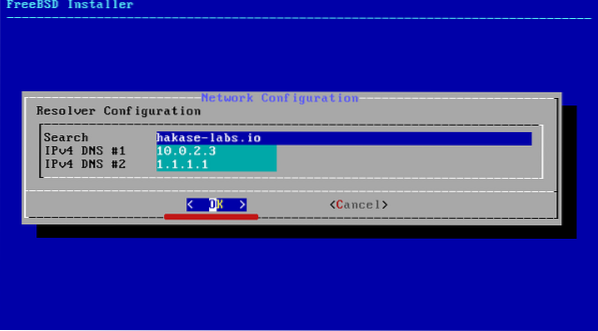
Next, configure resolver by giving in the details choose OK to continue.
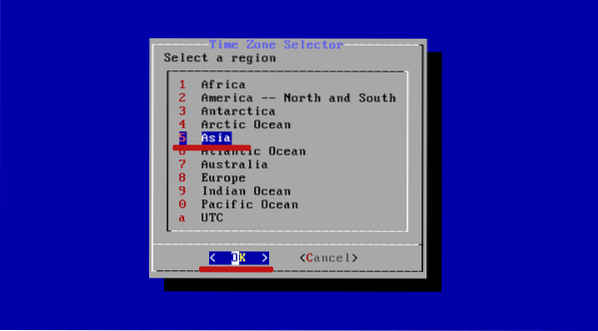
Step 5: Selecting timezone
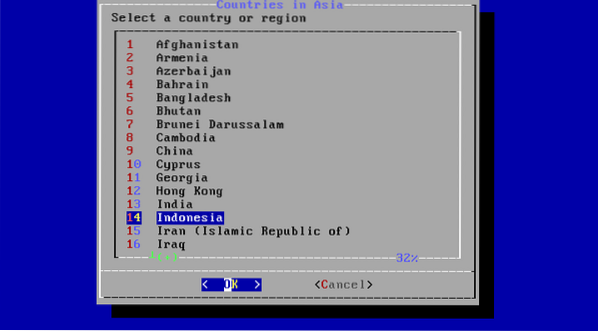
To configure timezone, select the region you're in and click on OK.
Then fill in the details:
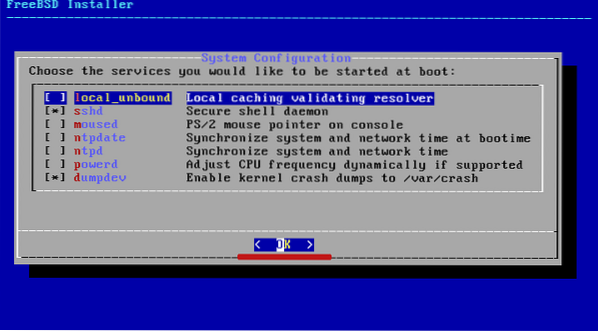
Lastly, select the services you'd want to start at boot.
Step 6: Strengthen system security:
This is commonly referred to as “security hardening.” To harden the system of your security, pick the relevant options, and click on OK.

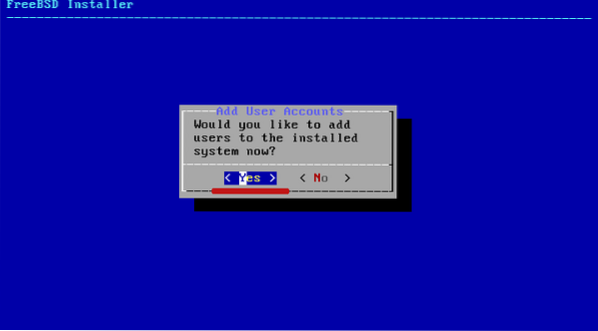
Step 7: Create a new user
The system will prompt you to create a new user. Click on YES to continue.
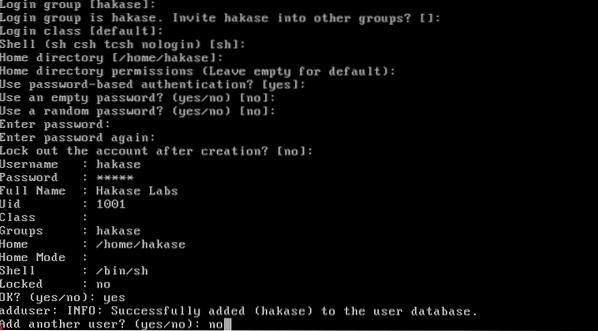
Give the user credentials to log in with later.
Click on Exit, then click OK.
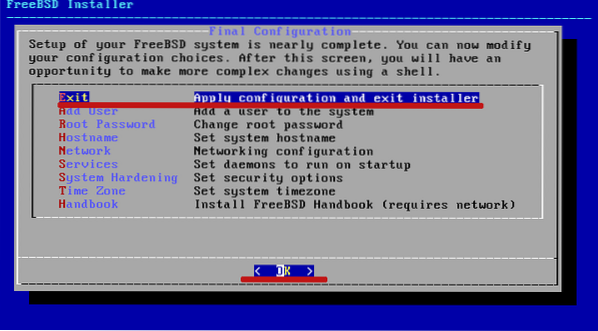
With a new user account created, FreeBSD has been successfully installed on your ZFS.
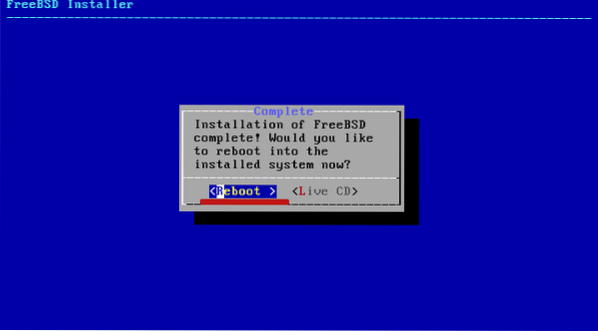
Just click on No if it asks you to configure manually.

Then restart your system by clicking on reboot as in the screenshot below:
Upon reboot, use your user credentials to log in with. Then verify the install with the command below.
$ uname -msr$ df -h
You should receive the following output:
Wrapping up
That's it for this tutorial. We've shown you how to install the latest FreeBSD version on ZFS.
As an advanced, next-generation filing system, ZFS has a lot to offer. Some of the features that newer versions have are:
- Pooled storage - an amalgamation of filing system and volume manager
- Snapshots - a feature that tracks changes in files.
- Copy-on-write - makes sure your work is saved upon creation.
- Data integrity verification and automatic repair
- Enormous storage space, and
- RAID-Z


