Types of Load Balances
There are two types of Load Balancing Platforms - HAProxy and Linux Virtual Server, also known as LVS, and Seesaw v2 is a load balancing platform based on Linux virtual server.
Seesaw is a very flexible tool that can be utilized as a basic load balancer for small to medium size websites to advanced load balancer for corporate level networks where a dozen of servers interconnected. It supports some of advanced Ipv6 features such as anycast, multicast, unicast, and direct server return, multiple VLANs.
Having a robust design makes it suitable for easy maintenance, and reliability. It is designed in 2012 to meet Google's unique needs, which the existing options didn't meet. It is developed in Go that is a statically-typed language and is derived from C language. It contains many high-level language features such as garbage collection to clean up the memory, type safety, variable-length arrays, dynamic-typing capabilities, and key-value maps, and a large standard library. Golang is a compiled language developed by Google. Many modern applications like Docker, Kubernetes, InfluxDB, Gogs(Go Git Service) and Caddy are written in Go.
Pre-Requisite
- The link to download GoLang's latest version for Linux is available in https://golang.org/dl/ in the form of archive file.
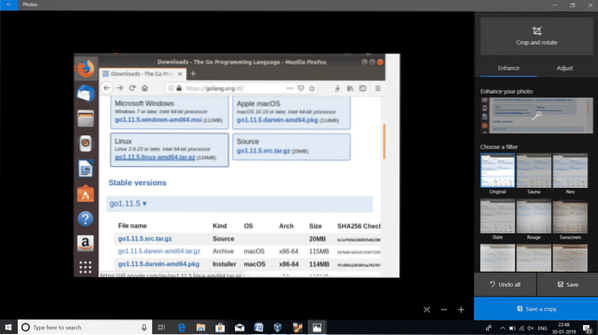
- Integrity of the tarball can be checked by comparing the hash value generated using the shassum command with the hash value provided in the website. If there is any difference in hash values one must always download a new tarball of the archive. If the check is successful then proceed ahead of the tutorial.
$shasum -a 256 go1.11.5.linux-amd64.tar.gz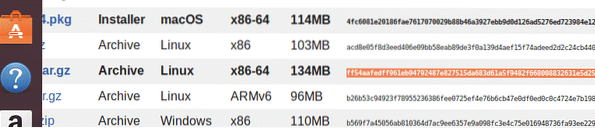
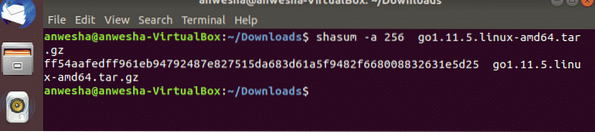
In this command -a is used to specify the algorithm to generate hash value and this command as a whole performs the SHA256 checksum of the archive files.
- The next step is to extract the tar archive files, if the integrity check is successful, into the /usr/local directory using the command given below: $sudo tar -C /user/local -xvzf go1.11.5.linux-amd64.tar.gz
In this command -C specifies the destination directory where the extracted files are sent.
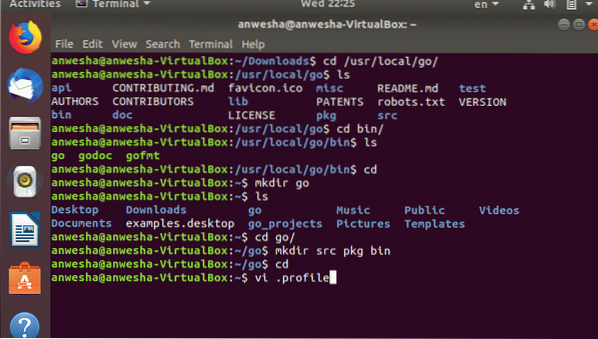
- To configure Go Environment in Ubuntu set-up Go workspace by creating a directory ~/go_project_directory which is the root of the workspace. The workspace contains three major directories
• bin - contains binary files of the golang.
• src- which stores all source files.
• pkg- which will store package objects.
A directory tree can be created as follows: $mkdir -p ~/go_projects/bin,src,pkg
$cd go_projects/
$ls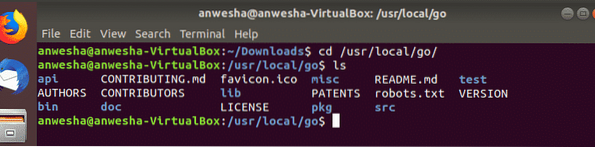
- To execute Go, follow as rest of Linux programs without specifying its absolute path. The directory where golang is installed should be used as one of the values of $PATH environment variable.
- To add /usr/local/go/bin to the PATH environment variable the following command must be run:
Or can open it in the terminal by using the command
$vi .profileThen /usr/local/go/bin must be added to the path. Then all changes must be saved and the user is required to logout of the profile and again login for further proceedings.
- All the paths are set in the profile by setting the values of GOPATH and GOBIN.
export GOBIN=”$GOPATH/bin”- If GoLang is installed in a custom directory other than the default(/usr/local) there is the requirement to specify that directory as the GOROOT variable. It is done in th .profile by
export PATH=$PATH:/usr/local/go/bin:$GOPATH/bin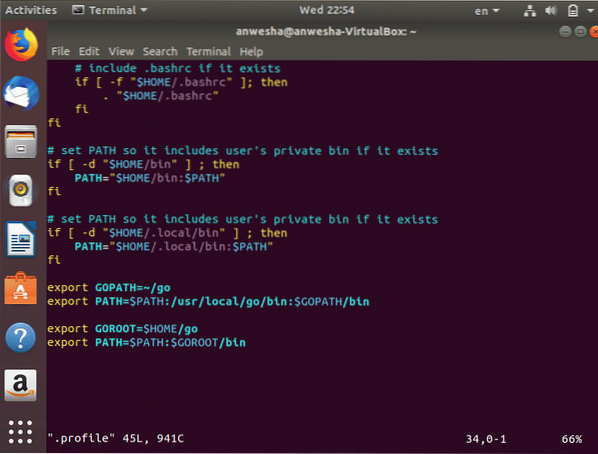
- The GoLang environment upon successful set up can be checked in the terminal by running the following command: $go
$go env
Installing Seesaw
- It was a requirement to install Go as Seesaw v2 is developed with it and depends on several Go packages like:
>github.com/golang/glog
> github.com/dlintw/goconf
>github.com/golang/protobuf/proto
>github.com/miekg/dns
- If one wishes to regenerate theprotobuf code,the protobuf comiler and Go protobuf compiler generator is also needed: $apt-get install protobuf-compiler
$go get -u github.com/golamg/protobuf/proto,proto-gen-go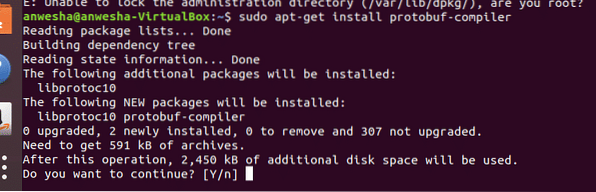
- Always it must be ensured that $GOPATH/bin is in the $PATH and in the seesaw directory.
- The next step is to run make command as it leads to addition of several binaries in the $GOPATH/bin with a seesaw_ prefix, these binaries must be installed to appropriate locations.
 $make test
$make install
$make protoAfter running the above three commands seesaw binaries are set to appropriate locations. it can be done by creating seesaw_install in $GOPATH/bin and executing the below script.
SEESAW_BIN="/usr/local/seesaw"
SEESAW_ETC="/etc/seesaw
SEESAW_LOG="/var/log/seesaw"
INIT='ps -p 1 -o comm='
install -d "$SEESAW_BIN" "$SEESAW_ETC" "$SEESAW_LOG"
install "$GOPATH/bin/seesaw_cli" /usr/bin/seesaw
for component in ecu,engine,ha,healthcheck,ncc,watchdog; do
install "$GOPATH/bin/seesaw_$component" "$SEESAW_BIN"
done
if [ $INIT = "init" ]; then
install "etc/init/seesaw_watchdog.conf" "/etc/init"
elif [ $INIT = "systemd" ]; then
install "etc/systemd/system/seesaw_watchdog.service" "/etc/systemd/system"
systemctl --system daemon-reload
fi
install "etc/seesaw/watchdog.cfg" "$SEESAW_ETC"
# Enable CAP_NET_RAW for seesaw binaries that require raw sockets.
/sbin/setcap cap_net_raw+ep "$SEESAW_BIN/seesaw_ha"
/sbin/setcap cap_net_raw+ep "$SEESAW_BIN/seesaw_healthcheck"
Configuring Seesaw
- Each node requires a seesaw.cfg file, known as the configuration file, where information about the node, and its belonging peer is stored. Protobuf is the cluster configuration file for each cluster, and is it in plain text format. This allows it to be opened with any Linux text editor like nano, vi. One can change the seesaw.cfg by using the following command:

An example of the seesaw.cfg file
[cluster]anycast_enabled = false
name = au-syd
node_ipv4 = 192.168.
node_ipv6 = 2015:cafe::2
peer_ipv4 = 192.168.10.3
peer_ipv6 = 2015:cafe::3
vip_ipv4 = 192.168.10.1
vip_ipv6 = 2015:cafe::1
[config_server]
primary = seesaw-config1.example.com
secondary = seesaw-config2.example.com
tertiary = seesaw-config3.example.com
[interface]
node = eth0
lb = eth1
The description of the abovementioned cript is given below
- anycast_enabled - Anycast can be enabled by setting this value.
- name - The short name that is given to this cluster.
- node_ipv4 - IPv4 address of the current Seesaw node.
- peer_ipv4 - IPv4 address of our peer Seesaw node.
- vip_ipv4 - The IPv4 address for current cluster virtual IP.
Conclusion
Due to the immense advantages of load balancing feature, it's often used in many corporate networks. There are three types of delivery modes in general in IPv4 standard, Unicast, Multicast and Broadcast. Anycast is accepted in IPv6. Anycast is present rarely in IPv4. Anycast uses to identify an interface from a group of interfaces which connect to the same service. VIPs are Virtual IP addresses that doesn't belong to any physical network interface. A load balancer must be reliable and has the most important features in cloud services.
Many of the load balancers in market don't have backend server monitoring and many other specific features. There are several load balancing methods on Open Systems Interconnection Layer 2/3/4. These layers are Data Link Layer, Network Layer and Transport Layer. Seesaw uses layer 4 technique with NAT AND DSR (Direct Server Return). DSR modifies the traffic flow or the load by allowing the server to respond directly to the client. All in all, The Seesaw load balancer is robust and reliable due to these aspects.


