Images are required to use in many applications for various purposes. One of the essential parts of web applications is the image. Many libraries exist in Python for image processing tasks such as PIL, Pillow, OpenCV, etc. PIL is a popular image processing library, but it does not Python 3. Pillow is implemented for Python 3 to do a similar PIL task and is called the fork of PIL. Pillow supports multiple image formats, and different types of image processing tasks like resizing, rotating, cropping, adding image text, etc., can be done easily by using this library. The Pillow library can be installed and used for various image processing tasks shown in this tutorial.
Installing Image Processing Module
Image processing module will require if you want to create the dice rolling simulator with GUI. Run the following commands from the terminal to update the pip and install the Pillow module.
$ python3 -m pip install --upgrade pip$ python3 -m pip install --upgrade Pillow
Example-1: Display an image
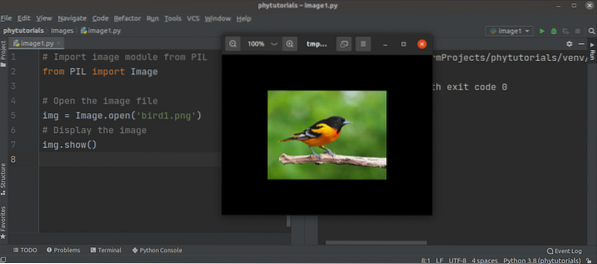
How an image can be displayed using python script has shown in the following script. The image module has been imported to use the open() function for opening the image file. Next, the show() function is called by using an image object to display the image.
# Import image module from PILfrom PIL import Image
# Open the image file
img = Image.open('bird1.png')
# Display the image
img.show()
Output
The image will be displayed in a dialogue box if the image file exists in the current location.
Example-2: Display the image with different attributes
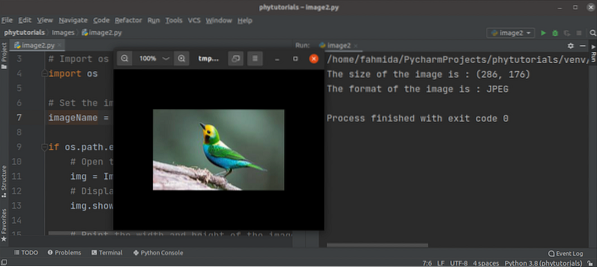
The following script will display the image in a dialogue box and print different types of image attributes. the os module has been imported with the Image module in this script to check whether the image file exists. If the file exists, then the image file will be opened and displayed in the dialogue box. Next, the image size and the image format will be printed using the size and format properties of the image object.
# Import image module from PILfrom PIL import Image
# Import os module
import os
# Set the image filename
imageName = 'bird2.png'
if os.path.exists(imageName) :
# Open the image file
img = Image.open('bird2.png')
# Display the image
img.show()
# Print the width and height of the image in pixels
print('The size of the image is : '.format(img.size))
# Print the format of the image file.
print('The format of the image is : '.format(img.format))
else:
# Print error message
print('Image file does not exist.')
Output
The image will be displayed in a dialogue box if the image file exists in the current location. The following output shows the size and format of the image. The width of the image is 286 pixels, and the height of the image is 176 pixels. The format of the image is JPEG.
Example-3: Create a new image by changing the size and format of the image
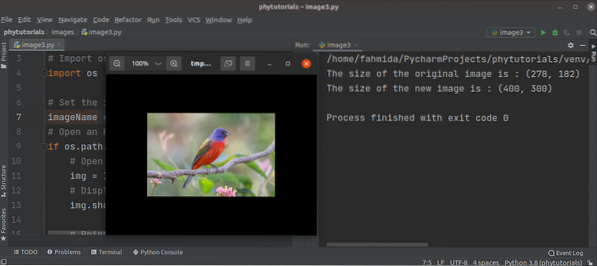
The following script will display the original image, and a new image will be created by changing the size and format of the original image. The script of the previous example has used to display the image in a dialogue box. resize() method is used with the new width and height values to set the size of the new image. save() method is used with the name of the new image to create the new image. The size of both the original and new images will be printed later.
# Import image module from PILfrom PIL import Image
# Import os module
import os
# Set the image filename
imageName = 'bird2.png'
# Open an PNG file
if os.path.exists(imageName):
# Open the image file
img = Image.open('bird2.png')
# Display the image
img.show()
# Print the width and height of the original image in pixels
print('The size of the original image is : '.format(img.size))
# Resize the image
resized_img = img.resize((400, 300))
# Save the resized image with new name
resized_img.save('newImg.jpg')
# Print the width and height of the new image in pixels
print('The size of the new image is : '.format(resized_img.size))
else:
# Print error message
print('Image file does not exist.')
Output
The image will be displayed in a dialogue box if the image file exists in the current location. The following output shows the size of both the original and new images. The width of the original image is 278 pixels, and the height of the original image is 182 pixels. The width of the new image is 400 pixels, and the height of the new image is 300 pixels.
Example-4: Create a cropped image of an image
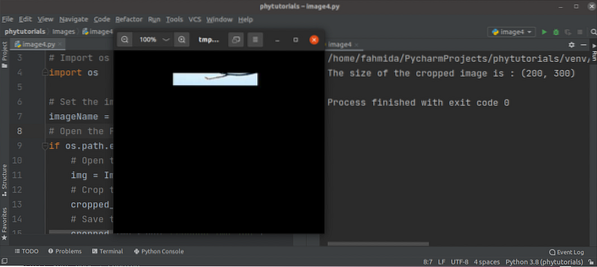
The following script will display the cropped image of an existing image. crop() method is used to crop the image based on the given box values. Next, the save() method is used to create the new cropped image. The new image will be displayed in a dialogue box like the previous examples.
# Import image module from PILfrom PIL import Image
# Import os module
import os
# Set the image filename
imageName = 'bird2.png'
# Open the PNG file
if os.path.exists(imageName):
# Open the image file
img = Image.open('bird2.png')
# Crop the image
cropped_img = img.crop((100, 150, 300, 450))
# Save the cropped image in another file
cropped_img.save('cropped_img.jpg')
# Open the cropped image
img2 = Image.open('cropped_img.jpg')
# Display the cropped image
img2.show()
# Print the width and height of the cropped image in pixels
print('The size of the cropped image is : '.format(img2.size))
else:
# Print error message
print('Image file does not exist.')
Output
The following cropped image will be displayed in a dialogue box if the original image file exists in the current location.
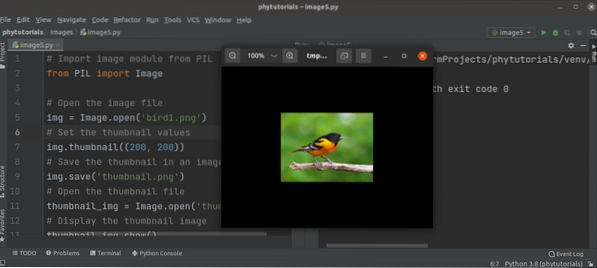
Example-5: Create a thumbnail of a file
The following script will create a thumbnail of an image. The thumbnail() method has been used in the script to create the thumbnail of an image. The created thumbnail image will be displayed in a dialogue box later.
# Import image module from PILfrom PIL import Image
# Open the image file
img = Image.open('bird1.png')
# Set the thumbnail values
img.thumbnail((200, 200))
# Save the thumbnail in an image file
img.save('thumbnail.png')
# Open the thumbnail file
thumbnail_img = Image.open('thumbnail.png')
# Display the thumbnail image
thumbnail_img.show()
Output
The following thumbnail image will be displayed in a dialogue box if the original image file exists in the current location.
Conclusion
The image module contains many functions to perform different types of image-related operations. The uses of some mostly used functions have been explained in this tutorial by using multiple examples.


