In this article, I am going to show you how to install NVIDIA graphics drivers on Ubuntu from the NVIDIA PPA. I will be using Ubuntu 19.04 for the demonstration in this article. But, it should work on any supported version of Ubuntu. So, let's get started.
Checking NVIDIA Graphics Card Availability:
First, you should check whether Ubuntu detected your installed graphics card correctly.
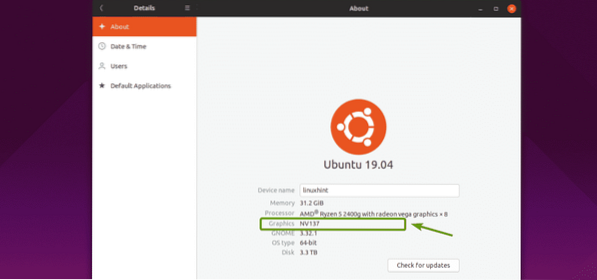
To do that, go to System Settings > Details > About, you should be able to see NVXXX or something in the Graphics section as shown in the screenshot below. It means, you don't have any NVIDIA graphics drivers installed yet. The open source nouveau drivers are used instead.
You can also check whether you have any NVIDIA PCIE graphics cards installed on your computer with the following command:
$ lspci | grep NVIDIAAs you can see, the NVIDIA 1050Ti graphics card installed on my Ryzen 5 2400G is displayed. So, I can install the NVIDIA graphics driver on my Ubuntu operating system.

Adding NVIDIA PPA:
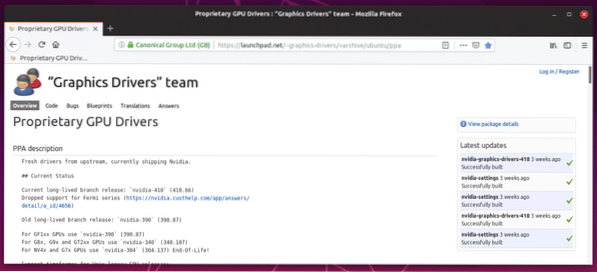
The official web page of NVIDIA PPA is https://launchpad.net/~graphics-drivers/+archive/ubuntu/ppa
You can find what latest drivers are available in this page as you can see in the screenshot below.
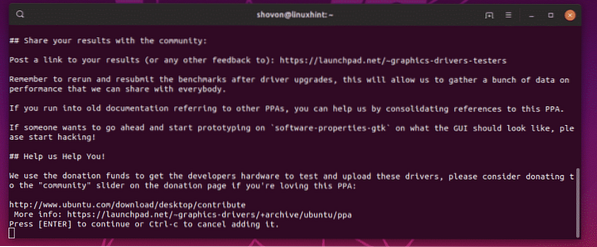
To add the NVIDIA PPA, run the following command:
$ sudo add-apt-repository ppa:graphics-drivers/ppa
Now, press
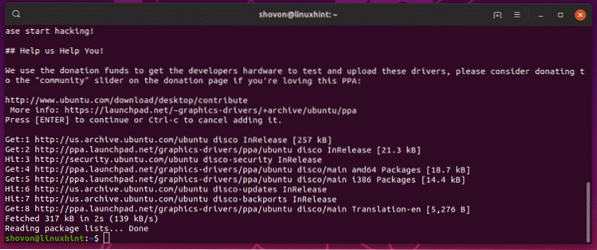
NVIDIA PPA should be added and the APT package repository cache should be updated.
As you can see, before I added the NVIDIA PPA, only nvidia-driver-418 and nvidia-driver-390 NVIDIA drivers were available for installation. These are proprietary NVIDIA graphics drivers.

After I added the NVIDIA PPA, nvidia-driver-396 and nvidia-driver-415 open source NVIDIA drivers are listed as well. Now, you can easily install NVIDIA drivers for your installed graphics card on Ubuntu.
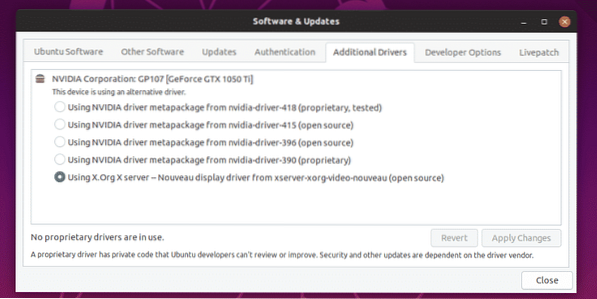
Installing NVIDIA Drivers using Software & Updates App:
You can install NVIDIA graphics drivers using the Software & Updates app on your Ubuntu operating system graphically.
First, open the Software & Updates app from the Application Menu of Ubuntu.

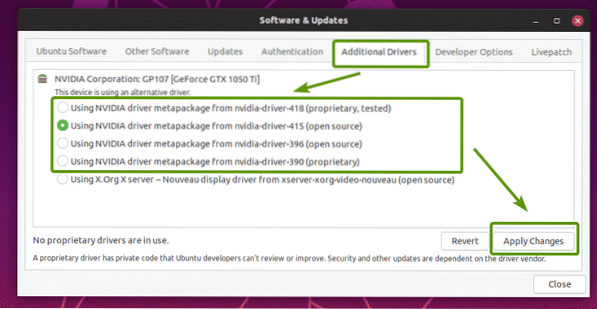
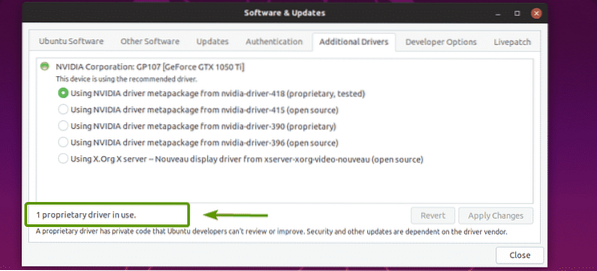
Then, from the Additional Drivers tab, select the NVIDIA graphics driver that you want to install and click on Apply Changes as marked in the screenshot below.
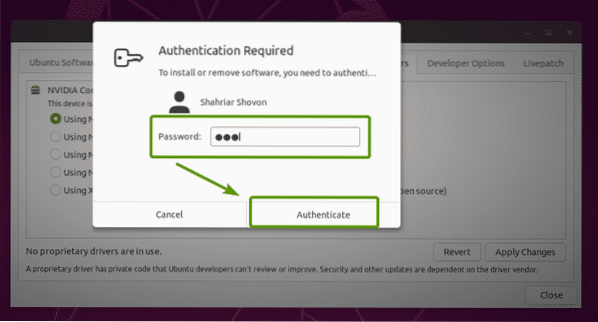
Now, type in the password of your login user and click on Authenticate.
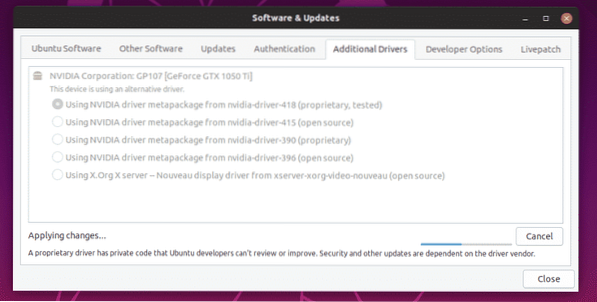
As you can see, NVIDIA graphics driver is being installed.
Once the driver is installed, you should see the following message. Now, restart your computer.
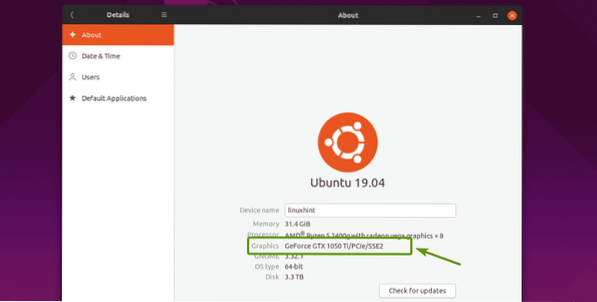
As you can see, now GeForce GTX 1050 Ti is in the Graphics section of System Settings > Details > About.
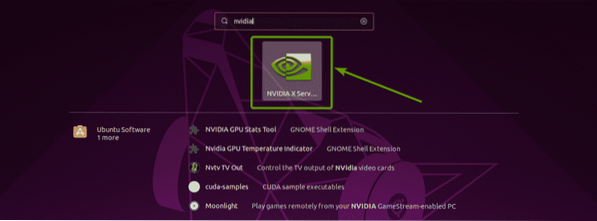
You should also find the NVIDIA X Server Settings app in the Application Menu of Ubuntu.
As you can see, NVIDIA X Server Settings says the graphics driver is being used is 418.56.

It also lists all the properties of my NVIDIA 1050 Ti Graphics card.
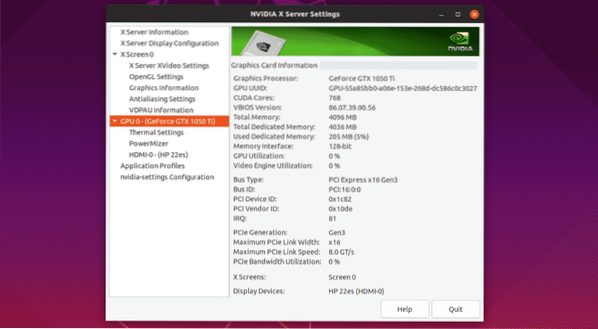
So, NVIDIA drivers are installed correctly and working.
Installing NVIDIA Graphics Drivers from the Command Line:
You can also use the package manager APT to install the NVIDIA graphics drivers from the command line.
First, type in the following command and press
You should see all the NVIDIA driver packages as tab competition. You can install any NVIDIA driver package from here.

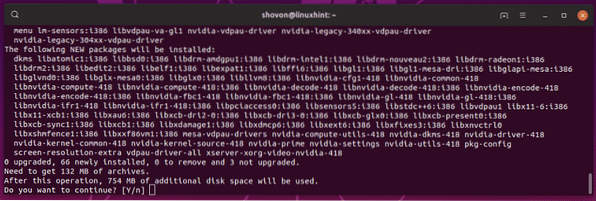
Let's say, you want to install the NVIDIA graphics driver 418 (nvidia-driver-418). To do that, run the following command:
$ sudo apt install nvidia-driver-418
Now, press y and then press
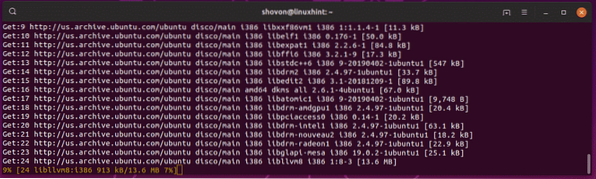
NVIDIA driver packages are being downloaded and installed.
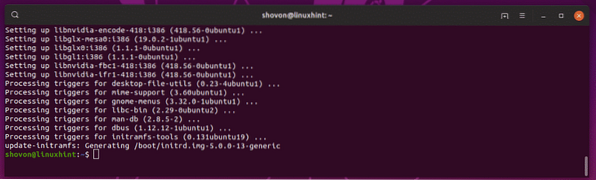
The NVIDIA driver packages are installed.
Now, reboot your computer with the following command:
$ sudo rebootOnce your computer boots, NVIDIA graphics drivers should be used instead of Nouveau drivers.
Installing NVIDIA Drivers on Headless Servers:
NVIDIA also has headless drivers. If you want to install NVIDIA drivers on a headless server, then these are the NVIDIA packages for you.
As you can see, the NVIDIA drivers has a lot of headless versions. You can install any one of them using the APT package manager.
$ sudo apt install nvidia-headless-
Installing NVIDIA Drivers using ubuntu-drivers:
You can use ubuntu-drivers to easily install NVIDIA drivers on your Ubuntu operating system.
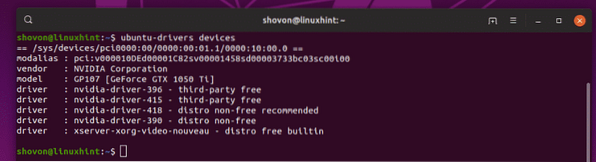
To see whether you have any NVIDIA graphics card installed on your computer, run the following command:
$ ubuntu-drivers devicesAs you can see, my NVIDIA 1050ti graphics card is detected and all the available drivers are listed.
Now, to install a suitable NVIDIA graphics driver for your graphics card, run the following command:
$ sudo ubuntu-drivers autoinstall
NVIDIA graphics drivers should be installed. Once it is, reboot your computer and enjoy.
So, that's how you use NVIDIA PPA on Ubuntu and install NVIDIA graphics drivers on Ubuntu. Thanks for reading this article.


