This is where a utility named Screen comes into the picture. Screen allows users to use multiple terminal sessions inside a single window, which can be disconnected and then reconnected exactly from where the session was disconnected. This is extremely beneficial, as the dangers of a lost connection are gone and every session can be resumed. Today, we will be looking at how one can use the Screen utility, and we will also be looking at some of the functionalities of Screen.
Installing Screen
Screen often comes preinstalled on many Linux distributions today. One can easily check whether the Screen utility is installed by running the following command in the terminal:
$ screen --version
If you do not have screen installed on your computer, then you must run the following command to install this utility:
$ sudo apt install screenScreen Use and Features
1) Starting Screen
To start Screen, open the terminal and enter the following command:
$ screenAfter entering this command, you will see a copyright screen which will ask you to press Enter and continue. Do so, and you will be brought back to the terminal with nothing happening. The terminal appears to be the same. You can go into folders, look into them, open files and do all the things that you already did before. So, what has changed?
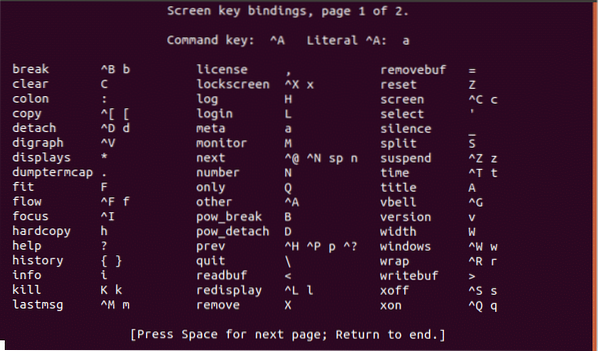
Though it appears that no change has taken place, after entering the Screen command, we did indeed end up opening a screen session. To obtain all the commands that come with Screen, first press Ctrl + a followed by ? (Question mark without quotes).
2) Detaching and Re-attaching to the Screen
Now, let us assume that we want to update our system. We enter the update command into the terminal and wait for it to complete. Going back to before, if our internet connection gets lost or our session gets disconnected, then our update process will stop, and we would have to start all over again. To avoid that, we will use the detached command of Screen. For this, enter Ctrl + a followed by: d. You will get an output similar to the one shown in the image below:

Now, you can multitask and do other tasks that you want to do. The upgrade still continues to run, but only in the background.
If, by chance, your connection drops, or you just want to reconnect to see its progress, then simply enter the following command into the terminal:
$ screen -rThis will re-attach to the screen and you will be able to directly see the update happening again. Even if your connection drops or your session got terminated, you can reconnect to the process happening in the background via this command.
3) Multiple Screens
As mentioned before, Screen allows you to connect multiple terminal sessions inside a single window. There are two ways that Screen allows you to do this: nested screens, and detaching and running another screen.
a) Nested Screens
To create nested screens, as in screens within a screen, you can either simply enter the Screen command or use Ctrl + a followed by: c. This will create a new window from your current location. Meanwhile, your old window will still be active in the background.
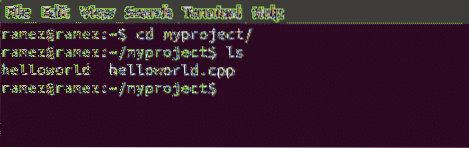
For example, in my starting window, I am running the top command, which can be accessed using the following code:
$ top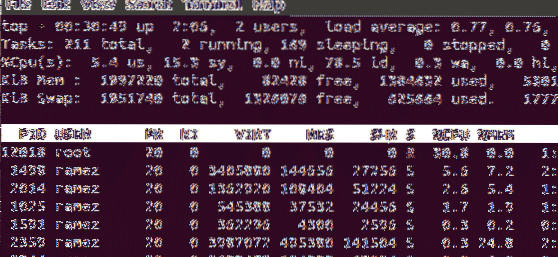
Now, I want to do some other work while keeping my top open in the background. For this, I first select Ctrl + a and then click on: c. With this, a new window opens, and now I can do other tasks.

For switching between the screens, I can use the commands: Ctrl + a followed by: n, which moves us to the next window; and Ctrl + a followed by: p, which switches to the previous window. Each process will continue running until you manually close the window.
If you want to go back to the window where the top process was running, you may do so simply by inputting any of the above two commands. I chose the latter, so I typed in Ctrl + a followed by: n.
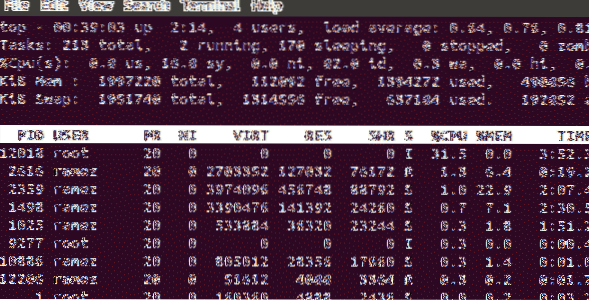
And voilà, we are back to the top screen.
b) Detaching and Running Another Screen
Another way of using multiple screens at the same time is by detaching the first screen and running another screen on the same terminal. Let us look at this situation with an example.
First, we enter the Screen command to start a session. Then, say, we want to see how much memory is being used from our internal hard drive. To do so, enter the following command into the terminal:
$ df -h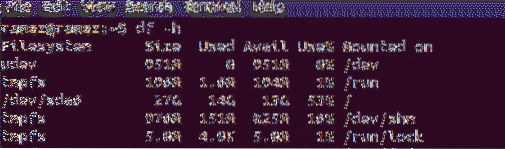
Detach this window by pressing Ctrl + a followed by: d. An output like the one in the image below will be seen.

Now, we will run the screen command to open a new session and start performing some of our tasks. I will simply be opening some folders and checking their directories for information.
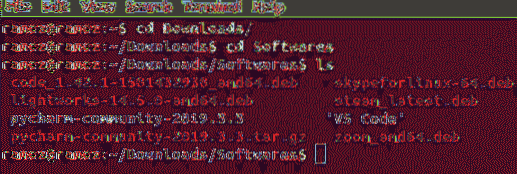
Let us detach this window, as well.

Now, we have to re-attach to the first window, on which we were looking at our memory data. But when we enter the re-attach command, we see something like this:

When there are multiple windows in your session and you want to re-attach to any one of them, you need to know the screen ID of each window. To obtain a list of screen IDs, enter the following the command into the terminal:
$ screen -ls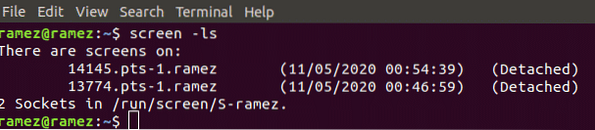
This shows us that there are two windows, along with their IDs (14145 and 13774), which both appear to have been detached. So, if there are multiple windows in our session and we wish to re-attach to some window, then the following command needs to be entered into the terminal:
$ screen -r IDAnd if we wish to re-attach our first window, then we will enter:
$ screen -r 13774
And voilà, we are back to our first screen.
4) Closing Screens
Closing the Screens utility can be done simply by entering the exit command into the terminal, as follows:
$ exitWhy Is the Screen Command So Useful?
We all have been through scenarios in which our internet connection fails, or our session is terminated, resulting the loss of crucial time or data. Screen offers a solution to this problem by allowing processes to continue to run in the background. In the case that the session does terminate, then Screen allows users to resume the process from the exact point of disconnection. This is highly beneficial, as it provides the ability to allow processes that require a lot of time to run in the background while still performing other work.


