The checkbox is used to select zero or more options from many options using the graphical user interface. A form with a checkbox can be created by using QCheckBox class in a Python script or using the QCheckBox widget of Qt Designer without writing any script.
When a form with a checkbox is created using QCheckBox class, then stateChanged.connect() function is called to apply the action done by the user's input. If the user checked any checkbox option, then the value of QtCore.Qt.checked will be True. Multiple checkboxes with a single selection like Radio Button can be created using QbuttonGroup class.
How a form with a checkbox can be created by writing a Python script is shown in this tutorial.
Necessary methods of QCheckBox
QCheckBox class has many functions to do different types of tasks with the checkbox. Some most commonly used methods of this class are described below:
| Method Name | Purpose |
|---|---|
| isChecked() | It returns a boolean value. When the user clicks to check the checkbox, it returns True, otherwise, it returns False. |
| setChecked() | It is used to change the state of the checkbox. True value is set to make the checkbox checked, and False value is set to make the checkbox unchecked. |
| text() | It is used to read the label of the checkbox. |
| setText() | It is used to set the label of the checkbox. |
| isTriState() | It returns a boolean value. It is used to check the tri-state to know whether the checkbox is enabled or not. |
| setTriState() | It is used to enable the third state of the checkbox that indicates the neutral state. |
Create a Form with Checkbox using QCheckBox Class:
The uses of the checkbox are shown in this section using different types of examples. The use of a single checkbox, as shown in the first example, and the use of multiple checkboxes are shown in the second example.
Example 1: Creating a Single Checkbox
The way of creating a single checkbox using QCheckBox class and reading the input value of the checkbox provided by the user are shown in this example. The necessary modules are imported at the beginning of the script. A label is used in the above checkbox for providing the information for the user. If the user clicks on the checkbox to check, then the script will print, “Wow! You like programming”, otherwise the script will print, “Oh no!, You don't like programming”.
# Import necessary modulesimport sys
from PyQt5 import QtCore, QtWidgets
from PyQt5.QtWidgets import QMainWindow, QCheckBox, QLabel, QVBoxLayout, QDesktopWidget
# Define class for creating the form with single checkbox
class SingleCheckbox(QMainWindow):
def __init__(self):
super().__init__()
# Create the label text for the user
lb = QLabel("Do you like programming?", self)
lb.setGeometry(20, 20, 200, 20)
lb.move(20, 20)
# Create a checkbox with the label
cb = QCheckBox('Yes', self)
cb.stateChanged.connect(self.Check_Answer)
cb.move(20, 50)
# Set the vertical Qt Layout
vbox = QVBoxLayout()
vbox.addWidget(lb)
vbox.addWidget(cb)
# Set the window title and size
self.setWindowTitle('Form with Single Checkbox')
self.setGeometry(60, 60, 300, 100)
# Display the window in the center of the screen
win = self.frameGeometry()
pos = QDesktopWidget().availableGeometry().center()
win.moveCenter(pos)
self.move(win.topLeft())
self.show()
# Define function to check the user's input
def Check_Answer(self, state):
if state == QtCore.Qt.Checked:
print("Wow! You like programming.")
else:
print("Oh no!, You don't like programming.")
# Create app object and execute the app
app = QtWidgets.QApplication(sys.argv)
form = SingleCheckbox()
app.exec()
The following window with a checkbox will appear after executing the script.
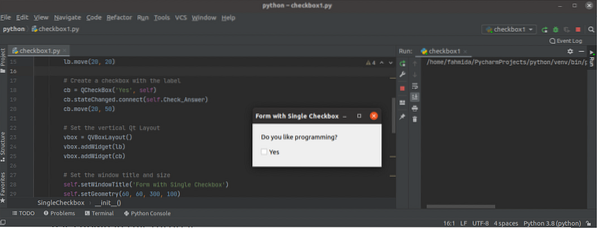
In the following output, the user has checked the checkbox twice and unchecked the checkbox once.

Example 2: Creating Multiple Checkboxes
The method of creating multiple checkboxes using QCheckbox class and reading multiple values of the multiple checkboxes are shown in this example. Two labels and three checkboxes are added to the window. The first label is added at the beginning of the checkboxes to provide information for the user, while the second label is added at the end of the checkboxes to display the values of the selected checkbox or checkboxes.
# Import necessary modulesimport sys
from PyQt5.QtWidgets import (QWidget, QCheckBox, QApplication, QVBoxLayout, QLabel, QDesktopWidget)
# Define class for creating the form with multiple checkboxes
class MultipleCheckbox(QWidget):
def __init__(self):
super().__init__()
# Set the label text for the user
lb = QLabel("Select your favorite food(s):", self)
lb.setGeometry(20, 20, 100, 20)
lb.move(20, 20)
# Create three checkboxes
cb1 = QCheckBox('Chocolate Cake', self)
cb1.move(20, 70)
cb1.stateChanged.connect(lambda: self.Selected_Value(cb1))
cb2 = QCheckBox('Ice-Cream', self)
cb2.move(20, 90)
cb2.stateChanged.connect(lambda: self.Selected_Value(cb2))
cb3 = QCheckBox('Pasta', self)
cb3.move(20, 110)
cb3.stateChanged.connect(lambda: self.Selected_Value(cb3))
self.label = QLabel('Nothing Selected')
self.label.move(20, 150)
# Set the vertical Qt Layout
vbox = QVBoxLayout()
vbox.addWidget(lb)
vbox.addWidget(cb1)
vbox.addWidget(cb2)
vbox.addWidget(cb3)
vbox.addWidget(self.label)
self.setLayout(vbox)
self.setWindowTitle('Form with Multiple Checkboxes')
self.setGeometry(60, 60, 350, 200)
self.lblText = "
# Display the window in the center of the screen
win = self.frameGeometry()
pos = QDesktopWidget().availableGeometry().center()
win.moveCenter(pos)
self.move(win.topLeft())
self.show()
# Define function to read the user's input
def Selected_Value(self, btn):
if self.lblText != ":
str = self.lblText
strArray = str.split(' ,')
self.lblText = "
for val in strArray:
if btn.text() != val:
if self.lblText == ":
self.lblText = val
else:
self.lblText += ' ,' + val
if btn.isChecked() == True:
if self.lblText == ":
self.lblText = btn.text()
else:
self.lblText += ' ,' + btn.text()
else:
if btn.isChecked() == True:
if self.lblText == ":
self.lblText = btn.text()
else:
self.lblText += ' ,' + btn.text()
self.label.setText('You have selected \n' + self.lblText)
# Create app object and execute the app
app = QApplication(sys.argv)
ex = MultipleCheckbox()
sys.exit(app.exec_())
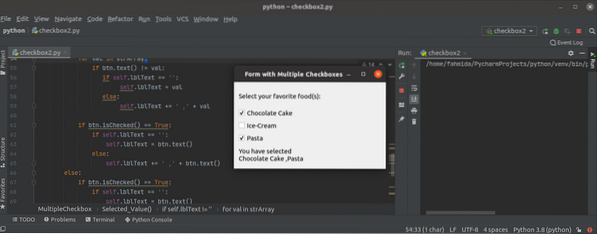
The following window will appear after executing the script. The default value of the second label is “Nothing is selected” and the value of the label will be changed when any checkbox is checked or unchecked by the user.

In the following output, two checkboxes are checked by the user, and the value of the second label is changed to “Chocolate, Pasta”.
Conclusion
The way of defining one or multiple checkboxes and reading the values of the selected checkbox(es) have been explained in this tutorial using two simple examples. The groups of checkboxes can be defined to select a particular checkbox from a group that is not shown here.


