In this article, I am going to show you how to use KRename to rename multiple files on the KDE 5 Plasma Desktop Environment. I will be using Kubuntu 18.04 LTS for the demonstration in this article. But any modern Linux distribution that supports KDE Desktop Environment (such as Ubuntu/Debian, LinuxMint, Arch) should work just fine. So, let's get started.
Installing KRename on Ubuntu/Debian from the Command Line:
On Ubuntu/Debian you can install KRename from the official package repository very easily.
First, update the APT package repository cache with the following command:
$ sudo apt update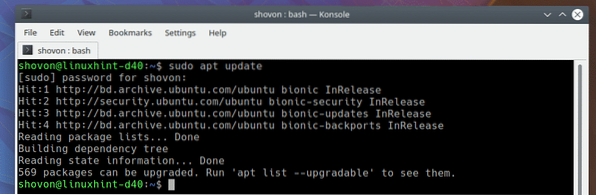
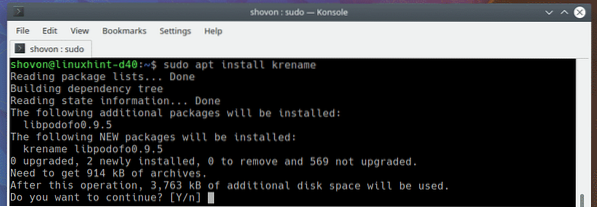
Now, install KRename with the following command:
$ sudo apt install krename
Now, press y and then press
KRename should be installed.

Installing KRename from Software Center:
You can also install KRename from the Software Center of KDE 5 Plasma Desktop.
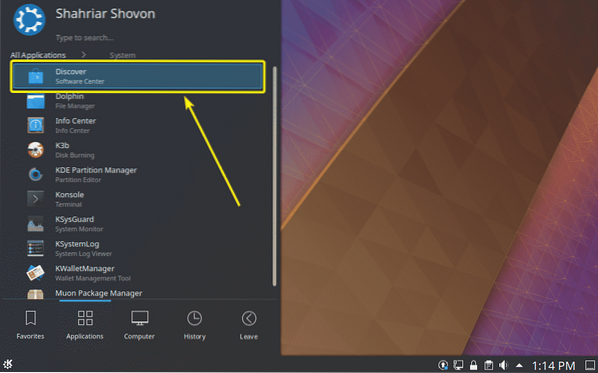
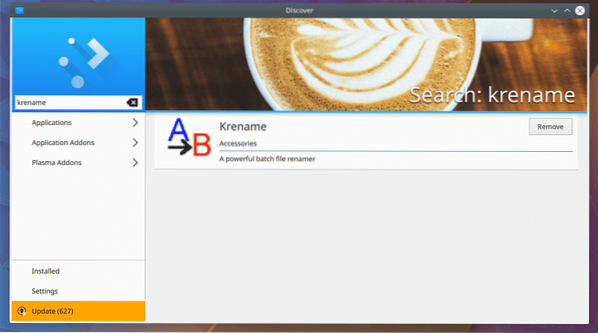
First, open Software Center from KDE Application Launcher > Applications > System > Discover as marked in the screenshot below.
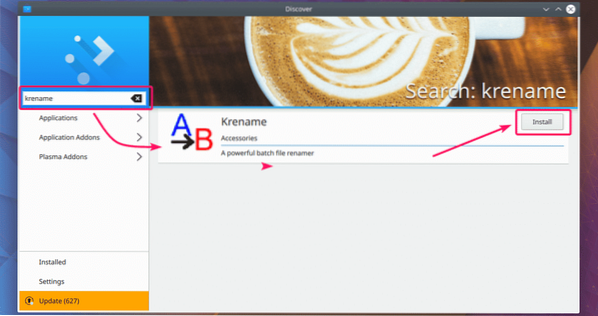
Now, search for KRename. Once you find it, click on Install as marked in the screenshot below.
KRename should be installed.
Starting KRename:
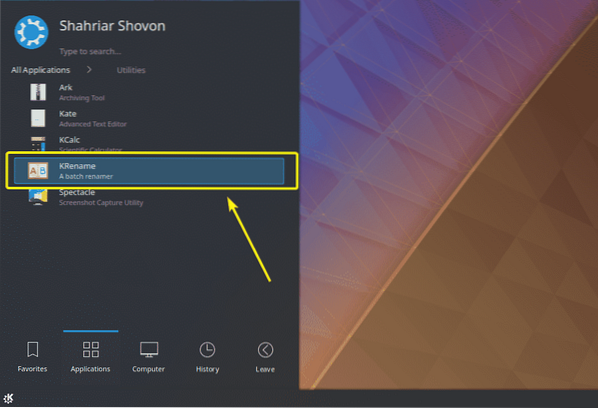
Once KRename is installed, you can start KRename from KDE Application Launcher > Applications > Utilities > KRename as marked in the screenshot below.
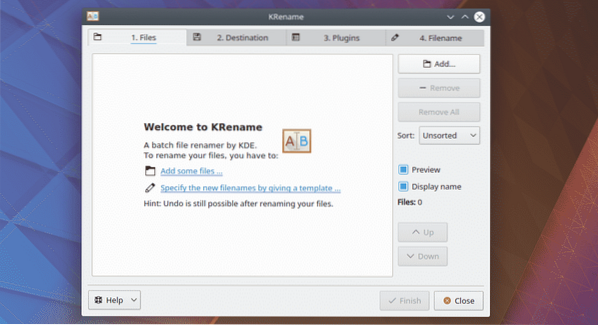
KRename should start. In the next section of this article, I will show you how to use KRename to bulk rename your files.
Using KRename:
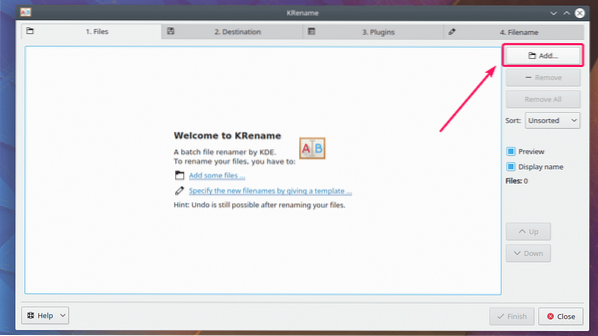
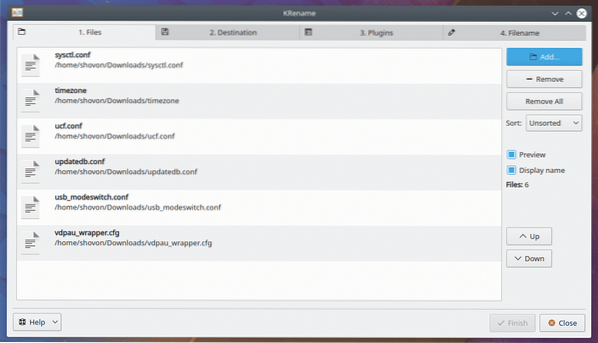
The first thing you have to do is to add some files to KRename. You can click on the Add… button to add the files that you want to rename.
Now, select the files that you want to rename and click on Open.
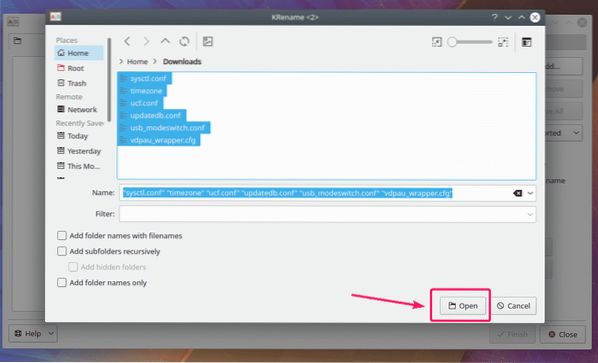
All the files that you want to rename should be opened.
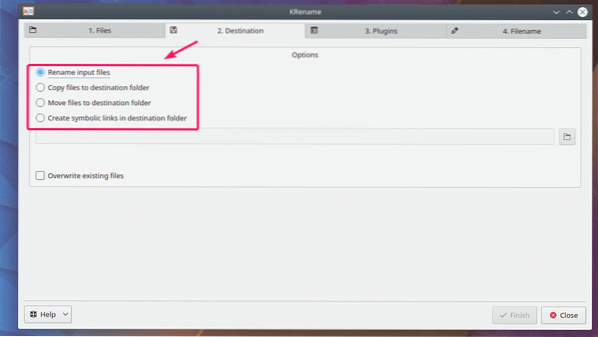
Now, go to the Destination tab. Normally you don't have to do anything from here. The default option Rename input files is what you want. But, if you want to move or copy the files to another folder after the rename operation, or create symbolic links to the files in another folder, you can do it from here with one of the options as marked in the screenshot below.
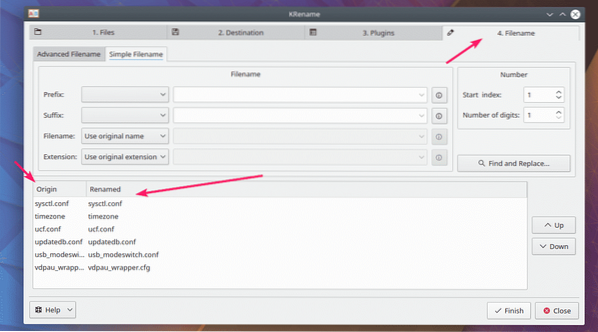
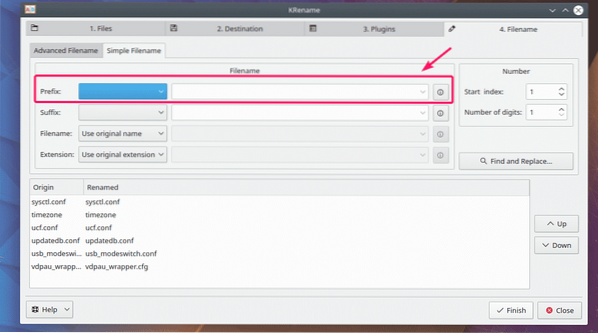
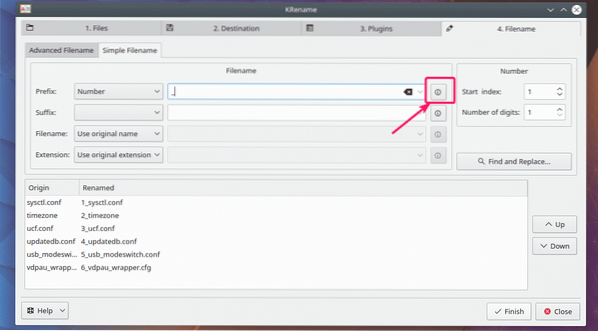
To rename your files, you have to go to the Filename tab. On the bottom you have a handy preview window as you can see in the screenshot below. Here, on the left, you have the original file names and on the right, you have the renamed file names.
Here, you have a Prefix section. You can use it to add a prefix on your existing filename.
Here, you have a Prefix section. You can use it to add a prefix on your existing filename.
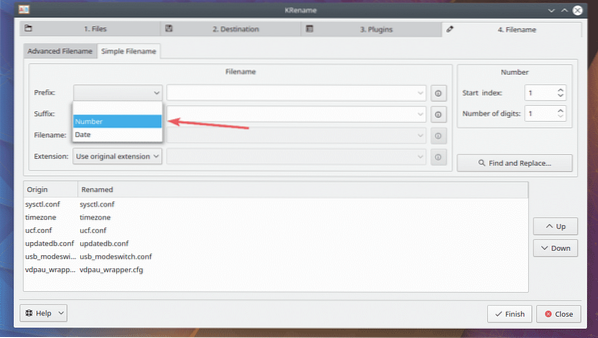
As you can see, the Number is inserted before the file.
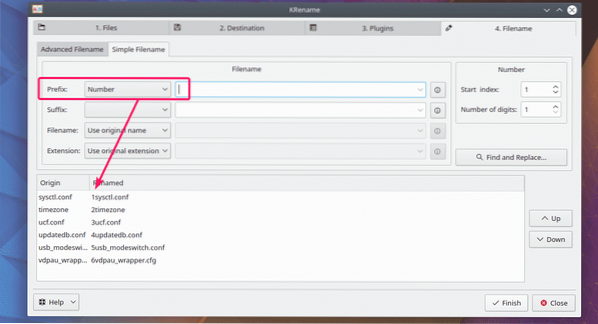
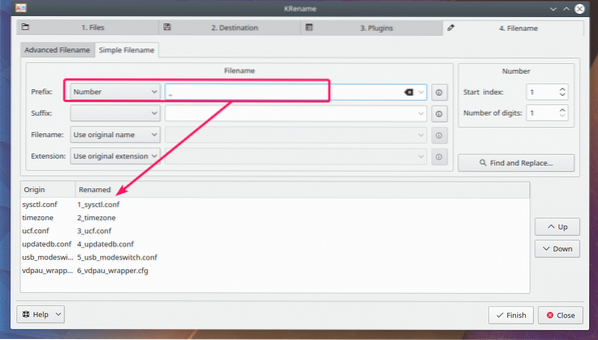
If you want to add something after the number, you can put it in the empty text box right next to the prefix checkbox.
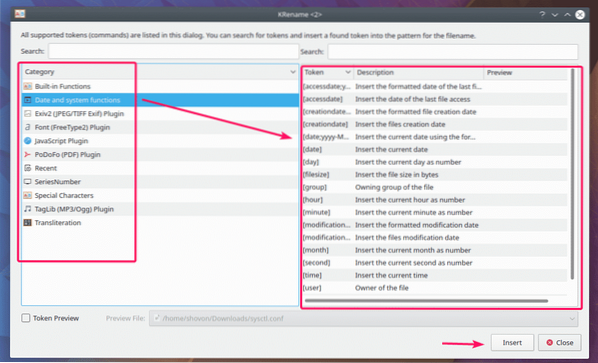
If you want more complex option, click on the icon as marked in the screenshot below.
As you can see, there are many categories and each category has a lot of options to choose from. Select what you want to put in your filename and click on Insert.
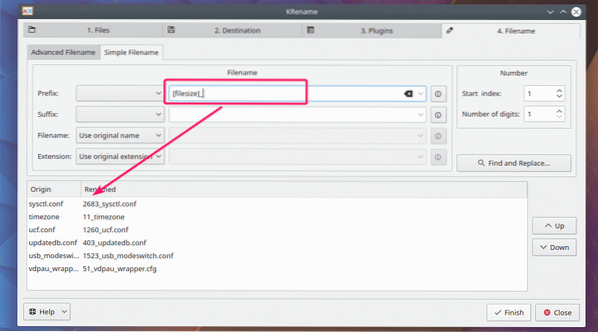
As you can see, I've added [filesize] option and the file names are updated in the preview section.
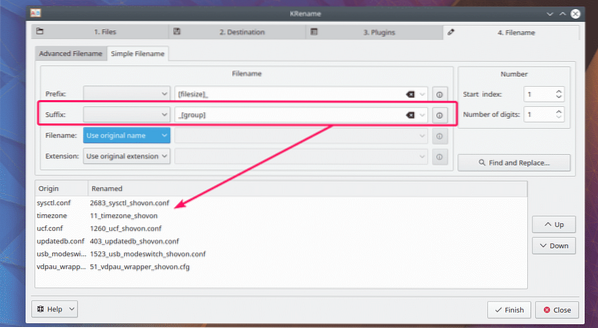
The same way, you can choose a Suffix (to add after the filename, before the extension). The options are the same as the Prefix. So, I am not showing you this again here.
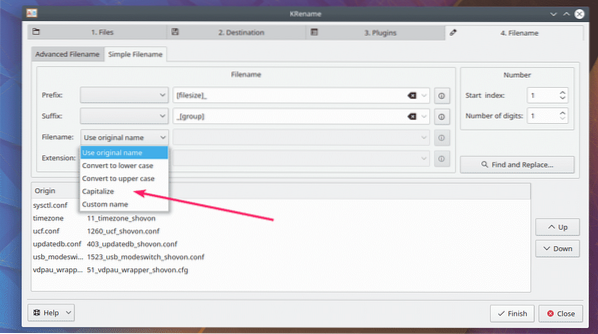
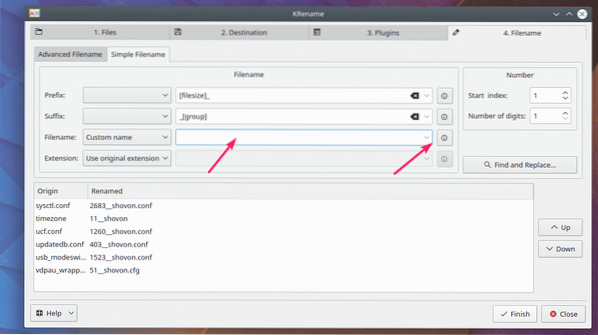
You can also change the filename to Uppercase, lowercase or Capitalize it from the Filename section. You will more likely want to set a custom name depending on your need. To do that, click on Custom name.
Now, you can either set a custom name, or select from many predefined options as you saw earlier.
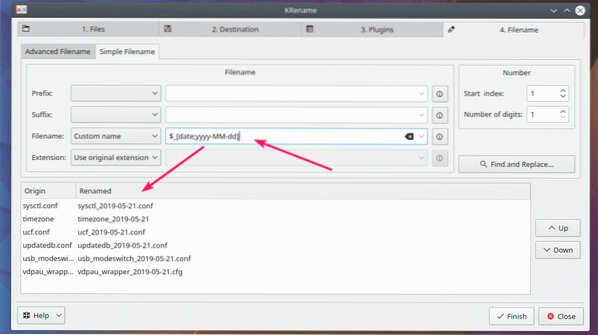
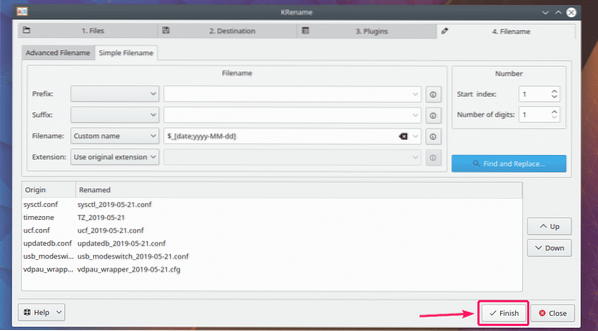
I added the current date after the filename using one of the predefined template. Here, $ is replaced by the original filename.
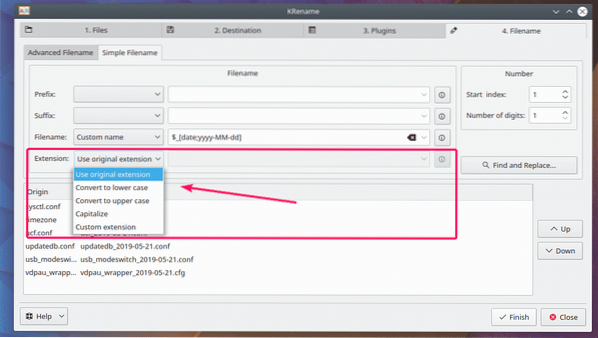
The same way, you can convert the extension to lower case, upper case or capitalize it from the Extension section. You can also set custom extension the same way as before.
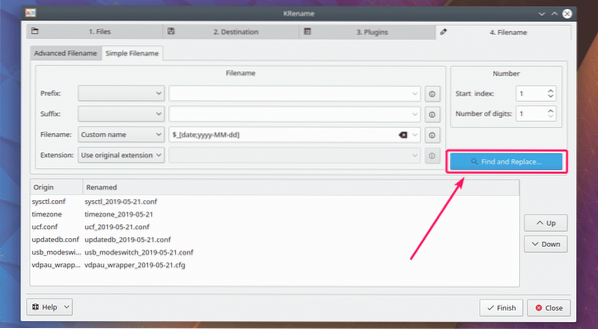
If you want, you can also search for strings and replace them. You can also use regular expression to match and replace strings in your filename. To do that, click on the Find and Replace… button as marked in the screenshot below.
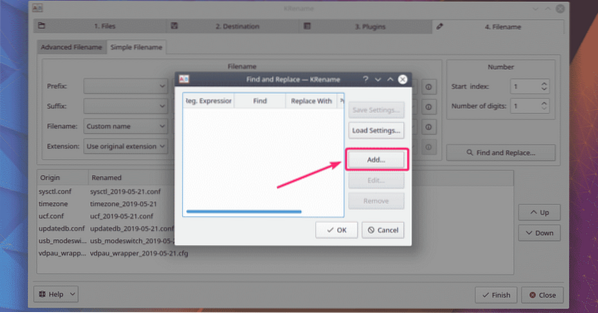
Now, click on Add… to add a new find and replace pattern.
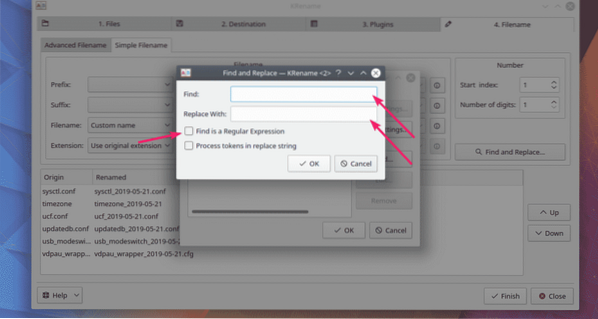
Now, type in what you want to find in the Find section, then what you want to replace with in the Replace With section. If you want to match regular expressions, then put the regular expression in the Find section and check Find is a Regular Expression. Once you're done, click on OK.
Now, click on OK for it to take effect. If the find and replace pattern is something that you use very frequently, then you can also save it and load it latter. To save the pattern, click on Save Settings… and save it somewhere safe. If you need it later, you can click on Load Settings… and load the pattern.
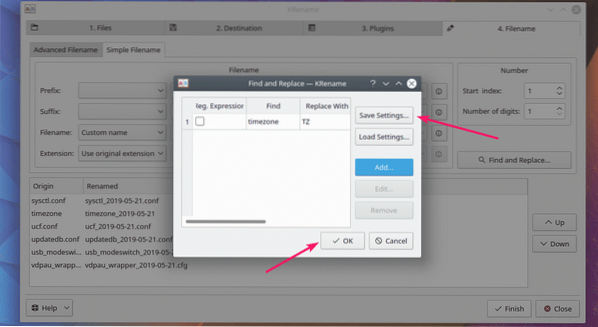
As you can see, timezone is replaced with TZ.

Once you're done, click on Finish for the rename operation to take place.
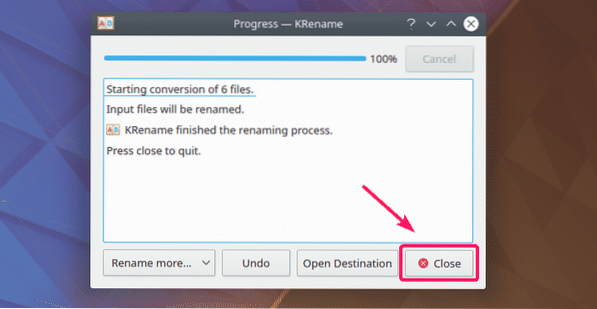
Once the rename process is finished. Click on Close.
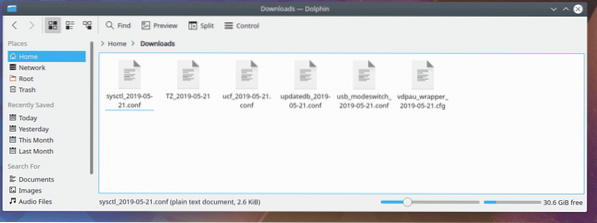
As you can see, the files are renamed.
So, that's how you install and use KRename on KDE Plasma Desktop Environment. Thanks for reading this article.


