On CentOS/RHEL, you can easily run the mysql_secure_installation command to set up a root password. But on Ubuntu 20.04 LTS, this method does not work, as MySQL uses a different authentication plugin for the root user.
This article will show you how to set up a MySQL root password on CentOS 8 and Ubuntu 20.04 LTS Linux distributions using Ansible modules.
Prerequisites
If you want to try out the examples included in this article,
1) You must have Ansible installed on your computer.
2) You must have at least a CentOS/RHEL 8 host or an Ubuntu 20.04 LTS host configured for Ansible automation.
There are many articles on LinuxHint dedicated to installing Ansible and configuring hosts for Ansible automation. You may check these out if needed.
Setting Up a Project Directory
Before we move on any further, we will set up a new Ansible project directory, just to keep things a bit organized.
To create the project directory mysql-root-pass/ and all the required subdirectories (in your current working directory), run the following command:
$ mkdir -pv mysql-root-pass/playbooks,host_vars,group_vars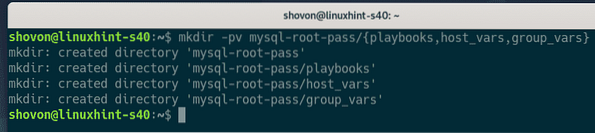
Once the project directory is created, navigate to the project directory, as follows:
$ cd mysql-root-pass/
Create a hosts inventory file, as follows:
$ nano hosts
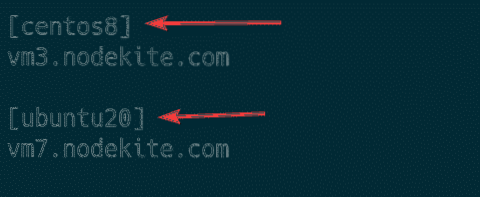
Add the host IP or DNS names of your CentOS/RHEL 8 or Ubuntu 20.04 LTS hosts in the inventory file (one host per line), as shown in the screenshot below.
Once you are done, save the file by pressing
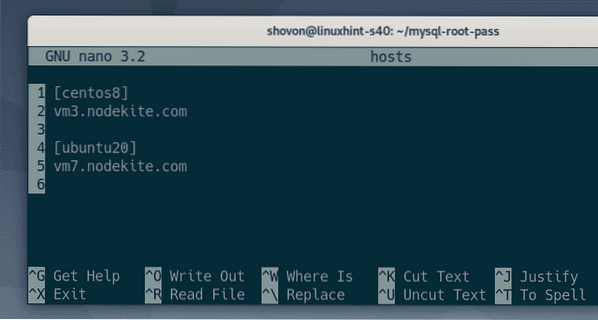
Here, I have created two groups, centos8, and ubuntu20. The centos8 group has the DNS name of my CentOS 8 host, vm3.nodekite.com; and the ubuntu20 group has the DNS name of my Ubuntu 20.04 LTS host, vm7.nodekite.com.
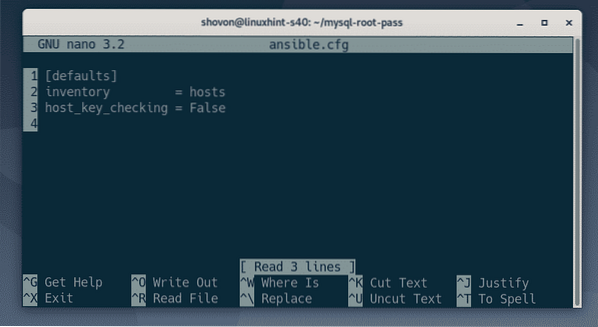
Create an Ansible configuration file ansible.cfg in your project directory, as follows:
$ nano ansible.cfg
Type the following lines in the ansible.cfg file:
[defaults]inventory = hosts
host_key_checking = False
Once you are done, save the ansible.cfg file by pressing
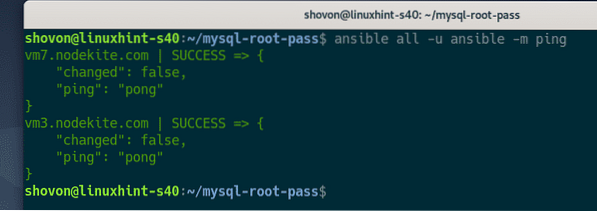
Try pinging all the hosts you have added in your hosts inventory file, as follows:
$ ansible all -u ansible -m ping
As you can see, the my CentOS 8 host (vm3.nodekite.com) and Ubuntu 20.04 LTS host (vm7.nodekite.com) are accessible.
Installing MySQL and Setting Up Root Password on CentOS/RHEL 8
This section will show you how to install the MySQL database server and set up a root password on CentOS 8 using Ansible. The same procedure should work on RHEL 8.
Create the new Ansible playbook install_mysql_centos8.yaml in the playbooks/ directory, as follows:
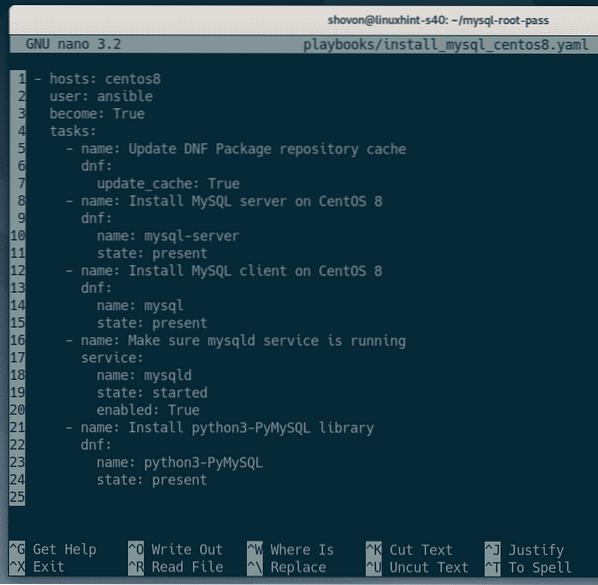
$ nano playbooks/install_mysql_centos8.yaml
Type the following lines in the install_mysql_centos8.yaml file:
- hosts: centos8user: ansible
become: True
tasks:
- name: Update DNF Package repository cache
dnf:
update_cache: True
- name: Install MySQL server on CentOS 8
dnf:
name: mysql-server
state: present
- name: Install MySQL client on CentOS 8
dnf:
name: mysql
state: present
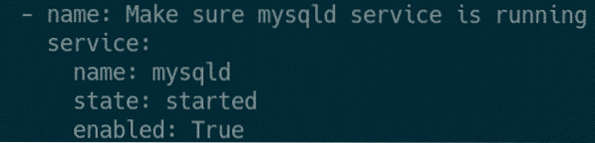
- name: Make sure mysqld service is running
service:
name: mysqld
state: started
enabled: True
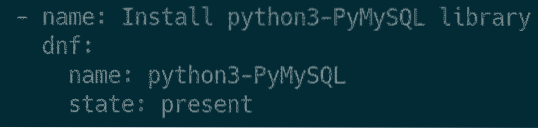
- name: Install python3-PyMySQL library
dnf:
name: python3-PyMySQL
state: present
Once you are done, press
The line below tells Ansible to run the playbook install_mysql_centos8.yaml on every host in the centos8 group.

Here, I have defined 5 tasks.
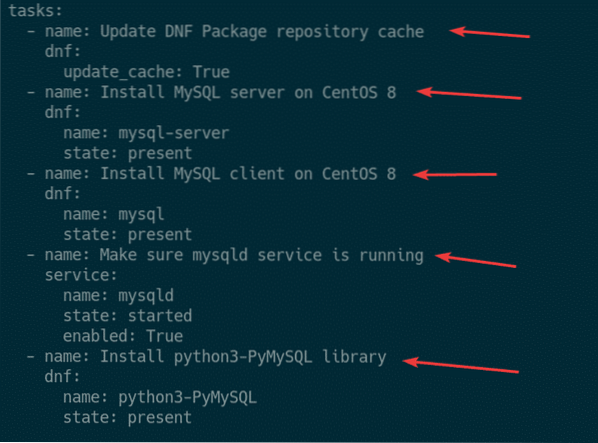
The first task updates the DNF package repository cache of CentOS 8 using the Ansible dnf module.

The second task installs the MySQL server package mysql-server using the Ansible dnf module.

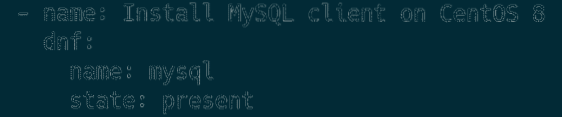
The third task installs the MySQL client package mysql using the Ansible dnf module.
The fourth task ensures that the mysqld service is running and that it has been added to the system startup so that it automatically starts on boot.
The fifth task installs the Python 3 MySQL library pymysql. This is required for accessing MySQL from Ansible.
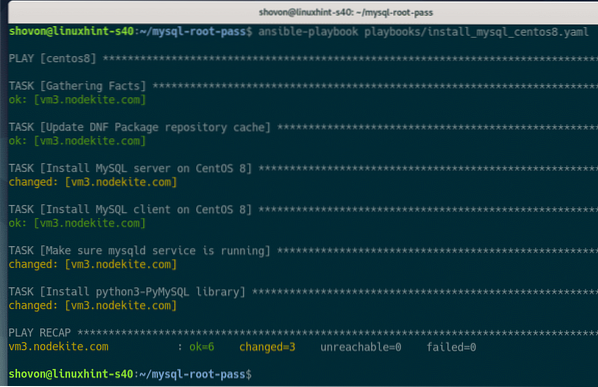
Run the install_mysql_centos8.yaml playbook, as follows:
$ ansible-playbook playbooks/install_mysql_centos8.yaml
As you can see, the playbook install_mysql_centos8.yaml ran successfully.
On my CentOS 8 host, I can access MySQL as the root user without any password, as you can see in the screenshot below:
$ sudo mysql -u root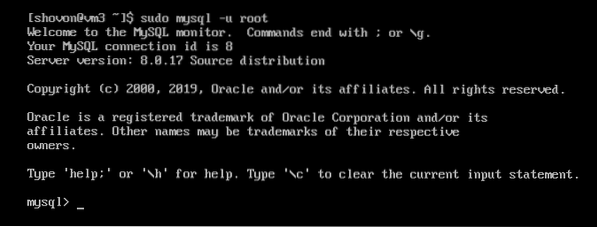
Now that the MySQL server is installed, it is time to set up a root password for the MySQL server.
Create the new group variable file centos8 (in the group_vars/ directory) for the centos8 group, as follows:
$ nano group_vars/centos8
Add a new variable mysql_pass with the root password (in my case, secret) you would like to set, as shown in the screenshot below.
Once you are done, press

Create a new playbook set_root_pass_centos8.yaml with the following command:
$ nano playbooks/set_root_pass_centos8.yaml
Type the following lines in the set_root_pass_centos8.yaml file:
- hosts: centos8user: ansible
become: True
tasks:
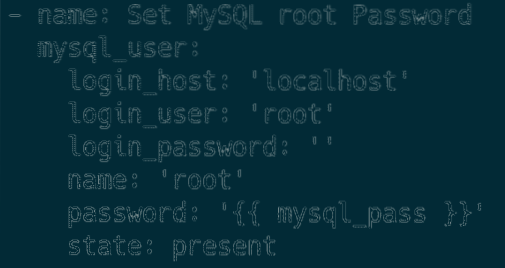
- name: Set MySQL root Password
mysql_user:
login_host: 'localhost'
login_user: 'root'
login_password: "
name: 'root'
password: ' mysql_pass '
state: present
Once you are done, press
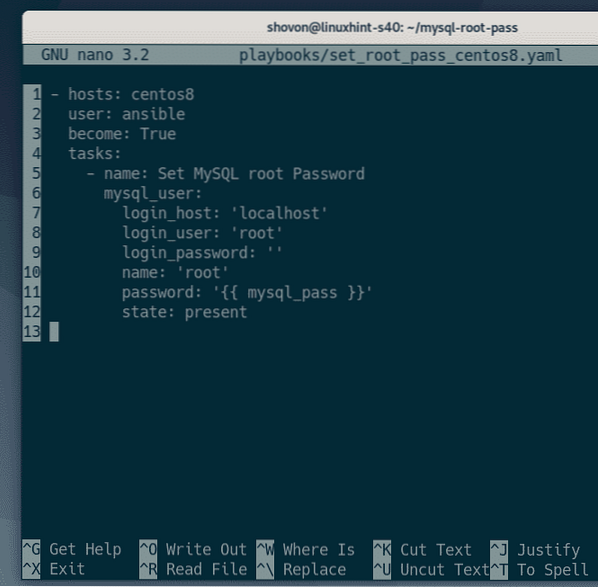
This playbook uses the mysql_user Ansible module to set a MySQL root password.
The login_host, login_user, and login_password options of the mysql_user Ansible module are used to set the current MySQL login hostname, username, and password, respectively. By default, the MySQL login hostname (login_host) is the localhost, the login username (login_user) is the root, and the login password (login_password) is empty (”) on CentOS 8.

The password option of the mysql_user Ansible module is used to set a new MySQL root password, here. The MySQL root password will be the value of the mysql_pass group variable that was set earlier.

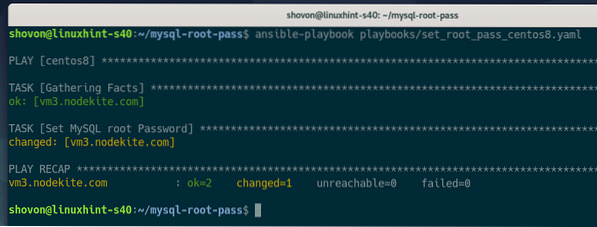
Run the playbook set_root_pass_centos8.yaml with the following command:
$ ansible-playbook playbooks/set_root_pass_centos8.yaml
The playbook ran successfully, as seen in the screenshot below:
As you can see, I can no longer log in to the MySQL server without a root password.

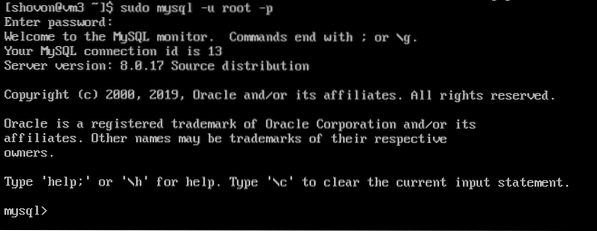
To log in to the MySQL server as the root user with a password, run the following command on your CentOS 8 host:
$ sudo mysql -u root -p
Type in the root password you have set using Ansible, and press

You should be logged in to the MySQL server as the root user.
Installing MySQL and Setting Up root Password on Ubuntu 20.04 LTS
This section will show you how to install the MySQL database server and set up a root password on Ubuntu 20.04 LTS using Ansible.
Create a new Ansible playbook install_mysql_ubuntu20.yaml in the playbooks/ directory, as follows:
$ nano playbooks/install_mysql_ubuntu20.yaml
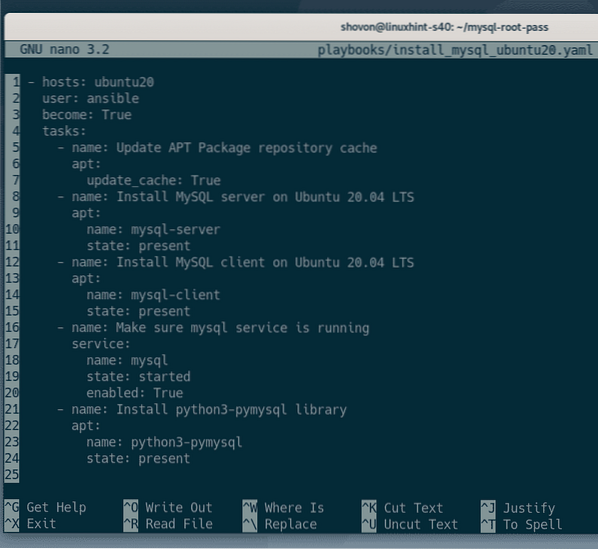
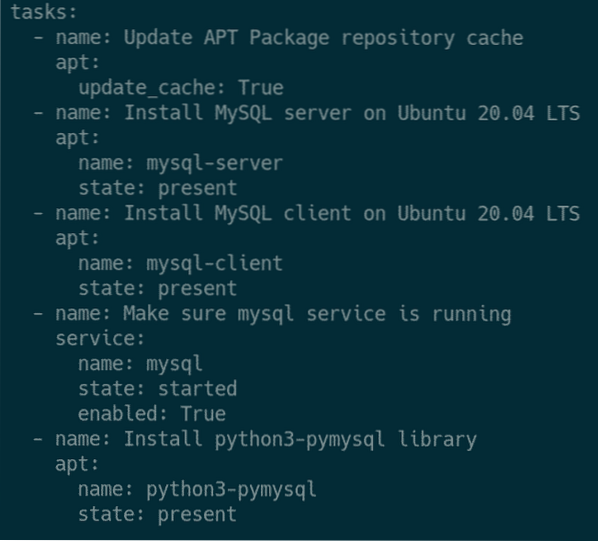
Type the following lines in the install_mysql_ubuntu20.yaml file:
- hosts: ubuntu20user: ansible
become: True
tasks:
- name: Update APT Package repository cache
apt:
update_cache: True
- name: Install MySQL server on Ubuntu 20.04 LTS
apt:
name: mysql-server
state: present
- name: Install MySQL client on Ubuntu 20.04 LTS
apt:
name: mysql-client
state: present
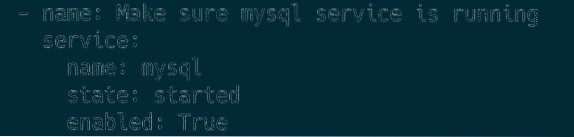
- name: Make sure mysql service is running
service:
name: mysql
state: started
enabled: True
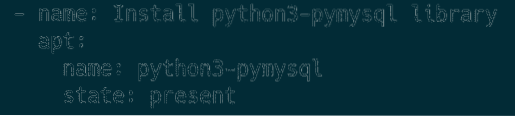
- name: Install python3-pymysql library
apt:
name: python3-pymysql
state: present
Once you are done, press
The following line tells Ansible to run the playbook install_mysql_ubuntu20.yaml on every host in the ubuntu20 group:

Here, I have defined 5 tasks.
The first task updates the APT package repository cache of Ubuntu 20.04 LTS using the Ansible apt module.

The second task installs the MySQL server package mysql-server using the Ansible apt module.

The third task installs the MySQL client package mysql using the Ansible apt module.

The fourth task makes sure that the mysql service is running and that it has been added to the system startup so that it automatically starts on boot.
The fifth task installs the Python 3 MySQL library pymysql. This is required to access MySQL from Ansible.
Run the install_mysql_ubuntu20.yaml playbook, as follows:
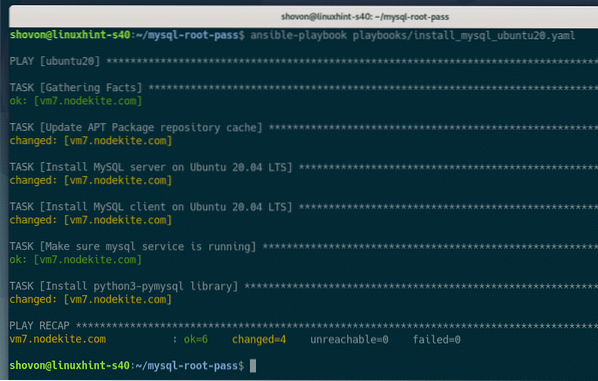
$ ansible-playbook playbooks/install_mysql_ubuntu20.yaml
As you can see, the playbook install_mysql_ubuntu20.yaml ran successfully.
On my Ubuntu 20.04 LTS host, I can access MySQL as the root user without any password, as you can see in the screenshot below.
$ sudo mysql -u root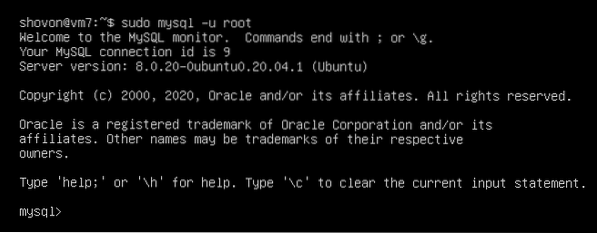
Now that the MySQL server is installed, it is time to set up a root password for the MySQL server.
Create a new group variable file ubuntu20 (in the group_vars/ directory) for the ubuntu20 group, as follows:
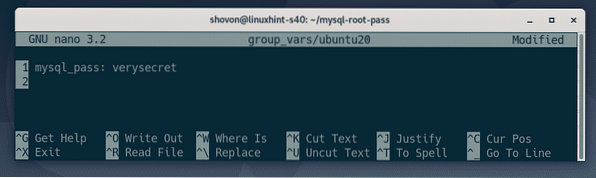
$ nano group_vars/ubuntu20
Add a new variable, mysql_pass, with the root password (in my case, verysecret) that you would like to set, as shown in the screenshot below.
Once you are done, press
Create a new playbook set_root_pass_ubuntu20.yaml with the following command:
$ nano playbooks/set_root_pass_ubuntu20.yaml
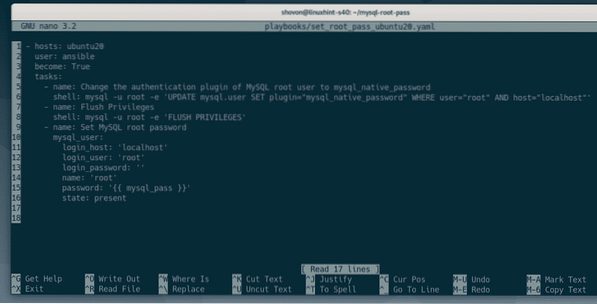
Type the following lines in the set_root_pass_ubuntu20.yaml file:
- hosts: ubuntu20user: ansible
become: True
tasks:
- name: Change the authentication plugin of MySQL root user to mysql_native_password
shell: mysql -u root -e 'UPDATE mysql.user SET plugin="mysql_native_password"
WHERE user="root" AND host="localhost"'
- name: Flush Privileges
shell: mysql -u root -e 'FLUSH PRIVILEGES'
- name: Set MySQL root password
mysql_user:
login_host: 'localhost'
login_user: 'root'
login_password: "
name: 'root'
password: ' mysql_pass '
state: present
Once you are done, press
Here, I have defined three tasks.
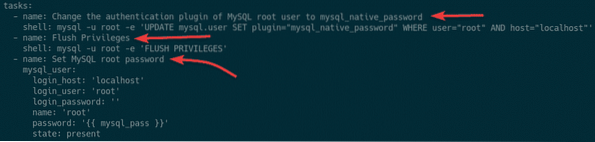
The first task changes the authentication plugin of the MySQL root user from auth_socket to mysql_native_password.

The second task reloads all the privileges.

The third task uses the mysql_user Ansible module to set a MySQL root password.
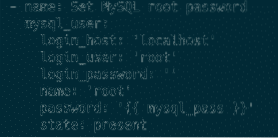
In the third task, the login_host, login_user, and login_password options of the mysql_user Ansible module are used to set the current MySQL login hostname, username, and password, respectively. By default, the MySQL login hostname (login_host) is localhost, the login username (login_user) is root, and the login password (login_password) is empty (”) on the system.
Here, the password option of the mysql_user Ansible module is used to set a new MySQL root password. The MySQL root password will be the value of the mysql_pass group variable, which I set earlier, in the group_vars/ubuntu20 file.

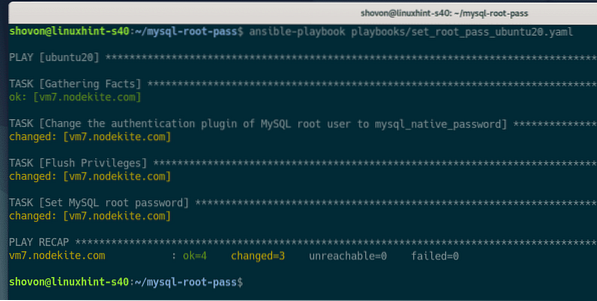
Run the playbook set_root_pass_ubuntu20.yaml with the following command:
$ ansible-playbook playbooks/set_root_pass_ubuntu20.yaml
The playbook ran successfully, as you can see in the screenshot below:
As you can see, I can no longer log in to the MySQL server without a root password.
$ sudo mysql -u root
To log in to the MySQL server as the root user with the set password, run the following command on your Ubuntu 20.04 LTS host:
$ sudo mysql -u root -p
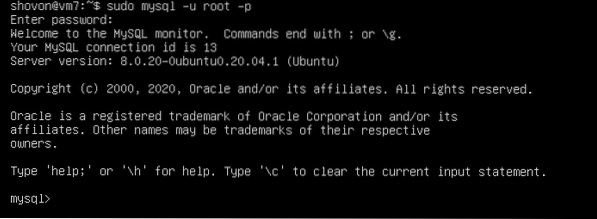
Type in the root password you have set using Ansible and press
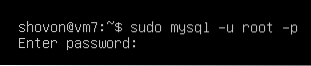
You should be logged in to the MySQL server as the root user.
Conclusion
This article showed you how to install the MySQL server and set a MySQL root password on CentOS 8 and Ubuntu 20.04 LTS Linux distributions using Ansible. This article used the mysql_user Ansible module for setting up the MySQL root password. You can use this module to change the MySQL root password, create new MySQL users, and perfore many more user management functions.
For more information on the mysql_user module, check the official documentation of the mysql_user module.


