Of the various customization options available with Microsoft Band 2, the one that deserves a special mention is Tiles interface. It allows you to select which tiles should appear on your Band 2, and in what order. Once done, you can scroll through the list of tiles displayed on the device and enable or disable their service, as you deem fit. Here's how you can manage tiles and notifications of your Microsoft Band 2.
Manage Tiles & Notifications of Microsoft Band 2
Choose which tiles appear on your Band. You can select which tiles appear on your Band. Here's how:
On Windows Smartphone, tap the Microsoft Health app.
Next, tap Menu icon > Manage Tiles.

Now, under Choose which tiles appear on your Band section, tap the toggle to the right of the name of any tile to turn it On or Off.
When done, scroll down to see more tiles. After you have made up your mind about which tiles you would prefer to keep, tap Save icon
Rearrange your tiles
By default, the Me Tile displaying the current time, is always the first tile on your Band and the Settings Tile always appears last. If required, you can change the order of the tiles between these two. To do so,
On your phone, tap the Microsoft Health app.
In the next step, tap Menu icon > Manage Tiles and tap the Arrow Right arrow to open the Band Organization screen.
Then, hold down a tile and drag it to a desired place.
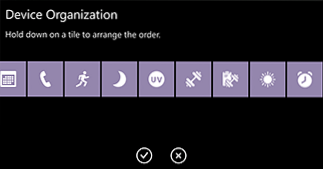
Repeat the step until all your tiles are placed in the desired order you want. Finally, tap Accept icon.
Apart from this, if you would like to manage notifications, quick responses, alerts, and more on your Band, you will need to modify the settings of some tiles. Here's how
Tap the Microsoft Health app residing on your Windows Smartphone, chose Menu icon > Manage Tiles and tap Edit Menu icon, adjacent to the tile you would like to modify.


