
In the era of cloud computing, you can't deny the necessity of having at least one cloud service. Those who have been using Dropbox, Google Drive, or Onedrive for decades will be able to relate to the concept of OwnCloud. Basically, the OwncCloud is the opensource and free replacement of all those third-party cloud servers. On Ubuntu, file hosting and sharing have become easier and boundless with the assist of OwnCloud service.
OwnCloud On Ubuntu Linux
If you have your own hosting server, you can install and configure your OwnCloud on your Ubuntu Linux. You can also choose any other hosting services to configure your Owncloud. OwnCloud can be synchronized with your mobile devices, Mac, or even with Windows operating devices. It is private, secure, and, most importantly, owned by you. You can share files among your clients and colleagues with the OwnCloud suite. In this post, we are going to see how to install and configure OwnCloud on Ubuntu Linux.
Step 1: Updating The Ubuntu System Repository for OwnCloud
OwnColud requires an updated and virtual private server that can host all your files. It is important to get your system updated because, as you are going to host a server so all security patches must be updated with no bugs. So, first things fast. Let's update and upgrade our Ubuntu system.
$ sudo apt update -y && sudo apt upgrade -y
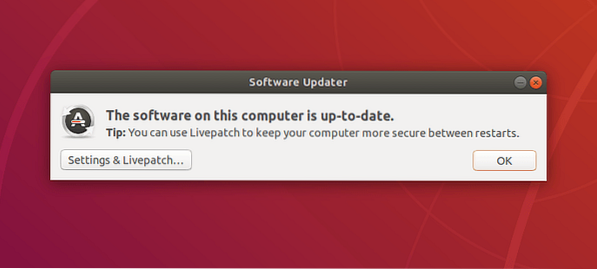
You can also check your Ubuntu Software Updater to check if there is an update available or not. Remember to choose the best server for your region to get the best download speed.
Step 2: Installing PHP and Apache Server for OwnCloud
You may ask, why should you install PHP to start OwnCloud? Well, the answer is simple; PHP is the best programming language to interpret with any website and web server. PHP can also be integrated with any database engine. To install and update your PHP version from Ubuntu, follow the apt command lines in your terminal.
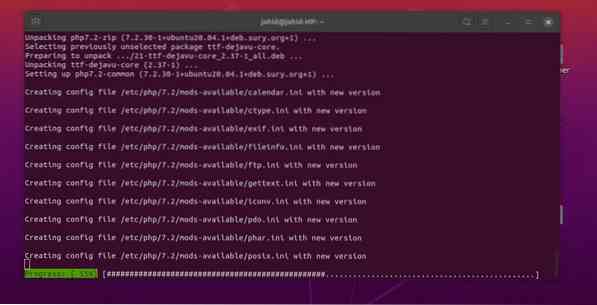
$ sudo apt install apache2 libapache2-mod-php7.2 openssl php-imagick php7.2-common php7.2-curl php7.2-gd php7.2-imap php7.2-intl php7.2-json php7.2-ldap php7.2-mbstring php7.2-mysql php7.2-pgsql php-smbclient php-ssh2 php7.2-sqlite3 php7.2-xml php7.2-zip
Now you can install the Apache Server on your Ubuntu system. The Apache HTTP server will take to the point where you can get started with the OwnCloud on Ubuntu. If you already have an Apache server installed, you can check whether it is working properly or not.
$ sudo apt update && upgrade $ sudo apt install apache2 $ sudo systemctl start apache2 $ sudo systemctl enable apache2
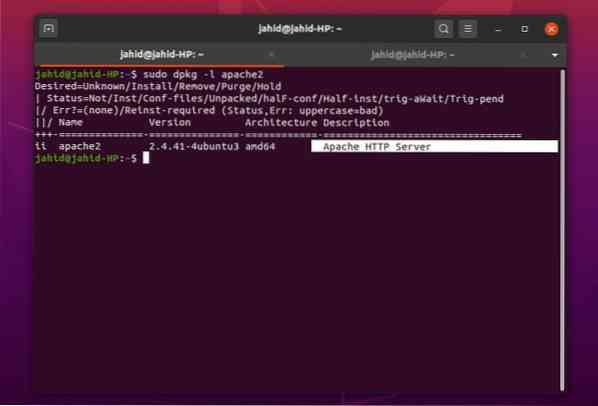
Here you can check if the HTTP server of the Apache is functioning or not. If you find any error while checking the Apache server status, be mindful that you are entering the correct version of the Apache server. Or if you find there is no Apache server installed in your system, you can follow the terminal commands provided below.
$ sudo dpkg -l apache2
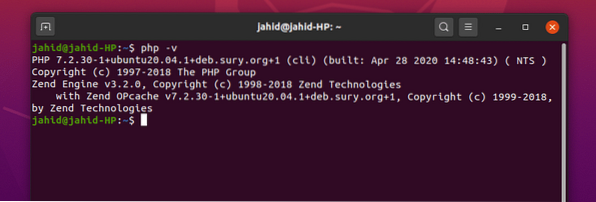
Now check your PHP version to ensure that the PHP framework is functioning properly.
$ php -v
Now you might need to make a few changes inside your PHP configuration file. Make the following changes using the Nano text editor, as shown below. You can also change these settings according to the demand of your OwnCloud server.
file_uploads = On allow_url_fopen = On memory_limit = 256M upload_max_filesize = 100M display_errors = Off date.timezone = Bangladesh/Dhaka
Step 3: Checking the Apache Server Status
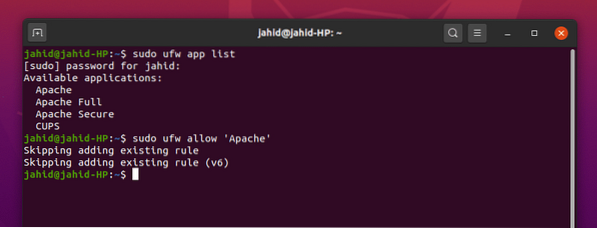
In order to check whether your Apache server is functioning correctly or not, very first, you need to allow your firewall defender to reach the Apache server. Usually, on Ubuntu, the firewall controls web traffic. It can drop or deny your Apache server address from the access list. So, let's tell our Firewall to accept the Apache server address. Before granting any access, you can always have the list that might need the firewall access. You may also need to get the firewall access for the OwnCloud service on your Ubuntu.
$ sudo ufw app list $ sudo ufw allow 'Apache' $ sudo ufw status
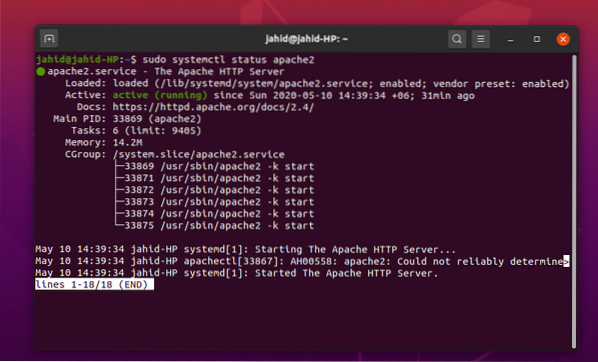
Now you can check the status of the Apache server. You can use the systemctl command in your Ubuntu terminal.
$ sudo systemctl status apache2
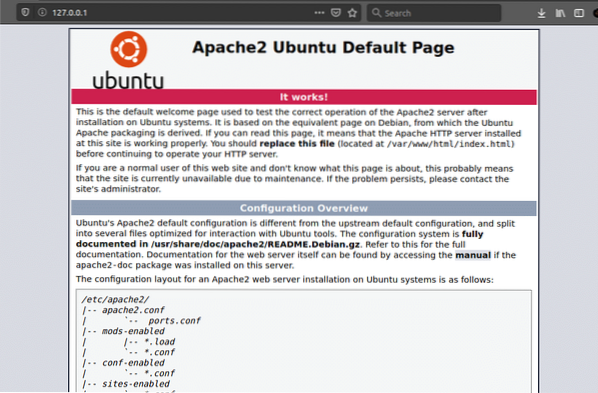
I assume that you have done all the above processes correctly, and now you're looking forward to getting into your Apache server. Here you might find a little complication to find your Apache server address. Normally the server is always hosted in the localhost, but if you're using any Virtual Machine or Docker, you can find the server address with the basic net tool ifconfig command.
$ ifconfig

There you go, your Apache default webpage is now opened in your browser. You can change this file from your Apache root directory. And you can also get the manual inside your usr/share directory.
/var/www/html/index.html /usr/share/doc/apache2/README.Debian.gz
Step 4: Installing and Configuring the MariaDB for OwnCloud
MariaDB is the recommended server for MySQL language. As we are working with the Apache webserver so, we will be dealing with a database as well. To install the MariaDB on your Ubuntu machine, follow the terminal commands provided below.
$ sudo apt install mariadb-server
Check your MariaDB status, whether it is working or not. Also, you may check the version of your MySQL.
$ sudo systemctl status mariadb $ mysql -V
Don't forget to add the GNU Privacy Guard(GPG) key for the MariaDB. This will help to encrypt your OwnCloud data. Then, update the Ubuntu repository.
$ sudo apt-key adv --recv-keys --keyserver hkp://keyserver.ubuntu.com:80 $ sudo add-apt-repository 'deb [arch=amd64,arm64,ppc64el] http://ftp.utexas.edu/mariadb/repo/10.3/ubuntu bionic main'
Here is the thing that you might want to know if your DB engine is working perfectly or not. By entering the MariaDB root password in the terminal, you can change the old password, remove anonymous users, disallow root login remotely, remove test database, and reload privilege tables from Ubuntu.
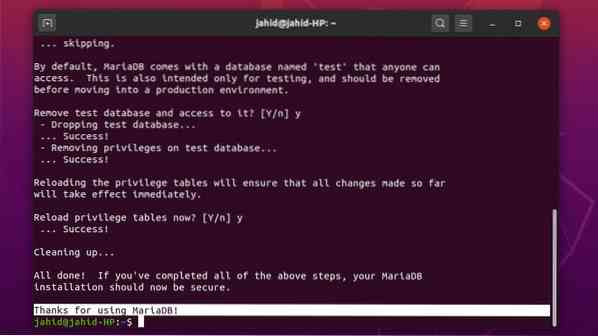
To secure your database server and get the root access use the following terminal command. If you find any error, first close your Apache localhost server then try again.
$ sudo mysql_secure_installation $ mysql -u root -p
To change your MySQL default password, login into your system as the root user and change the password. Configure your OwnCloud server from the Ubuntu root directory.
$ sudo mysql -u root $ sudo mysqladmin password $ sudo mysql -u root -p
Now you need to create a database for the OwnCloud server. Here are the terminal commands are given below. All the commands are simple and self-explanatory.
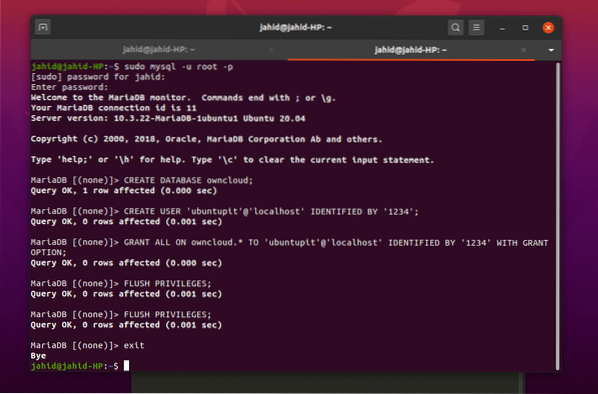
Create a new database for OwnCloud and assign a new password.
CREATE USER 'ubuntupit'@'localhost' IDENTIFIED BY '1234';
Grand all administrative permission to the database with the password.
GRANT ALL ON owncloud.* TO 'ubuntupit'@'localhost' IDENTIFIED BY '1234' WITH GRANT OPTION;
Now we are almost done. Flush, save and exit the terminal.
FLUSH PRIVILEGES; Exit;
Step 5: Downloading OwnCloud on Ubuntu
Download and installing the OwnCloud is pretty basic on Ubuntu. There are a variety of OwnCloud agents available on the official website of OwnCloud. If you are using a Docker, you can also find the Docker image of OwnCloud in GitHub.
But now, to install the OwnCloud Community edition on your Ubuntu, use the wget link and unzip the file into the var/www/ directory. Once the downloading and unzipping process is done, you can now configure your Apache server settings with the Vim or the Nano text editor.
$ sudo wget https://download.owncloud.org/community/owncloud-10.4.0.zip $ sudo unzip owncloud-10.4.0.zip -d /var/www/html/owncloud $ sudo vim /etc/apache2/conf-available/owncloud.conf $ sudo nano /etc/apache2/sites-available/owncloud.conf
If you don't find the Vim installed in your Ubuntu system, install it first. It's really simple.
$ sudo apt install vim
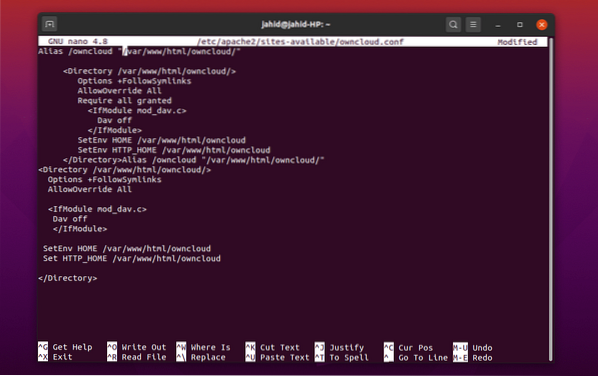
Now once the owncloud.conf file is opened with the editor, copy and paste the configuration settings inside the file and save it. You can use the ctrl + X, then Y, and hit then Enter button to save and exit the file for Nano editor.
Alias /owncloud "/var/www/html/owncloud/"Options +FollowSymlinks AllowOverride All Require all granted Dav off SetEnv HOME /var/www/html/owncloud SetEnv HTTP_HOME /var/www/html/owncloud Alias /owncloud "/var/www/html/owncloud/"Options +FollowSymlinks AllowOverride All Dav off SetEnv HOME /var/www/html/owncloud Set HTTP_HOME /var/www/html/owncloud
Here are some primary Apache server commands that would help you to configure your OwnCloud server. You can rewrite the script, edit the header, create a new environment, make a new directory and, update the Apache mime module with these terminal command lines. Then, restart your Apache server.
$ sudo a2enconf owncloud $ sudo a2enmod rewrite $ sudo a2enmod headers $ sudo a2enmod env $ sudo a2enmod dir $ sudo a2enmod mime $ sudo systemctl restart apache2
Step 6: Getting Started With the OwnCloud On Ubuntu
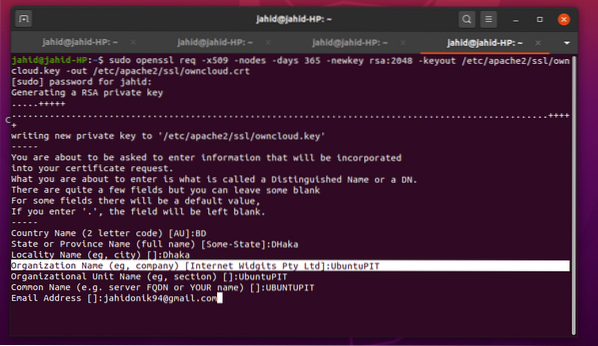
Enable the SSL for the Apache server and generate your own certificate for the Apache server to get a license. After that, you can browse to your OwnCloud by using the web address of your Apache server. Go to your web browser and write your server address and port(if necessary) the add a forward slash(/) and type owncloud, then hit the Enter button.
$ sudo a2enmod ssl $ systemctl restart apache2 $ sudo openssl req -x509 -nodes -days 365 -newkey rsa:2048 -keyout /etc/apache2/ssl/owncloud.key -out /etc/apache2/ssl/owncloud.crt
After everything is done successfully, finally, you should be able to reach the OwnCloud server page from your web-browser in Ubuntu.

If you find anything error occurred while opening the OwnCloud server in your web browser, you must look for the error inside your configuration files. Use these terminal command lines to find out where the actual errors are occurring.
$ journalctl | tail
Or you may also open the configuration file from the directory.
$ cd /etc/apache2 $ apache2ctl configtest
Finishing Touch
Installing OwnCloud on Ubuntu Linux is basically not a hard job. Most of the servers around the world are run under the Apache Ubuntu server. So, you need to be careful while editing and configuring the files with the Vim or Nano. You can customize your OwnCloud as much as you want; however, be mindful that messing up with PHP and Apache server could affect your OwnCloud server badly. Also, don't forget to grand the firewall access.
Choosing the best agent for cloud file transmission is really tough when you have got a lot of options available in your hand. But I must say, OwnCloud is one of the finest cloud filling systems for Ubuntu Linux. Let us know what your assessment of the OwnCloud file server system is. Write down your comment below in the comment section. Happy Cloud computing!


