What does GIMP do?
One of the most important jobs you can do in GIMP, is cropping the parts you want. Perhaps you want your motive to have another background or you need to remove details that are irrelevant or sensitive. In these cases, you can paint over or cut out parts of the picture. In this article, you will see a few ways to crop a picture with GIMP. You can cut the parts you have selected; the most straightforward case is cutting a square. Simply choose the selection tool with the letter r choose your space and mark. You also have the option to choose a specific aspect ratio of you final picture. You do this with the Tool Options dialog. When you have your selection, find 'Crop to Selection' in the 'image' drop-down menu.
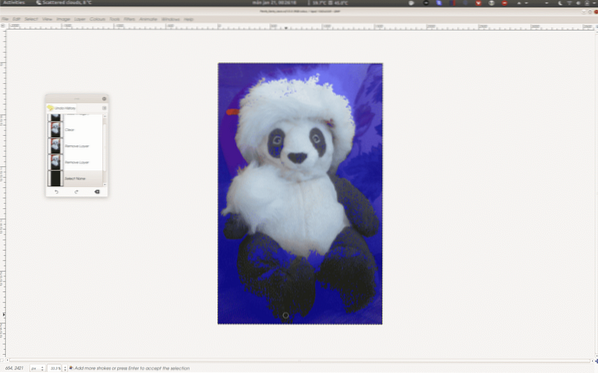
This is the simplest method so move on to the next level. You can use any regular shape to do the same, this is not as easy as cutting a straight line. It gets a bit more complicated when you want to cut out the person on the picture or, as I thought, the panda. Since the shape is not defined precisely by any geometric pattern you must trace along the edge. This is time consuming and error prone, but there are several other ways.
How do you choose your crop area?
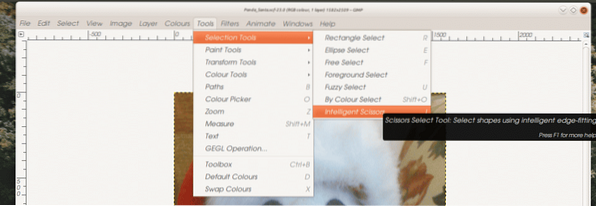
The best way to decide the crop area is to use the selection tools. It is important to decide how exact you want to be and what you are trying to achieve. The tools available are, among others, 'Intelligent Scissors' and 'Fuzzy Select'. If you have high contrast you can use 'Fuzzy Select' to choose the color your object has. The 'Fuzzy Select' is also excellent if you want to create shadow effects of your subject. For this method to work well, you need to tweak the threshold of maximum color difference. For cutting a contour, this is hard to get right. It is better to use the 'Intelligent Scissors' for a job like that. The Scissors is an exact tool but requires a bit of work. A steady hand is also helpful. To use the tool, invoke it from the Tools->Selection Tools menu or type 'I' on the keyboard.
The cursor changes to a pair of scissors. This is where it gets a little time-consuming; you need to cut the object out. You need to be precise but not too much, there are tricks. You start by clicking close to the edge of your object, a dot will appear. As soon as you move the cursor, a line appears. At the end is a round circle called a node. Now, keep on clicking along the edge of your object, the entire way around. When you study your work you will see that the line that the tool created has followed the edge but not perfectly. Before you hit enter to confirm your choice, you can go back along the line to fine-tune it.
If the feature missed details, you can click on the line and drag it closer. You can also move a node by holding down Ctrl-Shift and dragging the node. To confirm the shape, hit enter. At this point, you can also expand or shrink your selection by as many pixels as you wish. This is a useful strategy where you can deliberately choose a bit to much and shrink afterwards. Now, go to 'Edit->Copy' and enter. Next use 'Edit->Paste as' -> 'New Image', to make a new image. If you use the menu, you will see that you can past in to new layer and even new brush. This can be really useful for making beautiful patterns. Now you have a new image open, just save it with a new name and add it to something else.
More automated ways
A more automated way of taking out a special object from a picture is the 'Foreground Select' tool. This tool is designed to select a number of colors and mark everything else. The selection is made within the area you mark. Many users call this the lasso tool due to the symbol that is used at the cursor while you use it. To start using the 'Foreground Select' tool, pick it from the 'Tools -> Selection' menu. The lasso shows up next to your cursor. Now, you mark the area around the object roughly.
The tool will try to identify the object based on what you mark and your next step. When you have drawn a line around the object, the cursor changes to the draw tool. The reason for this is that you now need to define the different colors that it is made of. The selection is not always perfect, so you may need to continue marking the parts of the object that the tool did not select from the beginning. This procedure can be a little tedious but it saves time compared to the alternative.
GIMP is a powerful tool and the more you use it the more you can you it's powers. Practice by setting projects that require new features so you can experience yourself how they work.


