Python is a powerful programming language. It has many libraries for building REST or RESTful APIs. One of the popular library for building web apps and writing REST APIs is Flask.
In this article, I will show you how to create REST API in Python using Flask. Let's get started.
Requirements:
You should have
- Python 2 or Python 3 installed on your computer.
- PIP or PIP3 installed on your computer.
- The basic understanding of Python programming language.
- The basic understanding of executing commands in the shell.
You should be able to find articles and tutorials on all these topics on LinuxHint.com
I will be using Python 3 on Debian 9 Stretch in this article. If you're using Python 2, you will have to adjust a little bit. You should be able to figure it out yourself as it will be simple as writing python instead of python3 and pip instead of pip3.
Setting Up Virtual Environment:
To put it simply, virtual environment is used to isolate one Python app from another. The Python package used to do that is virtualenv.
You can easily install virtualenv using PIP on your computer with the following command:
$ sudo -H pip3 install virtualenvNow create a project directory (let's call it pyrest/) with the following command:
$ mkdir pyrestNow create a Python virtual environment on the pyrest/ project directory with the following command:
$ virtualenv pyrest/Now navigate into the project directory with the following command:
$ cd pyrestThen, activate the Python virtual environment with the following command:
$ source bin/activateFinally, run the following command to install the Flask Python library:
$ bin/pip3 install flaskWriting Your First Flask Script:
In this section, I will write a hello world program in Python Flask.
First, create a file hello.py in your project directory:
$ touch hello.pyNow add the following lines to hello.py file and save it.

In the next section, I will show you how to run Flask scripts.
Running Flask Script:
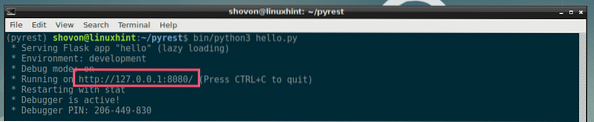
Now to start the hello.py Flask server, run the following command:
$ bin/python3 hello.pyAs you can see, the server has started on http://127.0.0.1:8080.
Now, you can access the Flask server http://127.0.0.1:8080 from the web browser or API testing softwares such as Postman. I am going to use CURL.
$ curl http://127.0.0.1:8080As you can see, the correct output is printed on the screen.

Congrats! Flask is working.
Accessing Data Using GET in REST API:
GET request on REST API is used to fetch information from the API server. You set some API endpoints and do a GET request on that end point. It's simple.
First, create a new file get.py in your project directory with the following command:
$ touch get.pyNow add the following lines in your get.py file and save it.
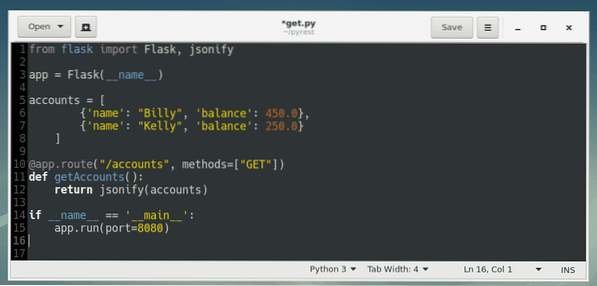
Here, on line 1, the Flask constructor function and jsonify function is imported from the flask module.
On line 3, a Flask object is created and stored on app variable.
On line 5, I created a Python array of dictionaries of some dummy data and stored it in the accounts variable.
On line 10, I defined the API endpoint /accounts and the request method, which is GET.
On line 11, I defined the function getAccounts(). getAccounts() function will execute when a GET request to /accounts endpoint is made.
Line 12, which is a part of getAccounts() function, I converted the accounts array of dictionaries to JSON using jsonify() function and returned it.
On line 14-15, I called the app.run() to tell Flask to run the API server on port 8080.
Now run the Flask API server with the following command:
$ bin/python3 get.pyThe server has started on port 8080.

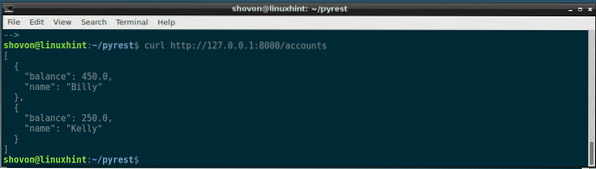
Now make a GET request to the /accounts endpoint with CURL as follows:
$ curl http://127.0.0.1:8080/accountsAs you can see, the accounts data is displayed as JSON format on GET request on /accounts endpoint.
You can also get specific account data as well. To do that, I am going to create another API endpoint /account/
Edit the get.py script and add the marked lines to it.
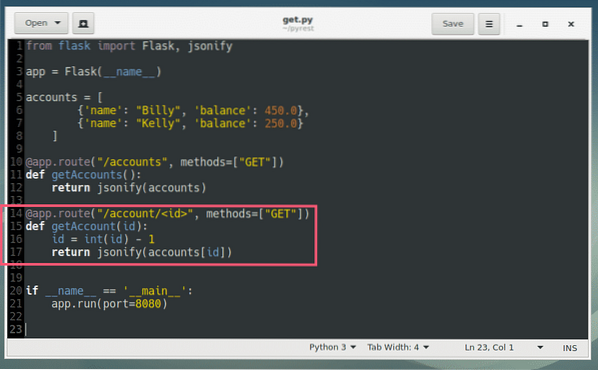
Here, on line 14, I defined the API endpoint /account/
On line 15-17, the function getAccount() for the API endpoint /account/
On line 16, the id variable is converted to an integer. I also deduced 1 from the id variable. Because the array index starts from 0. I want to start the account ID from 1. So if I put 1 as the account
On line 17, the array at index
The rest of the codes are the same.
Now run the API server again.
$ bin/python3 get.py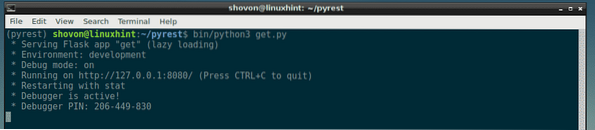
I requested data for account 1 and 2 separately and I got the expected output as you can see from the screenshot below.
$ curl http://127.0.0.1:8080/account/1$ curl http://127.0.0.1:8080/account/2

Adding Data Using POST in REST API:
Now I am going to rename get.py to api.py and add an API endpoint /account for adding new data.
Rename get.py to api.py:
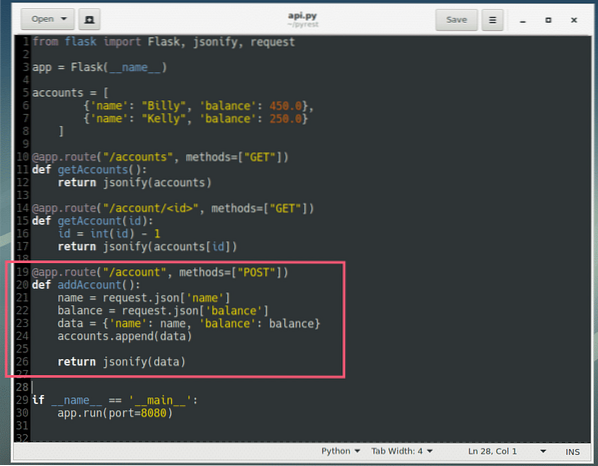
$ mv -v get.py api.pyFirst, add the lines (19-26) as marked in the screenshot below to the api.py file.
Now run the api.py server:
$ bin/python3 api.py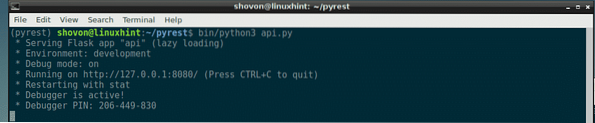
To insert new data into the /account endpoint, run the following command:
$ curl -X POST -H "Content-Type: application/json" -d '"name": "Shovon", "balance": 100'http://127.0.0.1:8080/account
NOTE: Here, '“name”: “Shovon”, “balance”: 100' is the JSON input data.
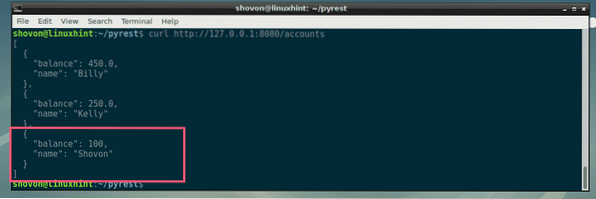
The data should be inserted.

As you can see, the new data is added.
So that's it for this article. Thanks for reading this article.