Basics of iSCSI:
iSCSI storage server is used to share block devices such as HDD/SSD partitions, or LVM partitions, or block files on the network. iSCSI clients can use these shares over the network just as any ordinary HDD or SSD mounted to it. The iSCSI client can format these disks, mount them and store files and directories as usual.
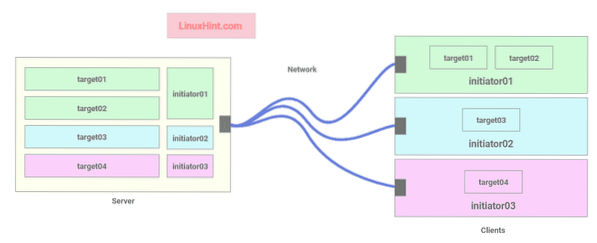
Fig 1: iSCSI server-client architecture
Each iSCSI client has an initiator ID which is used to connect to the targets on the server.
The targets are shares on the iSCSI server. Each target consists of a unique name (IQN), the path of the block device (i.e. disk partition or block file), the initiator ID that can connect to this target, and an optional username-password based authentication system.
In fig 1, the iSCSI storage server allows 3 initiators (3 iSCSI clients) to connect to 4 targets. initiator01 can connect to target01 and target02, initiator02 can connect to target03, and initiator03 can connect to target04.
Network Topology:
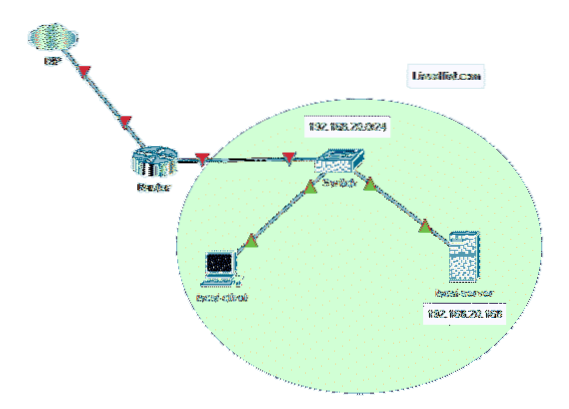
The network topology used in this article is given in fig 2. Here, I will configure an Ubuntu 18.04 LTS server as an iSCSI server. The iSCSI server has a static IP address 192.168.20.168. The iSCSI client is also on the network 192.168.20.0/24. So, it can access the iSCSI server.
iSCSI Target and Initiator Naming Conventions:
The iSCSI target name and initiator name must be unique.
The target naming format is:
iqn.YYYY-MM.reverse-domain-name:target-nameExample: iqn.2020-03.com.linuxhint:www, iqn.2020-03.com.linuxhint:logs,
iqn.2020-03.com.linuxhint:user-bob etc.
The initiator naming format is:
iqn.YYYY-MM.reverse-domain-name:initiator-nameExample: iqn.2020-03.com.linuxhint:initiator01, iqn.2020-03.com.linuxhint:initiator02,
iqn.2020-03.com.linuxhint:initiator03 etc.
Setting Up Static IP:
First, set up a static IP address on your iSCSI server. If you need any assistance, check my article Setup Static IP on Ubuntu 18.04 LTS Desktop and Server Operating System.
Installing iSCSI Server:
First, update the APT package repository cache with the following command:
$ sudo apt update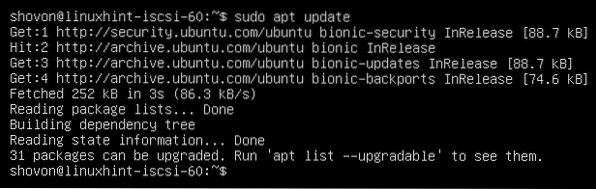
Now, install iSCSI server as follows:
$ sudo apt install tgt
To confirm the installation, press Y and then press
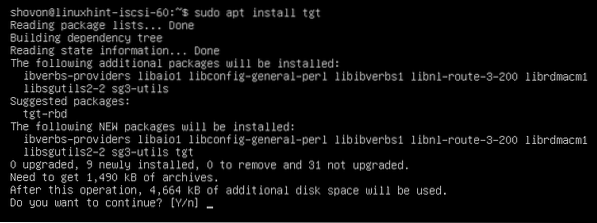
iSCSI server should be installed.

Sharing File Blocks via iSCSI:
You can share file blocks created with the dd command via iSCSI.
First, create a new directory where you want to keep all the file blocks as follows:
$ sudo mkdir -pv /iscsi/blocks
Now, create a new file block www.img in the /iscsi/blocks/ directory as follows:
$ sudo dd if=/dev/zero of=/iscsi/blocks/www.img bs=1M count=1024 status=progress
Now, create a new target configuration file iqn.2020-03.com.linuxhint.www.conf in the /etc/tgt/conf.d/ directory as follows:
$ sudo nano /etc/tgt/conf.d/iqn.2020-03.com.linuxhint.www.conf
Now, type in the following lines in the configuration file and save the file by pressing
backing-store /iscsi/blocks/www.img
initiator-name iqn.2020-03.com.linuxhint:initiator01
incominguser linuxhint secret
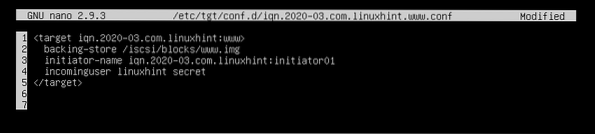
Here, the target name is defined in the target tag.
backing-store is set to the path of the block file.
initiator-name is used to set the initiator ID that will be allowed to access the target.
incominguser line is used to set the username and password that the initiator will use for authentication.
Sharing HDD/SSD via iSCSI:
You can also share the whole HDD/SSD or one or more HDD/SSD partition via iSCSI. If you share the whole HDD/SSD, the partitions of that HDD/SSD will also be accessible from the initiator or iSCSI client.
First, find the HDD/SSD name or HDD/SSD partition name that you want to share with the following command:
$ sudo lsblk
Now, create a new target configuration file iqn.2020-03.com.linuxhint.data.conf in the /etc/tgt/conf.d/ directory as follows:
$ sudo nano /etc/tgt/conf.d/iqn.2020-03.com.linuxhint.www.conf
Now, type in the following lines in the configuration file and save the file.
backing-store /dev/sdb
initiator-name iqn.2020-03.com.linuxhint:initiator01
incominguser linuxhint secret
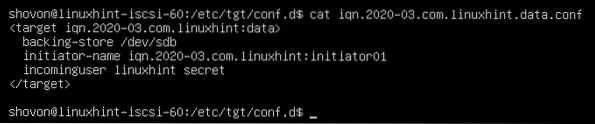
Here, I've shared the entire HDD /dev/sdb via iSCSI. If you want to share a single partition, then you can set backing-store to /dev/sdb1 or /dev/sdb2 and so on.
Restarting the iSCSI Service:
If you make any changes to the iSCSI target configuration file, run the following command for the changes to take effect:
$ sudo systemctl restart tgt
The iSCSI service should be running.
$ sudo systemctl status tgt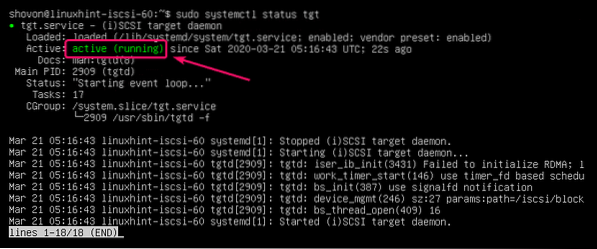
The iSCSI server port 3260 should also be open as you can see in the screenshot below.
$ sudo netstat -tlpn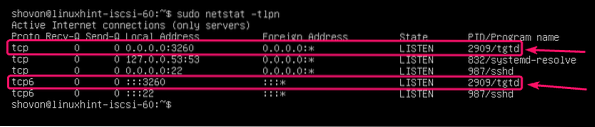
Adding iSCSI Service to the System Startup:
To start the iSCSI service on boot, run the following command:
$ sudo systemctl enable tgt
Configuring the Client:
You must have the iSCSI client tools installed on the client in order to use the iSCSI shares.
First, update the APT package repository cache with the following command:
$ sudo apt update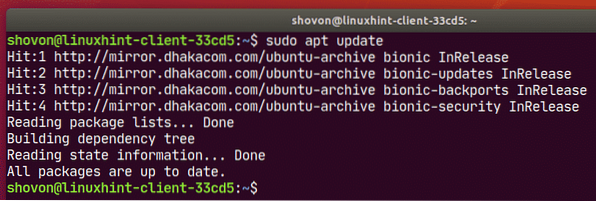
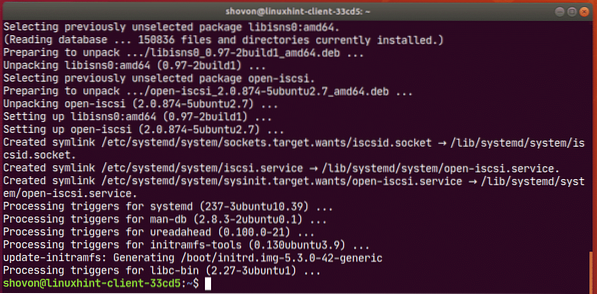
Now, install open-iscsi package with the following command:
$ sudo apt install open-iscsi
To confirm the installation, press Y and then press

open-iscsi should be installed.
Now, add the iscsid service to the system startup as follows:
$ sudo systemctl enable iscsid
Now, open the /etc/iscsi/initiatorname.iscsi configuration file.
$ sudo nano /etc/iscsi/initiatorname.iscsi
Now, set InitiatorName to your initiator name and save the file.

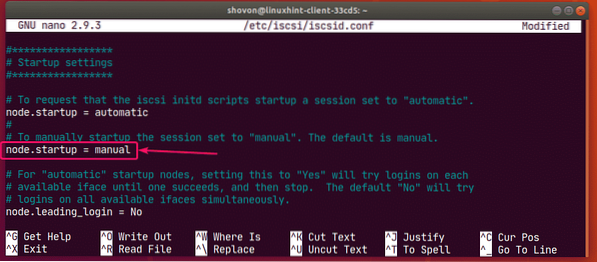
Now, open the /etc/iscsi/iscsid.conf file with the following command:
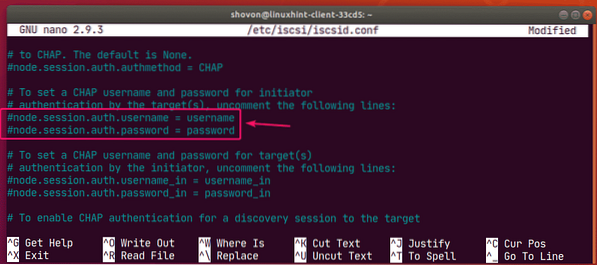
$ sudo nano /etc/iscsi/iscsid.conf
Now, uncomment the marked line.

Comment the marked line.
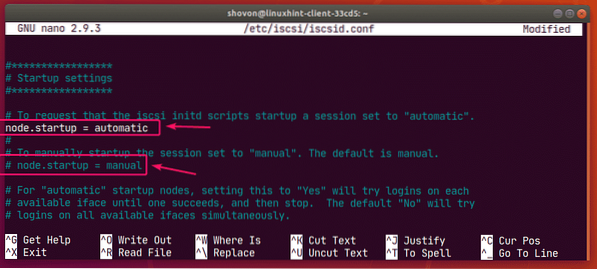
Finally, the Startup settings should be as follows.
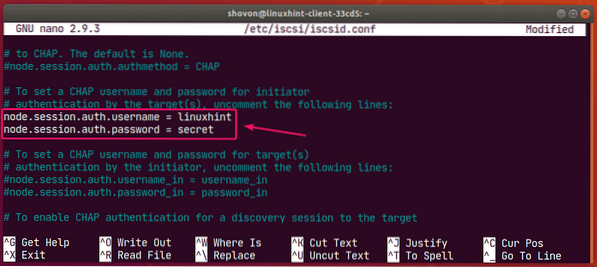
Uncomment the marked lines.
Set your username and password here and save the file.
Now, scan the iSCSI server for targets as follows:
$ sudo iscsiadm -m discovery -t sendtargets -p 192.168.20.168As you can see, the targets are listed.

Now, you can login to a specific target as follows:
$ sudo iscsiadm -m node -p 192.168.20.168 -T iqn.2020-03.com.linuxhint:www --loginHere, 192.168.20.168 is the IP address of the iSCSI server and iqn.2020-03.com.linuxhint:www is the target name.
You can also login to all the available targets with the following command:
$ sudo iscsiadm -m node -p 192.168.20.168 --login
Once you've logged in to the targets, the iSCSI disks should be available to your client. Now, you can partition, format or mount them as you like.
$ sudo lsblk -e7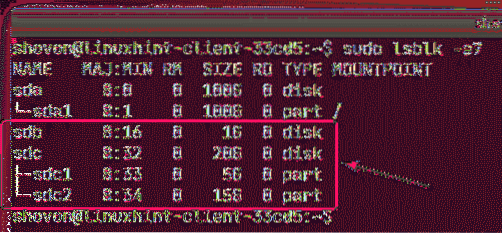
You can also make partitions in your iSCSI disks using fdisk, cdisk, parted, GNOME disks, GParted or any other partitioning software. To learn how to use fdisk to partition disks, check my article How to Use fdisk in Linux.
You can format your partitions as well.
$ sudo mkfs.ext4 -L www /dev/sdb1
Automatically Mounting iSCSI Partitions:
To mount an iSCSI partition, create a mountpoint as follows:
$ sudo mkdir /www
Now, open the /etc/fstab file as follows:
$ sudo nano /etc/fstab
Now, type in the following line in the /etc/fstab file and save the file.
/dev/sdb1 /www/ ext4 defaults,auto,_netdev 0 0
NOTE: Make sure to add the _netdev option in the /etc/fstab file. Otherwise, your client won't boot.
Now, you can mount the iSCSI partition as follows:
$ sudo mount /www
The partition should be mounted.

Now, you can change the owner and the group of the mountpoint to your login username and group name if necessary.
$ sudo chown -Rfv $(whoami):$(whoami) /www
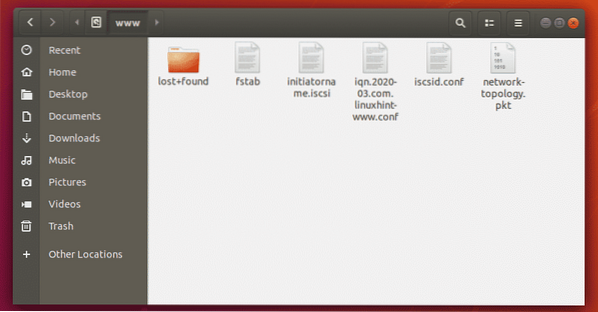
Now, you can store any files in your iSCSI partition.
So, that's how you configure iSCSI storage server on Ubuntu 18.04 LTS. Thanks for reading this article.


