There are a lot of things which you just can imagine to animate by hand because it is a very difficult task. Animation Nodes allows us to make complex animation in a less complex and tedious way.
Animation Nodes add-ons can save you a lot of time and has several advantages over traditional keyframing technique. For instance, you can avoid managing many keyframes, and each node tree can be used for any objects; you don't have to keyframe them every time.
Since this add-on does not come pre-installed in the Blender, you have to download it and install it manually: Download here (https://github.com/JacquesLucke/animation_nodes/releases).
- After downloading it, you will get a zipped file.
- Open blender, go to “Edit” on the navigation bar, and then “Preferences”.
- Click on “Add-ons” and then “Install from files”.
- Navigate to the downloaded zip file and then install
- After installing, check the add-on to enable it.
In this article, we will animate a cube to understand the basic idea of animation using nodes. Since it is visual scripting, so you must have basic knowledge of mathematics and programming.
This add-on has its own window. You will notice an additional option (Animation Nodes) in “Editor Type”.
The best way to use the Animation Nodes is by splitting the interface.
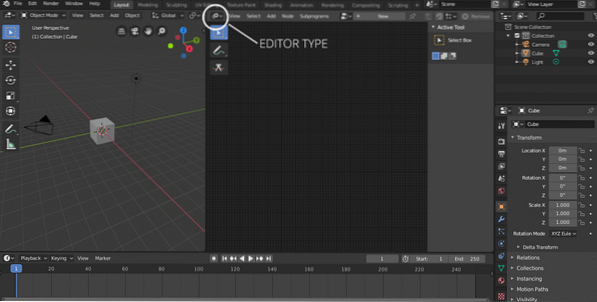
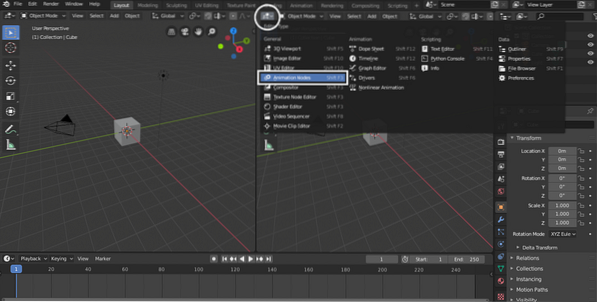
Go to Editor type in the window and select “Animation Nodes”.
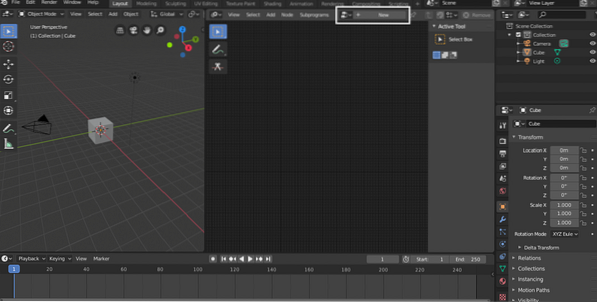
To create a tree, click on “New Tree” as shown in the following image; it can be given any name.
There are various ways to add nodes. Click on “Add” at the top or simply use hotkey “Shift+A”. Nodes can also be searched by enabling the search menu using “Ctrl+A” keys.
Many nodes can be used to perform various operations. There is an object, vector, rotation, animation, transform, and many other nodes. This add-on is designed for advanced motion graphics.
Now time to add the object node. Go to Add > Object > Object. Through this node, you can select the object from the scene on which you want to apply animation.
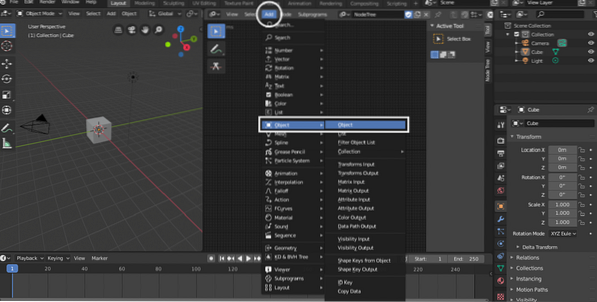
But to understand the idea, we are using the default cube.
To animate the transform properties, we need to add the “Transform Output” node. To add this node go to Add > Object > Transform Output. This node will allow you to animate the position, rotation, and scale.
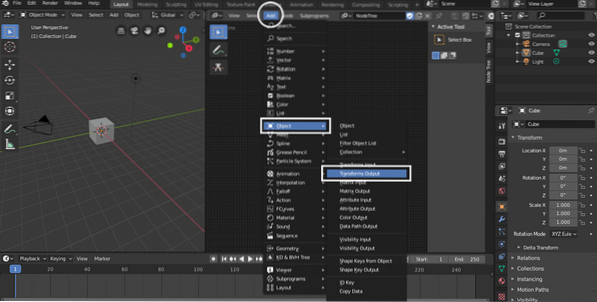
To animate any particular property, you need to enable it first from the “Transform Output” panel. In this particular example, the X position property is enabled, as shown in the following image:
To animate or modify any property, we need an animation node. The purpose of the animation node is to increment or decrement a value with respect to time.
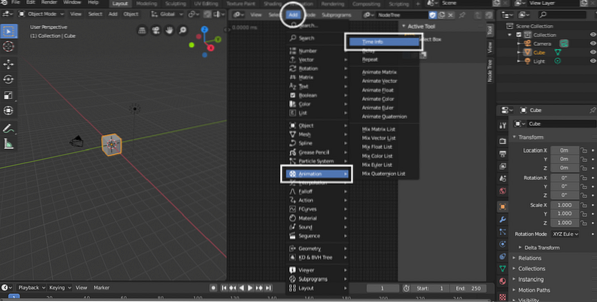
To add this property, go to Add > Animation > Time Info.
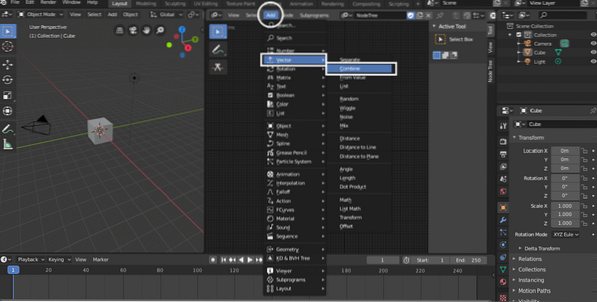
The Time Info node cannot be directly attached to the Transform Output Node. First, we need to hold x, y, and z values in a vector. Add vector node by going Add > Vector > Combined. A separate vector can also be added, but in this particular example, we will focus on a combined vector.
Join the Time Info node with an X value. But the same node can also be joined with Y and Z values. You will get the following tree.

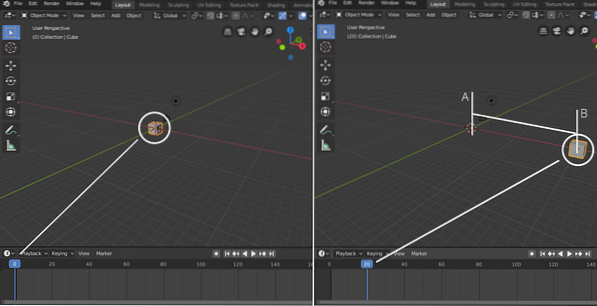
Now press the spacebar, the cube will animate towards the x-axis. Following image illustrating the movement of the cube from position A to position B.
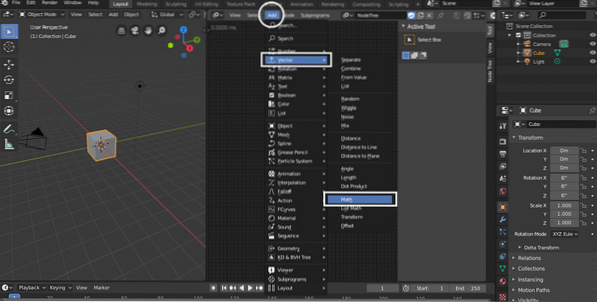
The speed of the animated object can also be adjusted using the Math node. This node will be used between “Time Info” and Combined Vector. To add math node goto Add > Number > Math.
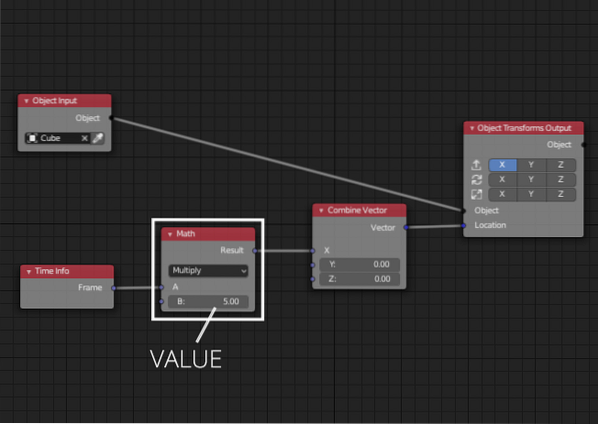
Join “Time Info” with any point either “A” or “B”. Select “Multiply” in the drop-down menu. Put any value in the Value field. If you add 5, the Time Info will be multiplied by 5. It is being shown in the following image:
The same process can be to animate y, z position, and scale also.
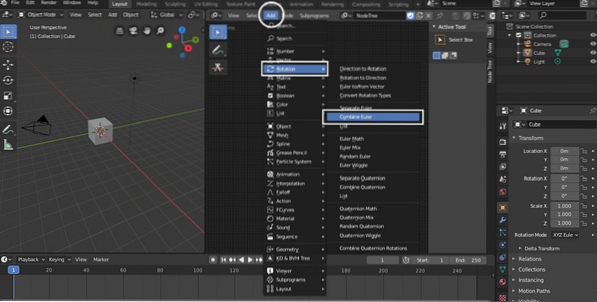
In rotation or spinning the object, things get a little different. In 3D space, the vector holds 3 values of x, y, and z. But in order to assign angles, we need an Euler vector to hold the values of x, y, and z rotation in degree/radians:
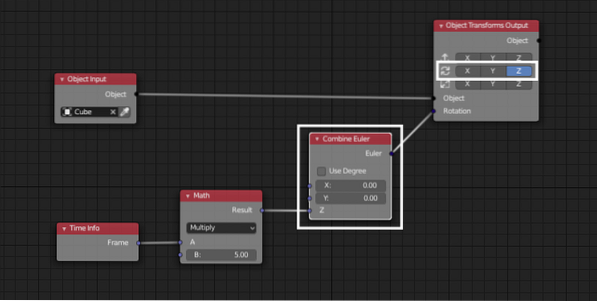
Similarly, the speed of rotation can also be modified.
Conclusion
Animation nodes is a complex tool to understand. Animation Nodes require basic mathematics and programming knowledge since it is more like a visual scripting editor. Animation Nodes is designed to help animators to make complex animations with the least amount of work.
It has made it easier to make complex animation in Blender. The developer of this add-on is actively updating it.


