Android studio is a specified IDE for android development launched by Google. Before the Android Studio launch, Eclipse was the popular IDE for developing android based applications. Android Studio provides a full-fledged environment for android application development. The core programming languages for Android are Java and Kotlin. Android Studio supports both these programming languages.
This guide provides a brief tutorial about installing and using Android Studio on Ubuntu 20.04.
Install Android Studio on Ubuntu 20.04
In order to install Android Studio on Ubuntu, you have to install it through the repository. Follow the below-given steps to install the Android Studio on Ubuntu 20.04 by adding repository:
Step 1: Update apt cache
Prior to installing any new package or application, it is recommended to update the apt cache with the command:
$ sudo apt update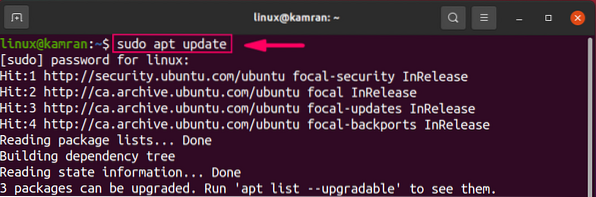
Step 2: Install Java Development Kit
Android Studio requires Java Development Kit to be functional. We need to install the JDK, before installing Android Studio using the following command:
$ sudo apt install openjdk-11-jdk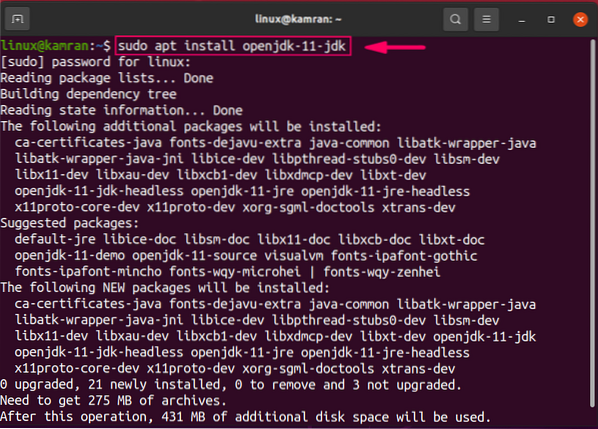
During the JDK installation, the command line prompt with 'y/n' option. To continue the installation, press 'y'.
Upon JDK successful installation, run the following command to verify the JDK installation:
$ java --version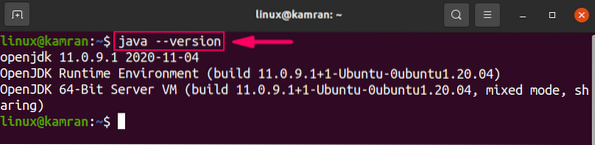
The command shows the installed version of JDK on your Ubuntu 20.04 system.
Step 3: Add a repository for Android Studio
Next, add the android studio repository using the following command:
$ sudo apt-add-repository ppa:maarten-fonville/android-studio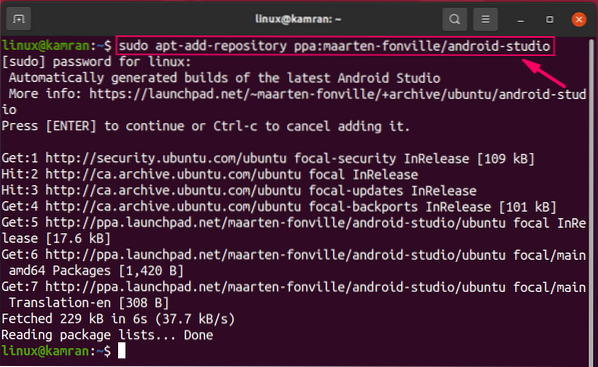
While adding the android studio repository, the command line prompt with 'Press [Enter] to continue or Ctrl-c to cancel adding it' options. To continue the process, press 'Enter'.
Step 4: Update apt cache
Once the repository is added, it is the best practice to update the apt cache using the following command:
$ sudo apt update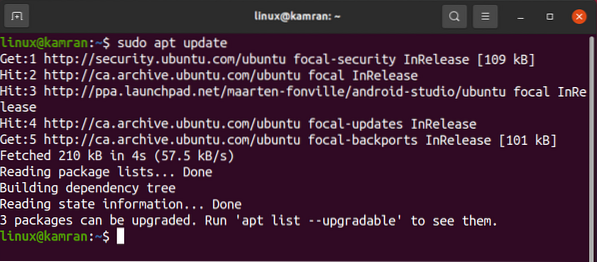
Step 5: Install Android Studio
Now everything is set up on your Ubuntu 20.04 for android studio installation. Execute the command given below to install Android Studio:
$ sudo apt install android-studio
During the installation, the command line prompt with 'y/n' option. 'To continue the installation process, press 'y'.
Perform Android Studio's initial configuration
Upon the first launch, we need to perform some initial configuration.
First, launch the android studio. Go to the application menu and write 'Android Studio' in the search bar.
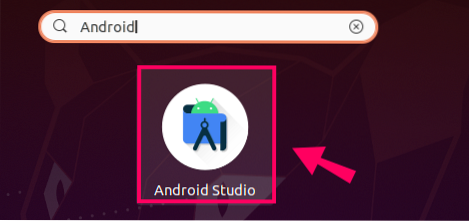
The Android Studio application will appear. Click on the application icon, and the android studio will be opened.

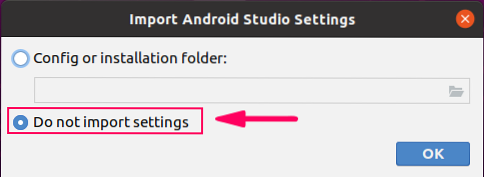
On the 'Import Android Studio Settings' screen, select the 'Do not import settings' option, and click on 'OK'.
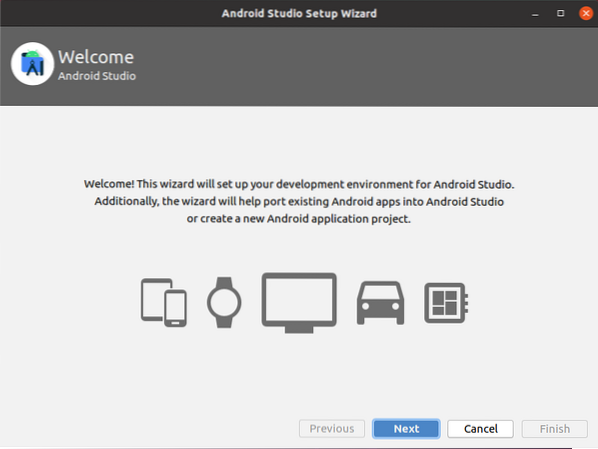
On the 'Android Studio Setup Wizard' screen, click on 'Next'.
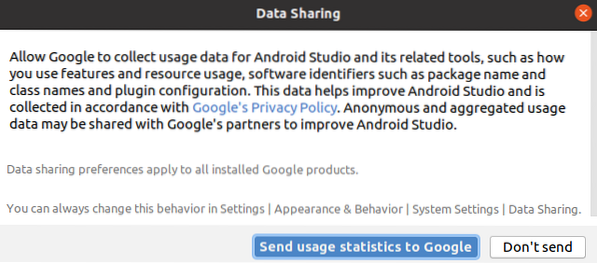
The Android Studio will ask for the 'Data Sharing'. Select the appropriate data sharing policy as per your choice.
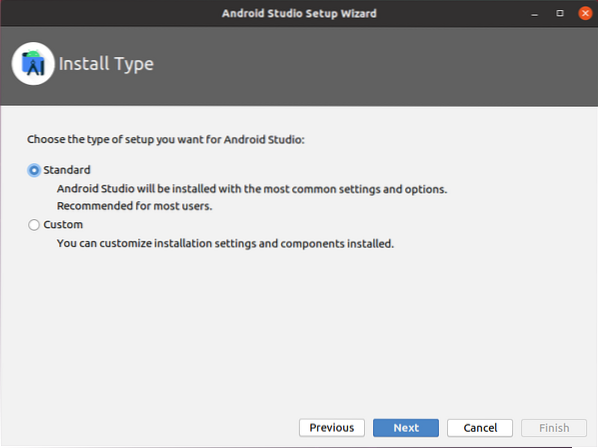
Next, choose the install type. It is suggested to choose the 'Standard' install Type. Therefore, select the 'Standard' option and click on 'Next'.
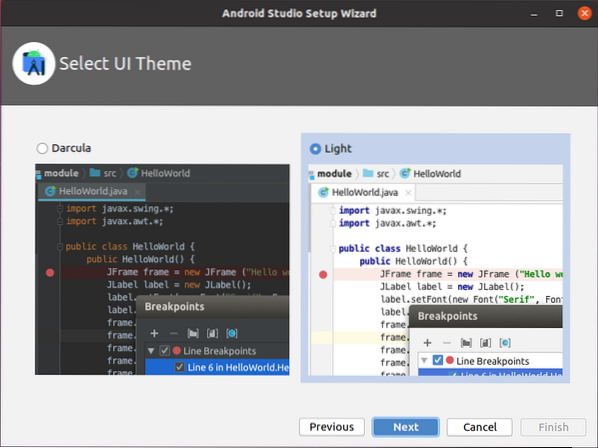
Android Studio comes up with two beautiful and attractive built-in themes. On the following screen, select the theme as per your choice and click on 'Next'.
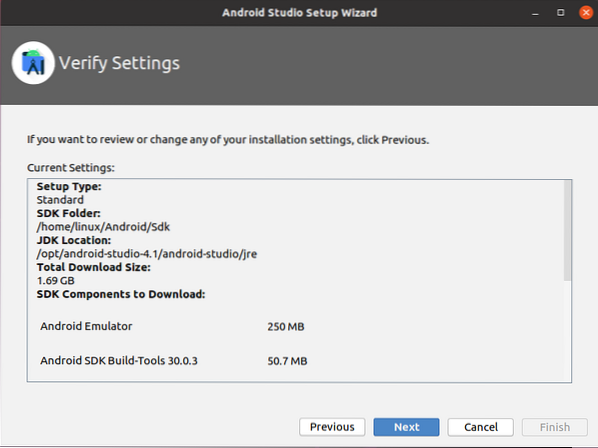
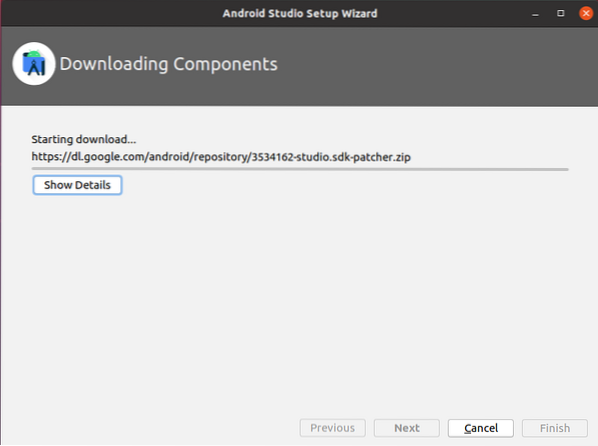
Now, the android studio needs to download some required components. To download the component, press 'Next'.
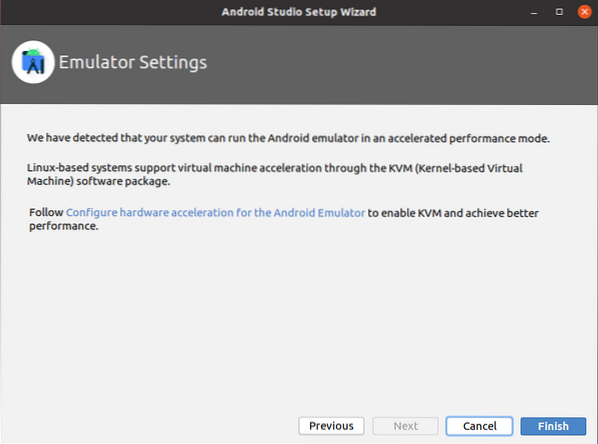
Next, the Android Studio will show some information regarding Emulator Settings. Read the information carefully and click on 'Finish'.
The components will be downloaded successfully.
Alright! The Android Studio initial configuration is done.
Create your first Android Application
Following is the Android Studio's Dashboard screen that appears after initial configuration.
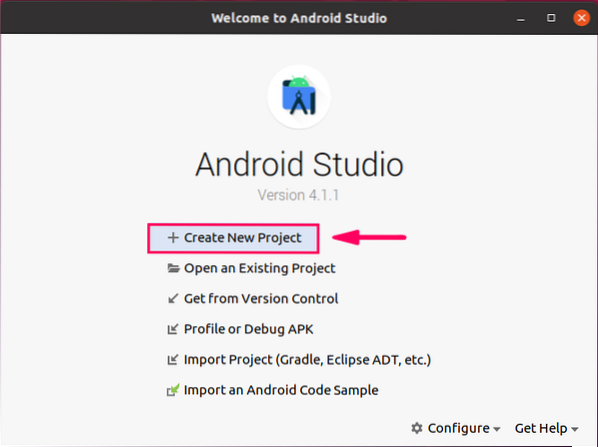
To create the first Android application, click on the first option, “Create New Project”.
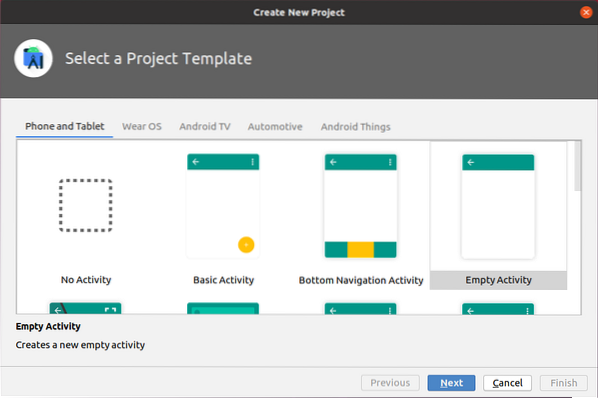
Next, from the 'Phone and Tablet' section, select the 'Empty Activity' and click on 'Next'.
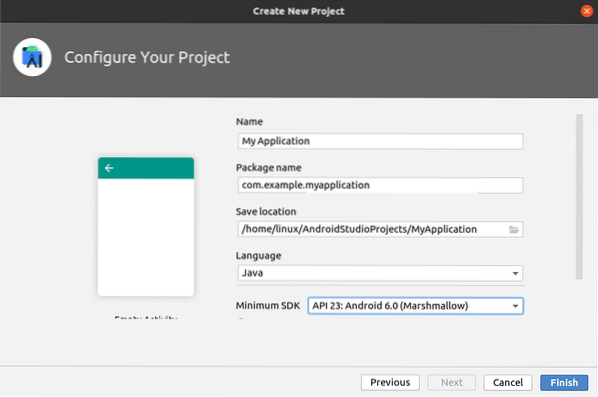
Enter the application name, choose your preferred programming language, i.e., Kotlin or Java, select minimum SDK version, and click on the “Finish” button.
I have selected API level 23 Android 6.0(Marshmallow).
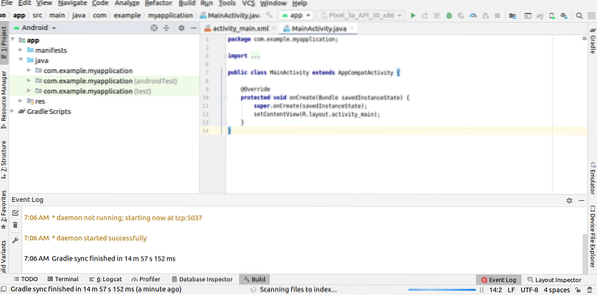
Next, you will see a screen like this.
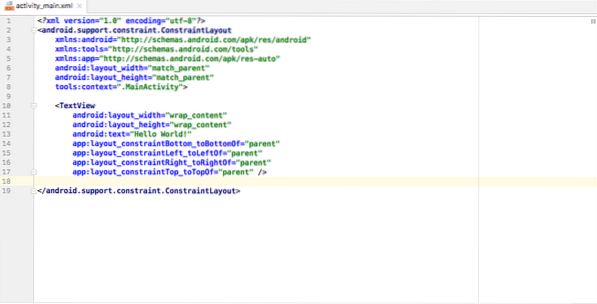
Navigate to the 'res' directory, expand the 'layout' folder, and open the 'activity_main.xml' file.
In the 'activity_main.xml' file, you will find the xml code for the activity design. The 'Hello World' text is already added in the xml file.
Attach your Android device to the machine and click on the green-colored “Run” button. The Android Studio will display all the available Android devices. Pick the device, and the app would be installed on the android device.
Conclusion
Android Studio has become the prime IDE for android apps development. It can be easily installed on Ubuntu 20.04 by adding the official android repository. In a few steps, you can configure the Android Studio and create your first Android application. This article is a brief tutorial of Android Studio.


