FOG allows you to create, manage and deploy various Mac OS, Linux, and OSX versions. Besides, it supports multiple Linux distributions like Fedora, Debian, Centos, Ubuntu, etc. This server-based cloning solution can drastically help reduce installation or update time for new labs or computers.
It is important to understand that disk imaging or cloning means copying elements from one drive to another. You can create an ideal image with the desired software and settings, upload it to a server and distribute it to other devices from there. In the case of FOG, you can upload and deploy it via a Pre-Boot execution environment.
This article is a one-stop guide covering an introduction to FOG, its installation, configuration, FOG-Client management, and a detailed Image Capture process.
Basic Components
As a Linux-based server, it can deploy both Windows and Linux images. However, it is essentially built to manage and deploy Windows operating systems. Such that, its user manual describes Linux support as primitive.
After installation, it requires you to use Linux command-line interface to operate the solution and deploy a PHP-built web user interface. FOG supports PXE-boot along with DHCP, iPXE, and TFTP. Besides, it entirely relies on the client's MAC addresses to track PCs.
System Requirement
- Requires customized disk partition for image allocation.
- Minimum 2 GB memory
- 1 or 2 v CPU for fast image compression/decompression
- Minimum 100 GB hard disk
FOG vs. Windows Deployment Services (WDS)
Microsoft imaging solution WDS requires a Windows server 20XX license and is a lot complex. It is an open-source solution that handles heterogeneous hardware imaging with a high-time setup and learning investment.
Even though it is used to build large environments, the cost of time goes up with the increasing number of machines. Besides, it requires Windows DNS and DHCP servers. In comparison, FOG is a solution for homogeneous imaging, with a low to medium cost and learning investment range, with several other multiple features and advantages.
FOG Features
- Automatically logs out a user after a period of inactivity.
- Remotely manages installed printers, performs shutdown/reboot.
- Allows joining the device to an Active Directory domain and change hostname after deployment.
- Allows joining the system to an Active Directory domain.
- Allows managing images by adding target device MAC address in the FOG's repository.
- Allows performing FOG tasks on the client's PC or target machine.
- Allows selecting an individual or group of hosts from the Hosts or Group Management section from FOG UI to deploy images.
- Allows removing blocks and restore deleted files.
Installation and Configuration
To begin the installation process, go to the web browser and download FOG from the project's website.
Or type the cd /opt command in bash and copy the download link from the website. Use the wget utility to download FOG in the opt folder.
[email protected]:~$ sudo wget https://github.com/FOGProject/fogproject/archive/1.5.9.tar.gzNote the download version 1.5.9.tar.gz and extract the file using the following command.
[email protected]:~$ sudo tar -xvzf 1.5.9.tar.gzcd into the FOG bin directory /fogproject-1.5.9/bin to open the FOG shell script installfog.sh. Use the following command to get started.
[email protected]:~$ cd /opt/fogproject-1.5.9/bin[email protected]:~/fogproject-1.5.9/bin$ sudo ./installfog.sh
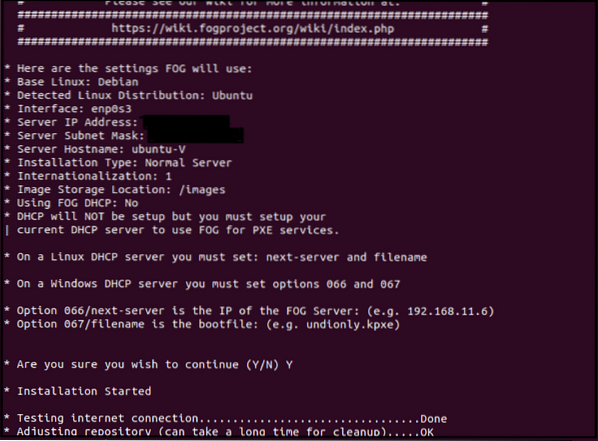
Notice that it automatically identifies the installed Linux distribution. Follow these step-by-step instructions to answer the series of questions to begin the installation process.
- Choose N to start a normal installation;
- Do not change default NIC;
- For FOG DHCP settings, press No if you already have a DHCP configured;
- Press “enter” to leave gateway, IP address, and DNS settings. Hence select the default settings such that the FOG server uses the device's current IP address;
- Choose the default hostname;
- Choose a language pack if needed; and, finally,
- Choose to continue the installation.
FOG will now automatically install all the necessary components. Some old versions of Ubuntu ask to set a MySQL password during installation; we can leave it empty as it is not a security risk. However, we can make these changes later, if required.
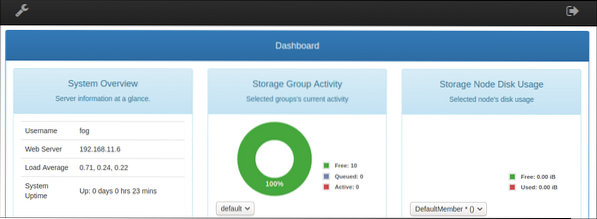
After installation, you can navigate the FOG server via Web Browser. Enter the following details in the search bar:
https://fogserver(OR IP address for FOG Server)/fog/management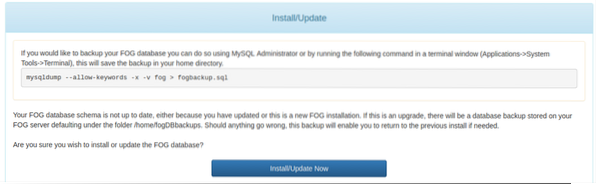
Before accessing the FOG dashboard, we install or update the FOG database.

Click Update and enter the default credentials (username: fog; password: password) to access the FOG dashboard.
Now, reboot the FOG server for a fresh start.
Further Configurations
USER Management
Navigate to the User Management icon in the dashboard. Go to General>User Name and General>Change Password to change the default credentials.
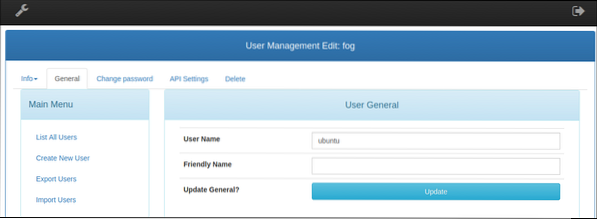
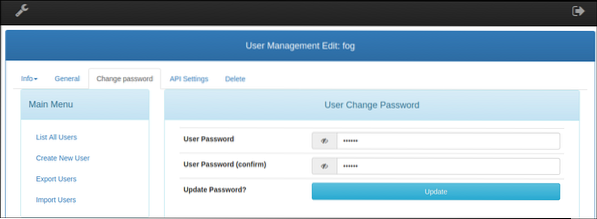
**Optional**: FOG also allows adding other users to create images and handle administrative tasks.
Setting DHCP Server Other than FOG
The above installation does not allow FOG to provide DHCP services to the network. To enable the FOG client to PXE boot into the server through the network, it requires changes to the current DHCP server settings.
Go to your command line terminal and update the repository.
[email protected]:~$ sudo apt-get updateUse your favorite editor to edit the DHCP configuration file located in the /etc/dhcp directory.
[cc lang="text" width="100%" height="100%" escaped="true" theme="blackboard" nowrap="0"]
[email protected]:~$ sudo nano /etc/dhcp/dhcpd.conf
The DHCP server generally requires two options settings:
Option 66
Set an option 66 to allow client boot requests to reach the FOG server.
Hence add the following line to the dhcpd.conf file in the /etc/dhcp directory for the client to look for the TFTP server.
option 66
Option 67
This option allows the PXE bootable device to look for the configuration files. Option 67, also known as the default BIOS Boot-file name, is set to ipxe.efi in the newer UEFI models.
option 67 "ipxe.efi"Whereas old hardware models with legacy BIOS firmware do not boot with this file, set the filename to “undionly.kkpxe” file.
Another method to set the dhcpd.conf file is by following the given template, with the correct network settings to start the dhcp server. The default dhcp settings offered by the FOG-server during the installation process do similar changes to the dhcpd.conf file.
The dhcpd.conf file must look like this:
#dhcpd.confoption space PXE;
option PXE.mtftp-ip code 1 = ip-address;
option PXE.mtftp-cport code 2 = unsigned integer 16;
option PXE.mtftp-sport code 3 = unsigned integer 16;
option PXE.mtftp-tmout code 4 = unsigned integer 8;
option PXE.mtftp-delay code 5 = unsigned integer 8;
option arch code 93 = unsigned integer 16; # RFC4578
use-host-decl-names on;
ddns-update-style interim;
ignore client-updates;
Next-server X.X.X.X;
authoritative;
log-facility local7;
subnet X.X.X.X netmask 255.255.255.0
option subnet-mask 255.255.255.0;
Range X.X.X.0 X.X.X.254;
default-lease-time 21600;
max-lease-time 43200;
option routers X.X.X.X;
class "UEFI-32-1"
match if substring(option vendor-class-identifier, 0, 20) = "PXEClient:Arch:00006";
filename "i386-efi/ipxe.efi";
class "UEFI-32-2"
match if substring(option vendor-class-identifier, 0, 20) = "PXEClient:Arch:00002";
filename "i386-efi/ipxe.efi";
class "UEFI-64-1"
match if substring(option vendor-class-identifier, 0, 20) = "PXEClient:Arch:00007";
filename "ipxe.efi";
class "UEFI-64-2"
match if substring(option vendor-class-identifier, 0, 20) = "PXEClient:Arch:00008";
filename "ipxe.efi";
class "UEFI-64-3"
match if substring(option vendor-class-identifier, 0, 20) = "PXEClient:Arch:00009";
filename "ipxe.efi";
class "Legacy"
match if substring(option vendor-class-identifier, 0, 20) = "PXEClient:Arch:00000";
filename "undionly.kkpxe";
Disk Image Creation
The first task after the FOG installation is to create an ideal machine (we will install Windows 10 for this tutorial) and install all the required software to capture and duplicate the OS on another hardware.
However, another prerequisite before creating an image is to deploy the FOG client that takes care of additional tasks offered by the FOG server Web UI.
FOG-Client Management
The FOG-client service allows lab in charge to perform tasks on the Clients device during the image boot process. Moreover, it enables the server to provide services to the client's PC. These services vary from Auto log-off, hostname changes, display and printer management to active directory integration, user tracker, and many more.
Installation
Open an instance of the FOG server in the windows 10 web browser by typing https://
Or type https://
Both client installers require similar installation steps.
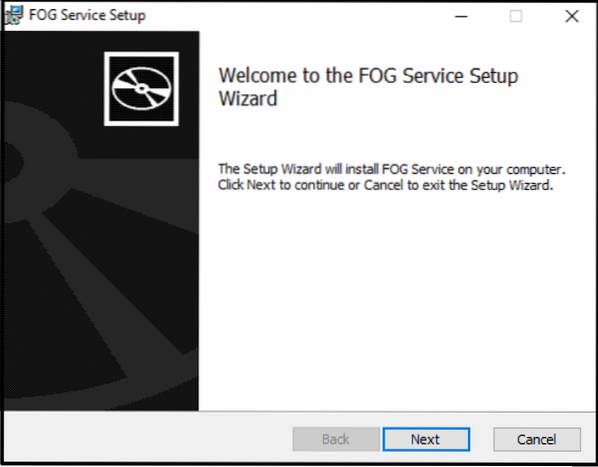
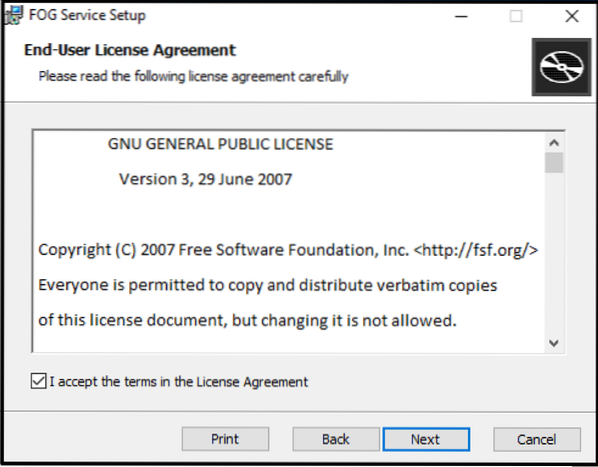
Click next on the installation screen and accept the license agreement.
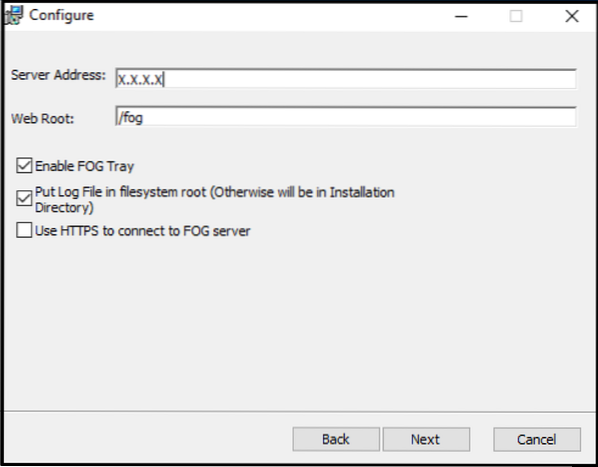
Add FOG Server IP address as the server's name in the next screen.
Keep the webroot name and the rest of the default setting.
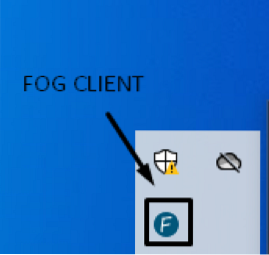
Deselect the Enable Fog Tray option to remove the FOG symbol from the taskbar (optional).
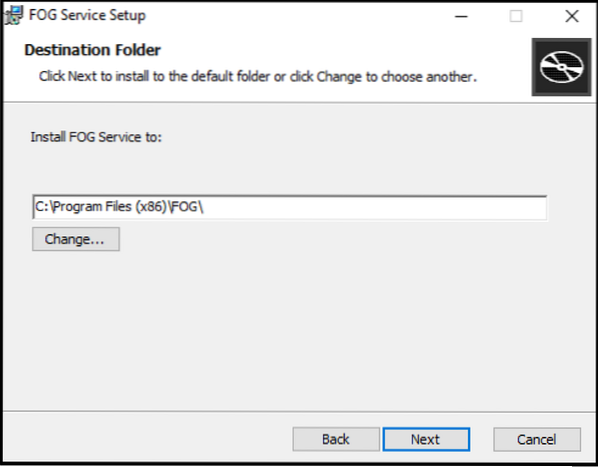
Leave the default destination folder and follow the rest of the installation process.
Reboot the machine and check the taskbar to notice successful Fog-Client installation.
Machine Approval
Since the windows deployment did not happen via FOG, the client is not trustworthy for the server and requires manual approval from the server.
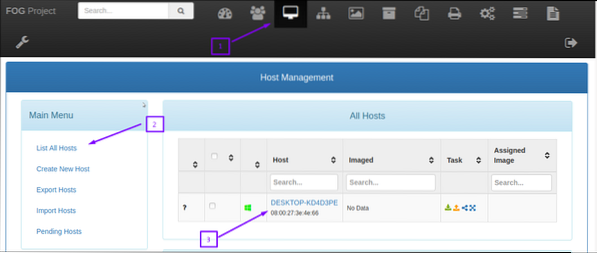
Go to the Host Management section in the dashboard, select List all Hosts and click on the machine with the recently installed Fog-Client and click on Approve this host?

However, machine image deployment via the FOG server does not require any approval and is considered trustworthy by the server.
Machine Registration at FOG
Now, the machine is in an ideal state to capture an image. Boot it from the network to enter a PXE Boot environment.
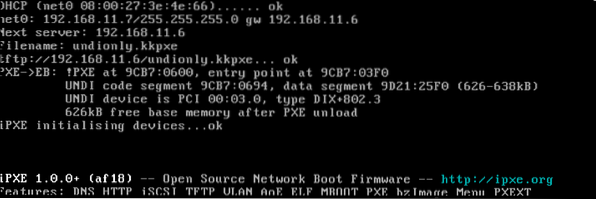
The screenshot above represents a successful PXE boot:
The PXE client brings the network link and requests an IP address via DHCP. The DHCP server (X.X.X.X) provides the client machine with the IP-address/netmask, along with a next-server (FOG-server IP_address) and the bootable file “file name” (undionly.kkpxe).
The PXE client now gets the undionly.kkpxe image from the /tftpboot directory via TFTP server.
Undionly executes and presents with the FOG boot menu after configuration.
The FOG boot menu states “Host is NOT registered”; it is unknown to the FOG. Scroll down to “Quick registration and inventory” and select before default “boot from hard disk”. After registration, reboot the client and shut down the machine.
Image Registration at FOG
This step adds/registers an image to the FOG server. Such that, it captures the entire hard disk and all partitions.
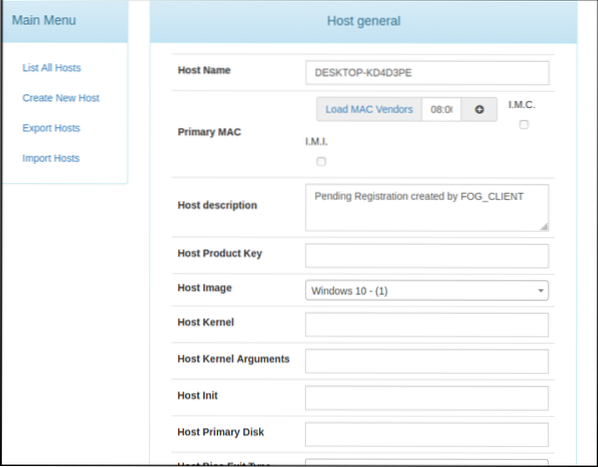
Login to the FOG-server Web UI, select the “Image Management” section from the dashboard, and choose “Create New Image”. Type in the new image name, leave default options as they are, and scroll down to click on 'Add'.

Machine-Image Association
Now associate the Window 10 image with the existing host in the Host Management section.
Click on the “Host Management” section of the dashboard and select “List All Hosts”.
Select the host to capture an image. Go to the “Host Image” drop-down menu and choose the recently added Window 10 image.
Creating Capture Task
The capture task instructs the FOG server to capture and store the hard disk content of the Windows 10 image whenever the machine boots from the network.
While in Host Management of the FOG Web UI choose “Basic Tasks” to select 'Capture'. Click on “Task”; this allows changing the task imaging settings.
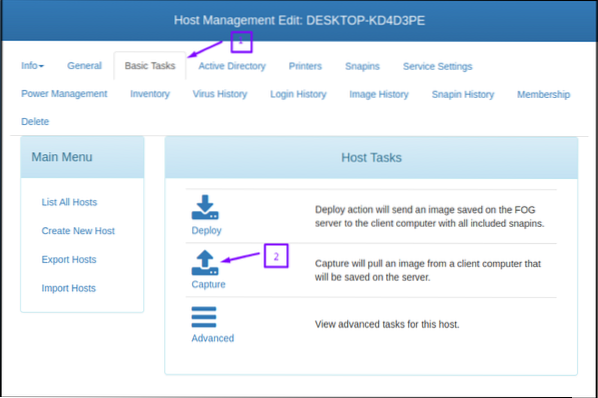
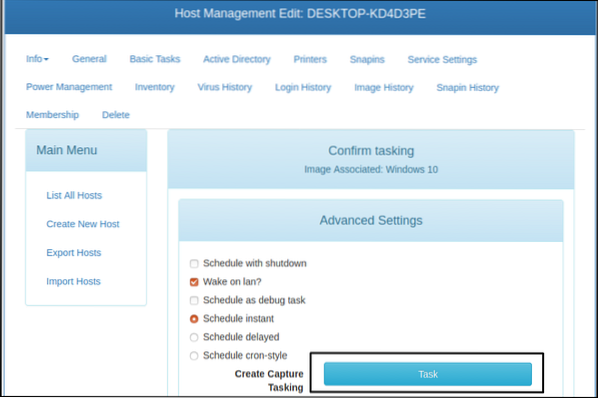
Image Capture
Make sure the host machine boots from the network when you initiate the capture process. Since the capture task is assigned to the host, you will notice a Partclone execution instead of the FOG boot menu.
Partclone reads the hard disk content via the network and writes in the form of a compressed image file on the server. After successful image capture, the FOG updates the database, and the machine reboots.
The image is successfully captured and is ready to deploy on other machines.
Conclusion
The article presents a detailed introduction to the Free Open-source Ghost server solution and compares it with the Windows Deployment Solution (WDS). It provides an in-depth tutorial on FOG installation and configuration. It also demonstrates the DHCP server setting to install FOG-Client to PXE boot in the host machine for image capture. Lastly, it details the image capture process to facilitate readers with an easy-to-understand guide.

